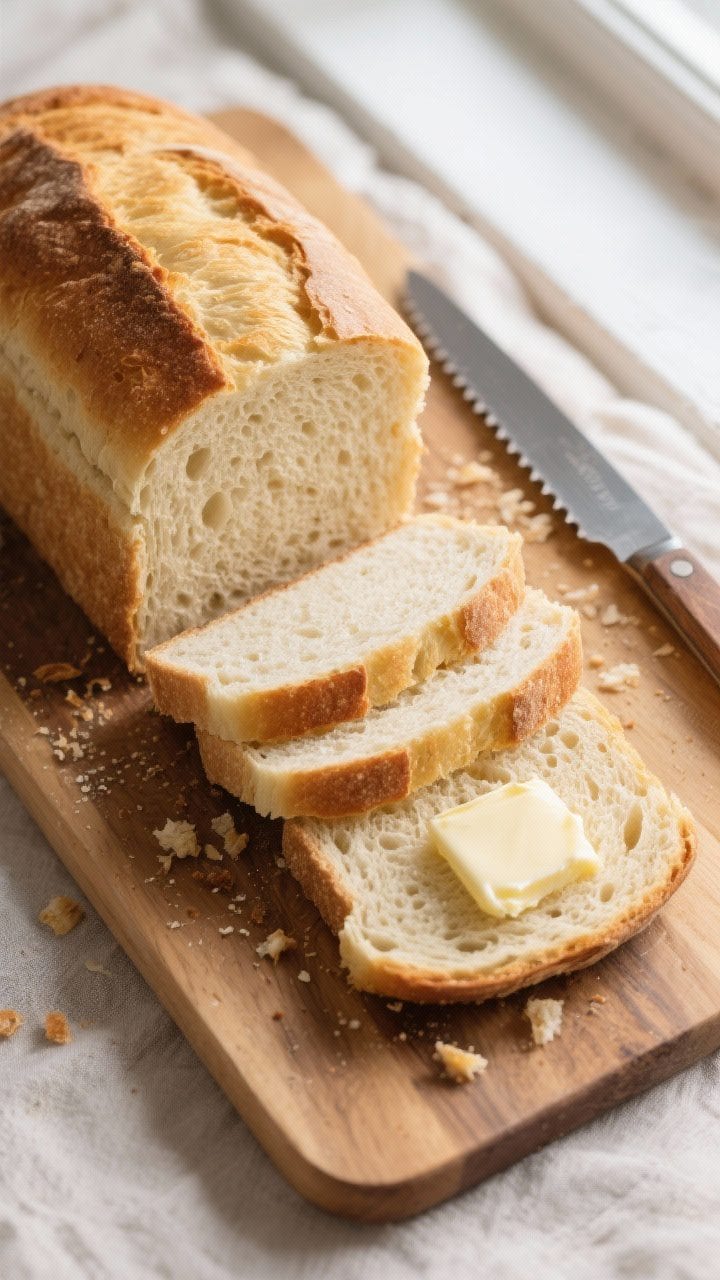
There’s something satisfying about pulling a warm loaf of bread from your own oven. The smell fills your kitchen, and the first slice practically begs for butter. This soft sandwich bread is simple, reliable, and perfect for everyday meals.
No fancy equipment needed—just a bowl, your hands, and a loaf pan. If you’ve been nervous about baking bread, this recipe is a great place to start.
What Makes This Recipe So Good
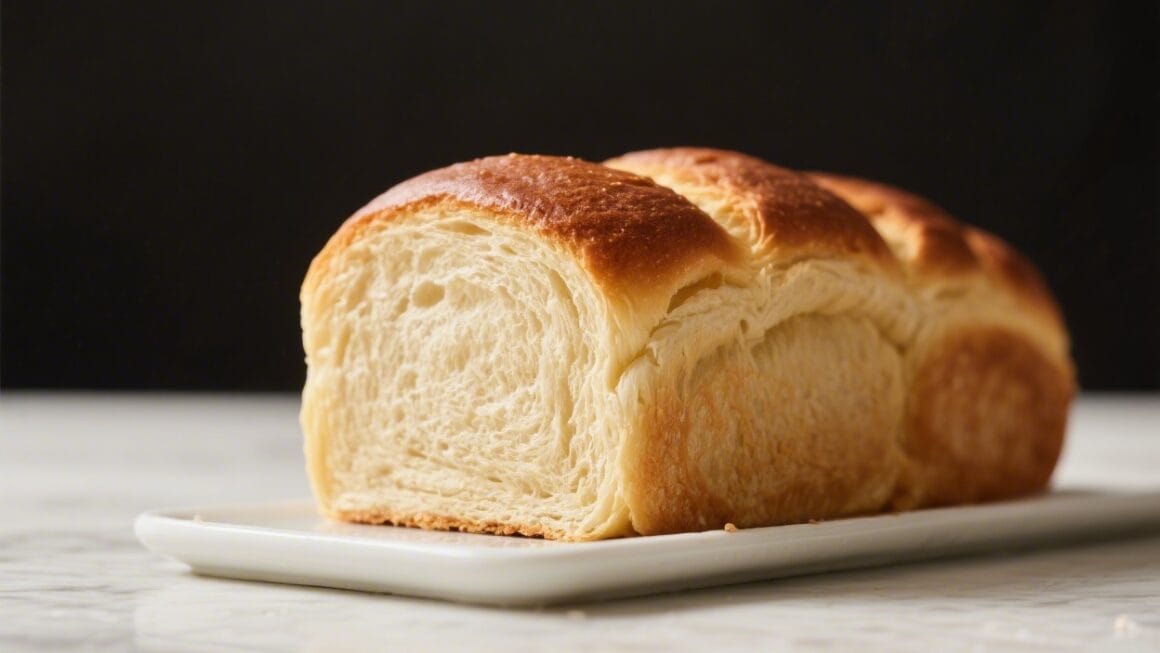
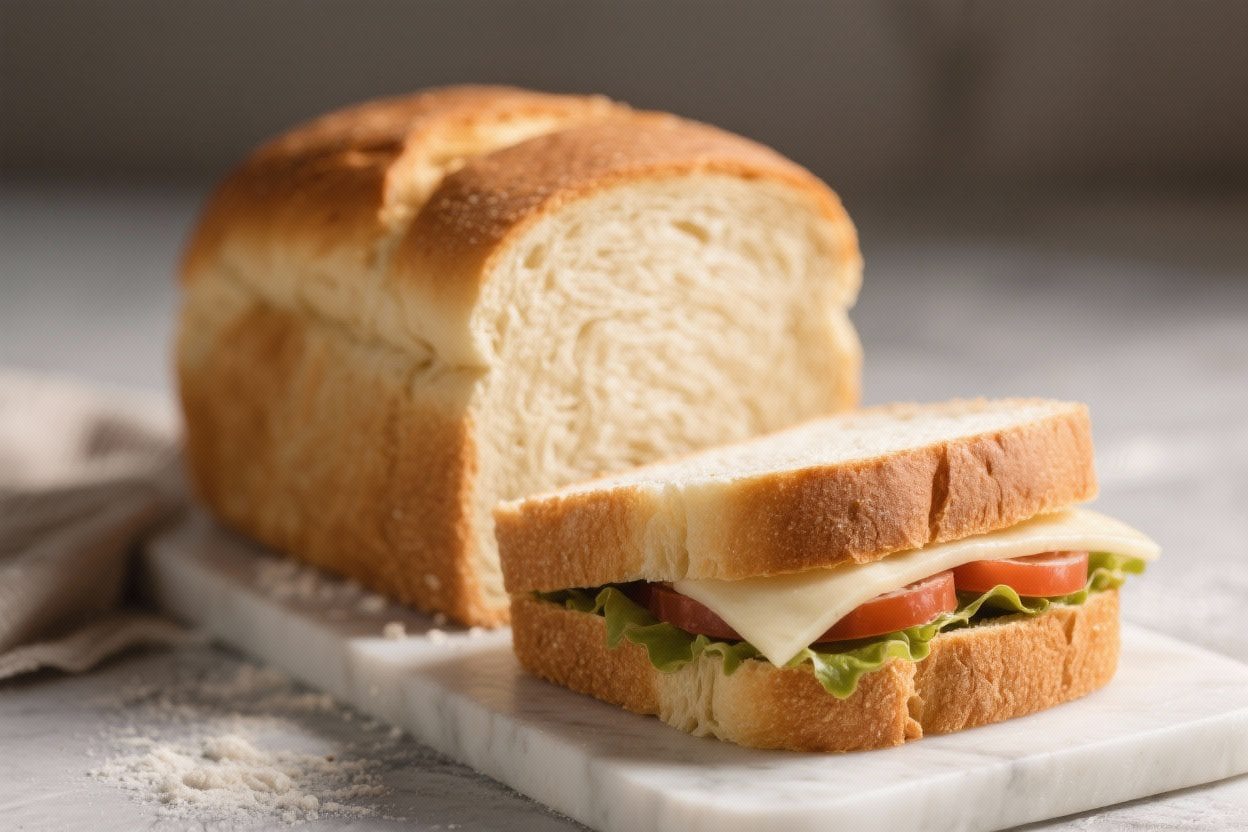
- Soft and tender crumb: The bread stays moist and pillowy, ideal for sandwiches and toast.
- Balanced flavor: A touch of sugar and butter adds gentle sweetness without being dessert-like.
- Beginner-friendly: Clear steps, common ingredients, and forgiving dough.
- Versatile: Works for PB&J, grilled cheese, breakfast toast, or French toast.
- Stays fresh: Keeps soft for days and freezes beautifully.
Ingredients
- 3 1/4 to 3 1/2 cups (390–420 g) bread flour (all-purpose works too; bread flour gives more chew)
- 1 cup (240 ml) warm milk (about 105–110°F/40–43°C)
- 1/2 cup (120 ml) warm water (about 105–110°F/40–43°C)
- 2 tablespoons (25 g) granulated sugar
- 2 teaspoons (7 g) instant yeast (or 2 1/4 teaspoons active dry yeast)
- 1 1/2 teaspoons fine sea salt
- 3 tablespoons (42 g) unsalted butter, softened (plus extra for greasing and brushing)
- Neutral oil or butter for greasing the bowl and pan
Equipment: Large mixing bowl, wooden spoon or dough hook, 9×5-inch (23×13 cm) loaf pan, kitchen scale (helpful), clean towel or plastic wrap.
Instructions
- Proof the yeast (if using active dry): In a bowl, combine warm milk, warm water, and sugar. Sprinkle the yeast on top.Let it sit 5–10 minutes until foamy. If using instant yeast, you can skip proofing and mix it with the flour; still warm the liquids.
- Make the dough: In a large bowl, add 3 1/4 cups flour, salt, and yeast (if instant). Pour in the milk-water mixture and add the softened butter.Stir until a shaggy dough forms. If it’s very sticky, add flour 1 tablespoon at a time until it comes together.
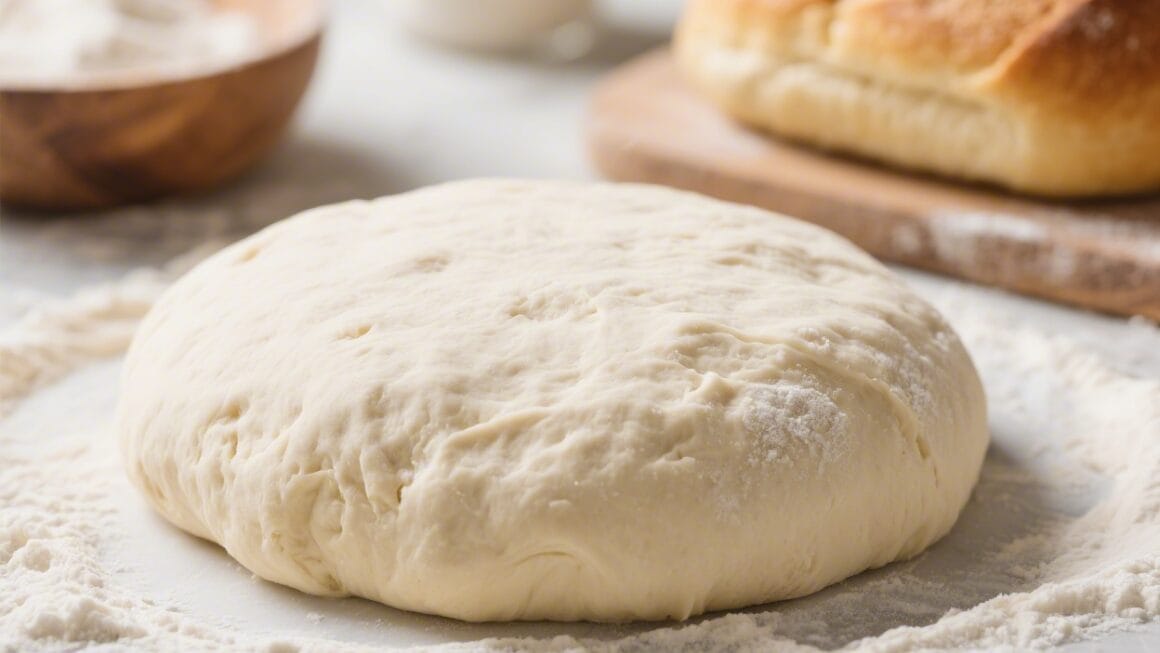
- Knead until smooth: Turn the dough onto a lightly floured surface and knead 8–10 minutes, or use a stand mixer on medium-low for 6–8 minutes. The dough should be soft, slightly tacky, and elastic.It should stretch without tearing.
- First rise: Shape the dough into a ball. Place in a lightly greased bowl, turning once to coat. Cover and let rise in a warm place until doubled, about 60–90 minutes.A finger pressed in should leave a slow, soft indentation.
- Shape the loaf: Gently deflate the dough and turn it out. Pat into a rectangle about 8×12 inches. Fold the long side toward the center, then the other side over it (like a letter).Roll it up from the short end into a tight log, pinching the seam closed.
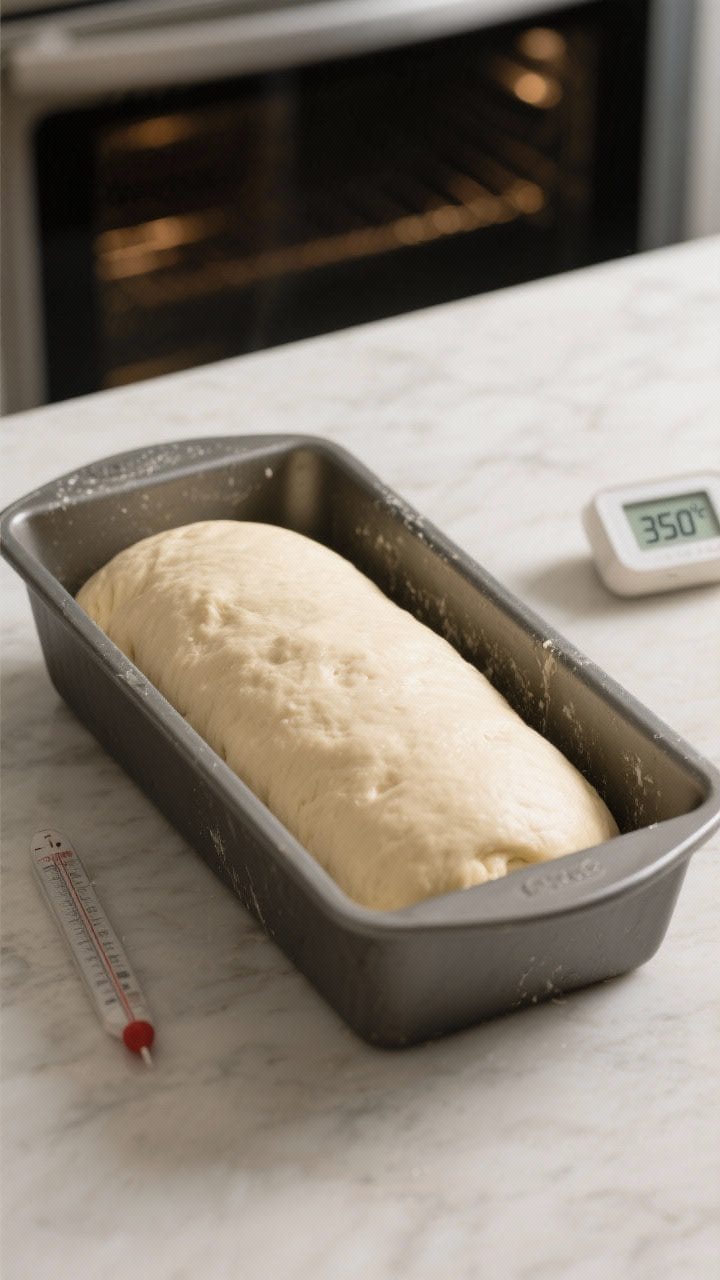
- Pan and second rise: Place the log seam-side down in a greased 9×5-inch pan. Cover and let rise until the dough domes about 1 inch above the rim, 45–75 minutes depending on room temperature.
- Preheat the oven: Heat to 350°F (175°C) during the second rise. Position a rack in the center.
- Bake: Bake 30–35 minutes, until the top is golden brown and the loaf sounds hollow when tapped.An instant-read thermometer should read about 195–200°F (90–93°C) in the center.
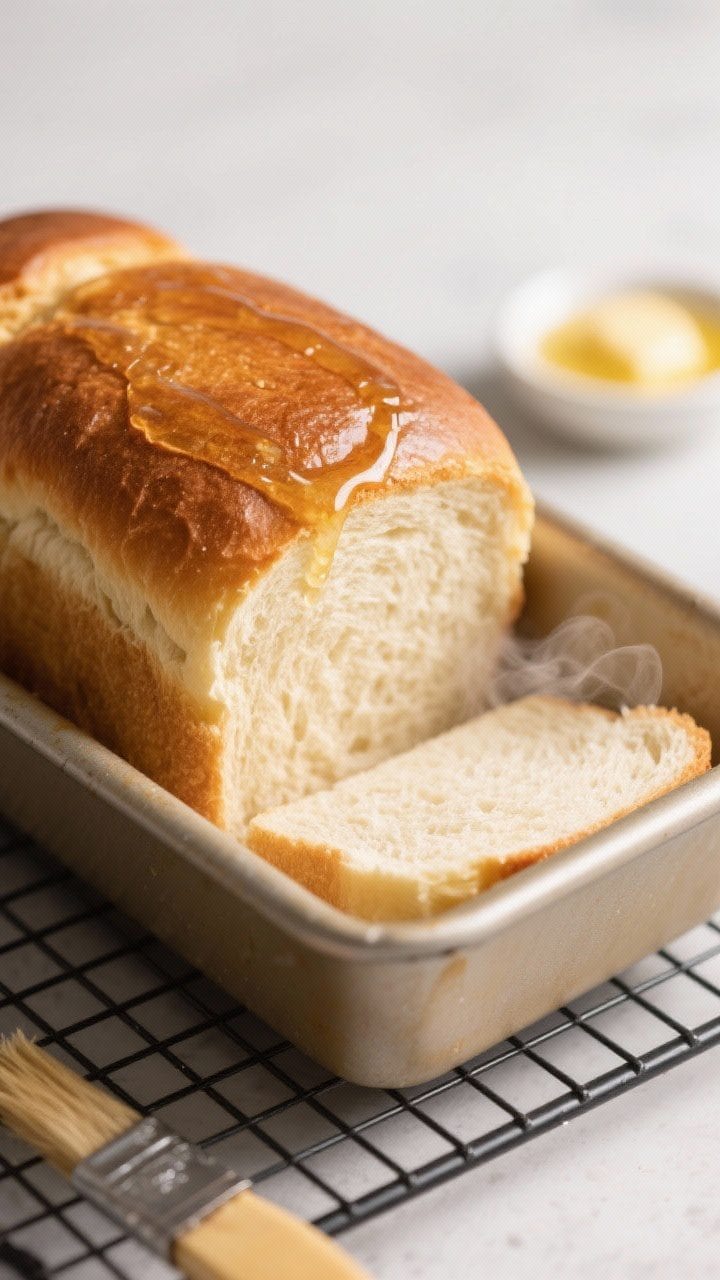
- Finish and cool: Remove from the pan right away. Brush the top with melted butter for a soft, shiny crust. Cool on a rack at least 45 minutes before slicing so the crumb sets.
How to Store
- Room temperature: Wrap the cooled loaf in a clean towel or store in a bread bag or airtight container.It stays soft for 3–4 days.
- Freezer: Slice the loaf, wrap well, and freeze for up to 3 months. Toast slices straight from frozen.
- Avoid the fridge: Refrigeration speeds staling and dries out the crumb.
Benefits of This Recipe
- Cost-effective: Pantry ingredients make a full loaf for a fraction of store-bought prices.
- Better ingredients: You control the salt, sugar, and fat. No preservatives or fillers.
- Flexible schedule: The dough tolerates slightly longer rises if your kitchen is cool.
- Kid-approved texture: Soft, sliceable, and perfect for lunch boxes.
- Beginner confidence: Clear visual cues and forgiving dough build your baking skills.
Common Mistakes to Avoid
- Overheating the liquids: Milk and water should feel warm, not hot.Too hot kills yeast and prevents rising.
- Adding too much flour: Slightly tacky dough bakes softer. Add flour only until the dough stops sticking badly.
- Under-kneading: Poor gluten development leads to dense slices. Knead until smooth, stretchy, and elastic.
- Rushing the rise: Let the dough double on the first rise and rise above the pan on the second.Volume matters more than time.
- Slicing too soon: Hot bread squishes and dries out. Cool at least 45 minutes for clean slices.
Recipe Variations
- Honey Wheat: Swap 1 cup of bread flour for whole wheat flour and replace sugar with 2 tablespoons honey. Add 1 extra tablespoon milk if needed.
- Seeded Loaf: Fold in 3 tablespoons mixed seeds (sunflower, sesame, flax).Sprinkle more on top before baking.
- Milk Bread Style: Use all milk (1 1/2 cups) and reduce water to zero for a richer, softer crumb. You may need a touch more flour.
- Garlic Herb: Add 1 teaspoon garlic powder and 2 teaspoons dried herbs to the flour. Great for savory sandwiches.
- Dairy-Free: Use warm water or unsweetened plant milk and swap butter for olive oil or vegan butter.
FAQ
Can I make this without a stand mixer?
Yes.
This dough is easy to knead by hand. Use a bench scraper to help lift and fold, and aim for a smooth, elastic finish after 8–10 minutes.
What if my dough isn’t rising?
Check the yeast age and liquid temperature. Make sure your room is warm enough—around 75°F (24°C) is ideal.
You can create a warm spot by placing the covered bowl in an oven that’s off with the light on.
How do I get a softer crust?
Brush the loaf with melted butter right after baking and cover it loosely with a clean towel while it cools. The steam softens the crust.
Can I use all-purpose flour?
Absolutely. All-purpose flour makes a softer, slightly less chewy loaf.
Start with 3 1/4 cups and add more only if needed.
How do I know when to stop adding flour?
The dough should feel soft and slightly tacky, but not cling stubbornly to your hands. If it cleans the bowl and holds its shape, you’re there.
Can I make two smaller loaves?
Yes. Divide the dough after the first rise, shape, and place in two 8×4-inch pans.
Bake 25–30 minutes.
What’s the best way to slice it?
Use a long serrated knife and gentle sawing motions. For super neat slices, wait until the loaf is fully cool or chill it briefly before slicing.
Final Thoughts
Homemade sandwich bread doesn’t have to be complicated or fussy. With a few simple steps and basic ingredients, you can bake a loaf that’s soft, reliable, and perfect for everyday meals.
Once you make it a couple of times, it becomes second nature—and your sandwiches will never be the same. Keep this recipe handy; it’s a classic you’ll come back to again and again.
Printable Recipe Card
Want just the essential recipe details without scrolling through the article? Get our printable recipe card with just the ingredients and instructions.