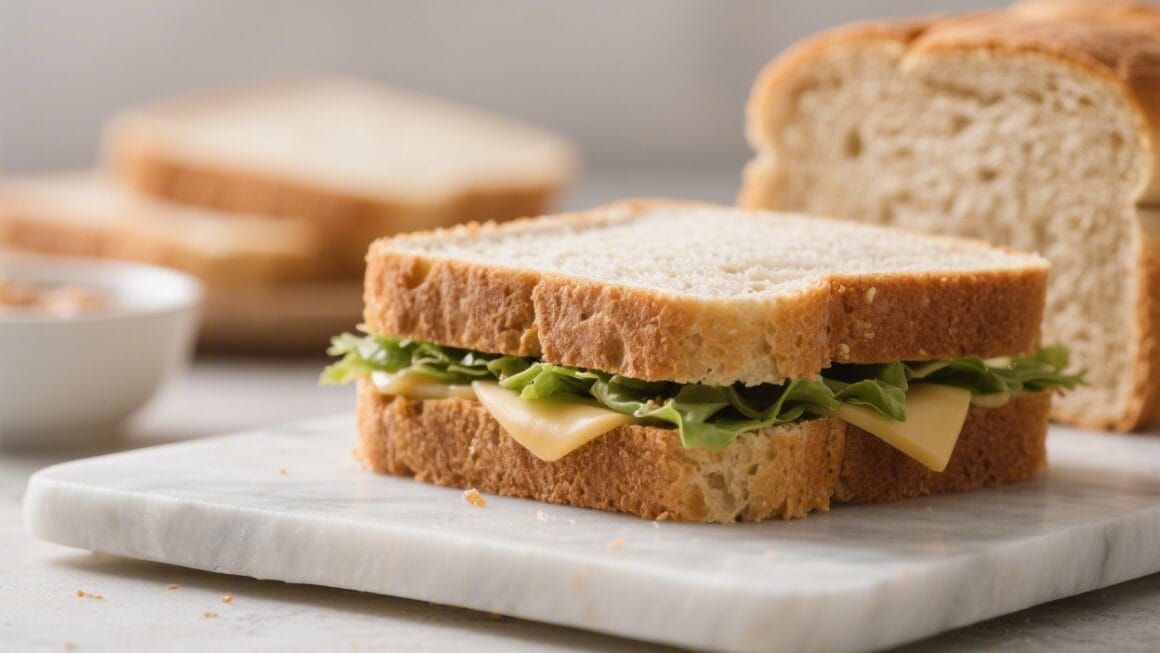
Warm, soft bread that’s gluten-free and actually tastes like bread? Yes, it’s possible. This loaf is tender, slices beautifully, and doesn’t crumble into a mess.
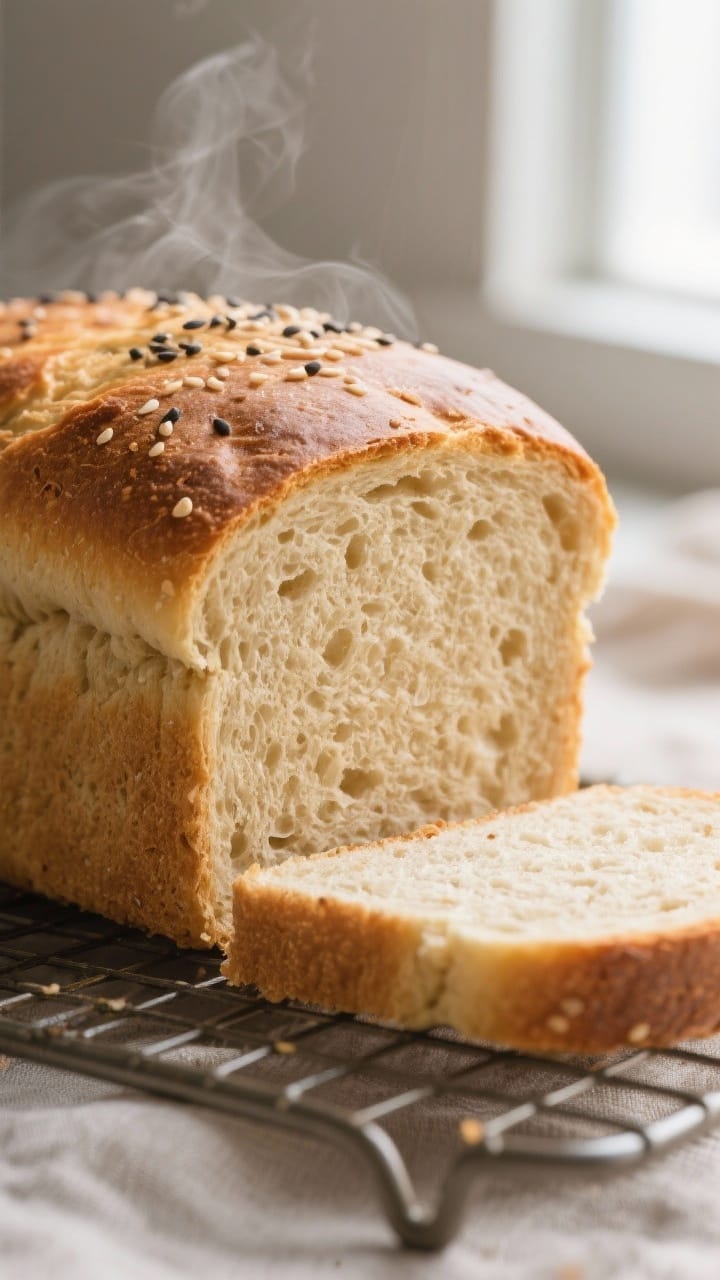
You’ll get a fluffy texture, a golden crust, and a clean, balanced flavor that works for toast, sandwiches, or a simple smear of butter. No fancy equipment needed—just a bowl, a mixer, and a loaf pan. If you’ve had dry or dense gluten-free loaves before, this recipe will change your mind.
Why This Recipe Works
This bread uses a blend of flours and starches to mimic the structure gluten usually provides.
A combination of xanthan gum and psyllium husk keeps the crumb soft and sliceable. A touch of fat and milk (or non-dairy milk) locks in moisture so the bread stays tender for days, not hours. Finally, a higher hydration dough creates steam during baking, which leads to a light, springy texture.
Ingredients
- Gluten-free flour blend (2 cups/260 g), preferably one with rice flour + starches, without added gums
- Tapioca starch (1/2 cup/60 g)
- Psyllium husk powder (1 tablespoon)
- Xanthan gum (1 teaspoon)
- Instant yeast (2 1/4 teaspoons, one packet)
- Granulated sugar or honey (2 tablespoons)
- Salt (1 1/4 teaspoons)
- Warm milk or unsweetened non-dairy milk (1 cup/240 ml, about 105–110°F/40–43°C)
- Warm water (1/2 cup/120 ml)
- Neutral oil or melted butter (3 tablespoons)
- Eggs (2 large, room temperature)
- Apple cider vinegar or lemon juice (1 teaspoon)
- Optional toppings: sesame seeds, poppy seeds, or oats (gluten-free)
Instructions
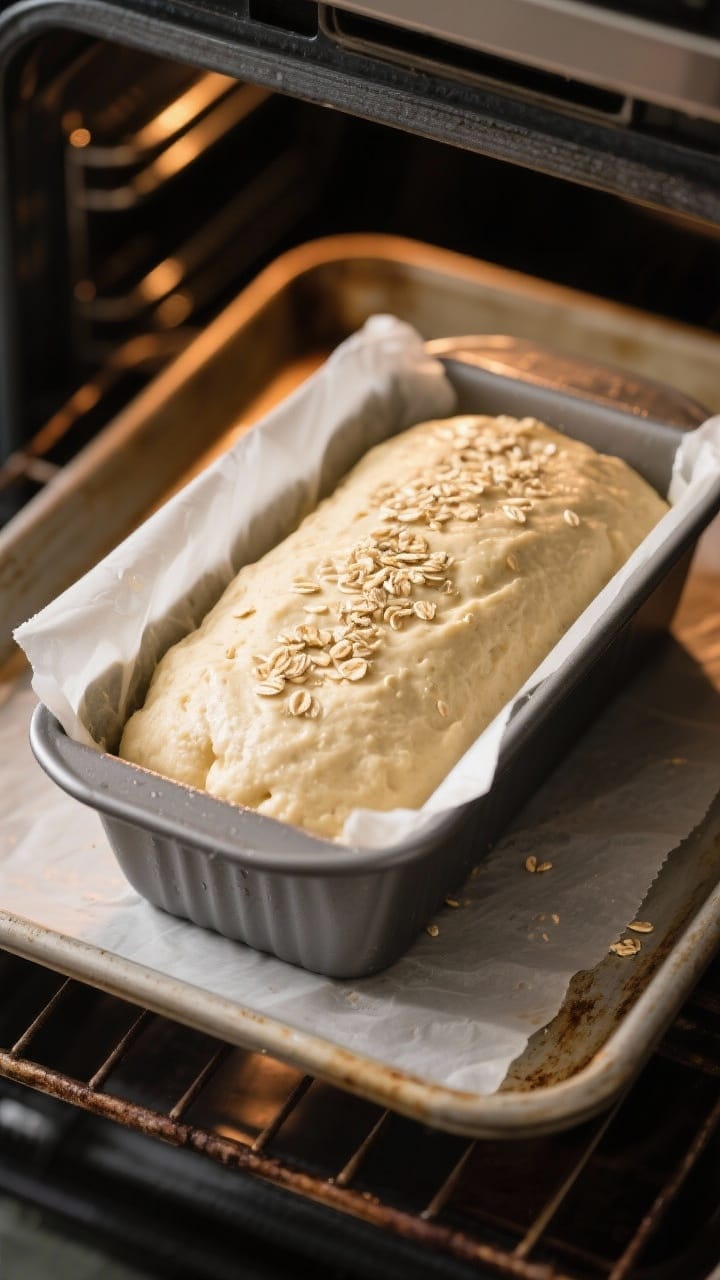
- Prep the pan and ingredients. Lightly grease a 9×5-inch (23×13 cm) loaf pan and line it with a parchment sling.Make sure your milk and water are warm, not hot. Bring eggs to room temperature for better rise.
- Mix dry ingredients. In a large bowl, whisk together the gluten-free flour blend, tapioca starch, psyllium husk powder, xanthan gum, salt, sugar, and instant yeast. Break up any lumps so everything is evenly distributed.
- Combine wet ingredients. In a separate bowl, whisk the warm milk, warm water, oil (or melted butter), eggs, and vinegar until smooth.
- Make the dough. Pour the wet mixture into the dry ingredients.Beat with a hand mixer fitted with beaters (or a stand mixer with paddle) on medium for 2–3 minutes. The dough will look like thick batter—stickier and looser than wheat bread dough. That’s normal.
- First rest (quick hydration). Let the dough sit in the bowl for 5–7 minutes.This allows the psyllium and xanthan to absorb liquid, making the dough easier to shape.
- Fill the pan. Scrape the dough into the prepared pan. Use a wet spatula to smooth the top into a gentle dome. If using toppings, lightly mist the surface with water and sprinkle them on.
- Proof. Cover loosely with oiled plastic wrap or an upside-down baking sheet.Let rise in a warm, draft-free place until the dough swells to about 1 inch above the rim in the center, 35–60 minutes depending on room temperature. Do not overproof—if it starts to mushroom dramatically over the sides, it’s gone too far.
- Preheat the oven. Near the end of proofing, preheat to 375°F (190°C). Place a rack in the lower-middle position. For extra lift, place an empty baking sheet on the rack to heat up with the oven.
- Bake. Set the loaf pan on the preheated baking sheet and bake for 45–55 minutes.The top will be golden brown and firm. The internal temperature should reach about 205–210°F (96–99°C). If the crust browns too fast, tent with foil for the last 15 minutes.
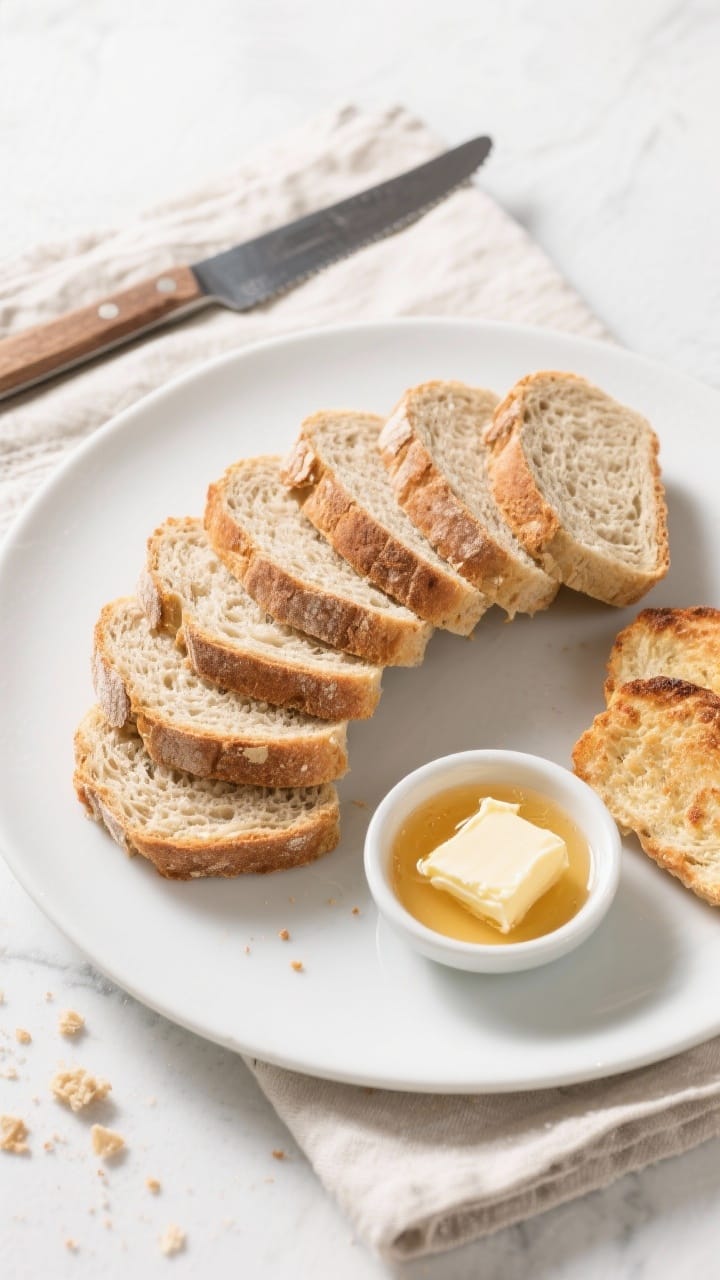
- Cool in stages. Let the loaf rest in the pan for 10 minutes, then lift it out using the parchment.Cool on a rack for at least 1 hour before slicing. Don’t cut early—the crumb needs time to set.
- Slice and enjoy. Use a serrated knife for clean, even slices. Toasting brings out extra flavor and structure, especially on day two.
Keeping It Fresh
Store the cooled loaf in an airtight bag or container at room temperature for up to 2 days. For longer storage, slice the bread and freeze it in a zip-top bag with parchment between slices.
Toast straight from the freezer for quick breakfasts. Avoid refrigerating; it speeds up staling in gluten-free bread.
Benefits of This Recipe
- Soft, sliceable texture that works for sandwiches without crumbling.
- Simple ingredients you can find in most grocery stores.
- Customizable to dairy-free and refined sugar-free diets.
- Reliable rise thanks to a balanced blend of flours, starch, and binders.
- Freezer-friendly for make-ahead convenience.
Common Mistakes to Avoid
- Using a flour blend with added gum when you’re already adding xanthan and psyllium. Too much binder leads to a gummy loaf.
- Overheating the liquids. Hot milk or water can kill yeast.Aim for pleasantly warm, not hot.
- Under-mixing. Gluten-free doughs need a thorough beat to hydrate and activate binders. Go a full 2–3 minutes.
- Overproofing. If the dough rises too high, it may collapse in the oven. Bake when it’s about 1 inch above the rim.
- Slicing too soon. Cutting hot bread compresses the crumb and makes it gummy.Let it cool fully.
Alternatives
- Dairy-free: Use unsweetened almond milk, oat milk, or soy milk, and replace butter with oil.
- Egg-free: Replace 2 eggs with 1/2 cup (120 g) unsweetened applesauce plus 1 tablespoon oil. Texture will be a touch denser but still soft.
- Whole-grain boost: Swap 1/4 cup of the flour blend for certified gluten-free oat flour or sorghum flour for a wheat-like flavor.
- Seeded loaf: Stir in 2 tablespoons each of sunflower and pumpkin seeds for crunch. Sprinkle extra on top before baking.
- Sweet breakfast version: Add 1 teaspoon cinnamon and 1/3 cup raisins.Reduce salt to 1 teaspoon.
What If I Don’t Have Psyllium Husk Powder?
You can omit it and increase xanthan gum to 1 1/2 teaspoons, but the loaf will be slightly less flexible and may stale faster. Psyllium adds moisture and structure that helps with slicing.
Can I Use Active Dry Yeast Instead of Instant?
Yes. Proof 2 1/4 teaspoons active dry yeast in the warm milk, water, and sugar for 5–10 minutes until foamy, then proceed.
Reduce the sugar in the dry mix accordingly.
How Do I Know the Dough Is Hydrated Enough?
It should resemble thick cake batter—spreadable, not kneadable. If it seems like playdough, add a tablespoon or two of warm water. Hydration is key to a soft crumb.
Why Did My Bread Collapse After Baking?
Common reasons include overproofing, underbaking, or too much liquid.
Check proof height, bake to 205–210°F internally, and measure ingredients by weight when possible.
Can I Bake This in a Bread Machine?
If your machine has a gluten-free cycle, it can work. Add wet ingredients first, then dry. Scrape down the sides during mixing, and check that the dough looks like thick batter.
Baking in the oven often gives better browning.
How Do I Get a Thicker Crust?
Bake the last 10 minutes without the pan—carefully remove the loaf and place it directly on the oven rack. You can also extend the bake by 5 minutes or increase the oven to 390°F (200°C) for the final 5 minutes.
Wrapping Up
Soft gluten-free bread shouldn’t feel like a compromise. With a well-balanced flour blend, the right binders, and a slightly wetter dough, you get a tender, golden loaf that holds up to real-life eating.
Keep a sliced loaf in the freezer for easy weekday toast, or bake it fresh on a weekend and enjoy that first warm slice with butter. Once you’ve nailed this method, try the variations and make it your own. This is the kind of bread you’ll come back to again and again.
Printable Recipe Card
Want just the essential recipe details without scrolling through the article? Get our printable recipe card with just the ingredients and instructions.