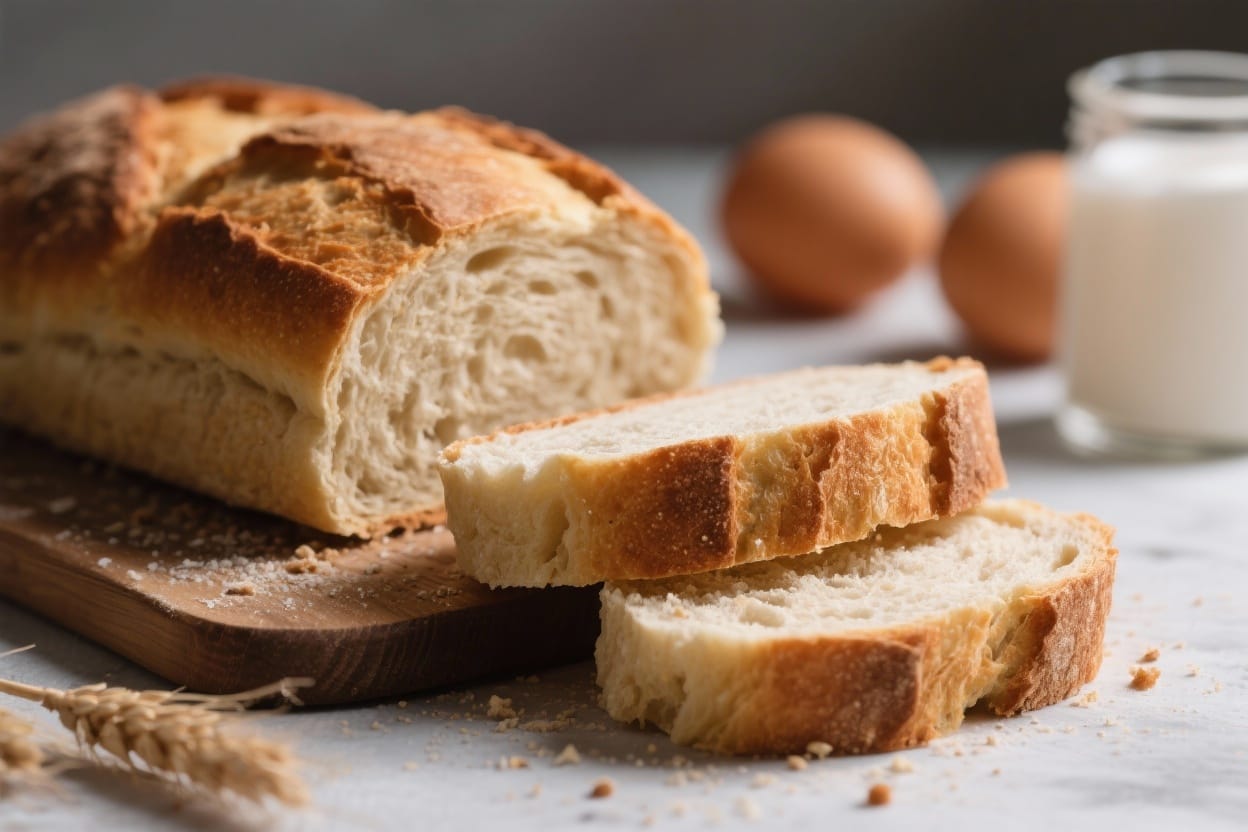
Simple Homemade Bread Loaf – A Reliable, Everyday Recipe
There’s something comforting about a warm loaf of bread cooling on your counter. It smells inviting, tastes nostalgic, and turns a regular meal into something special. This simple homemade bread loaf is designed for everyday baking—no fancy equipment, no complicated steps. If you’re new to bread, you’ll find it friendly and forgiving. If you already bake, you’ll appreciate how consistent and adaptable it is.
What Makes This Special
Simple homemade bread loaf – Simple Homemade Bread Loaf – A Reliable, Everyday Recipe There’s something comforting about a warm l
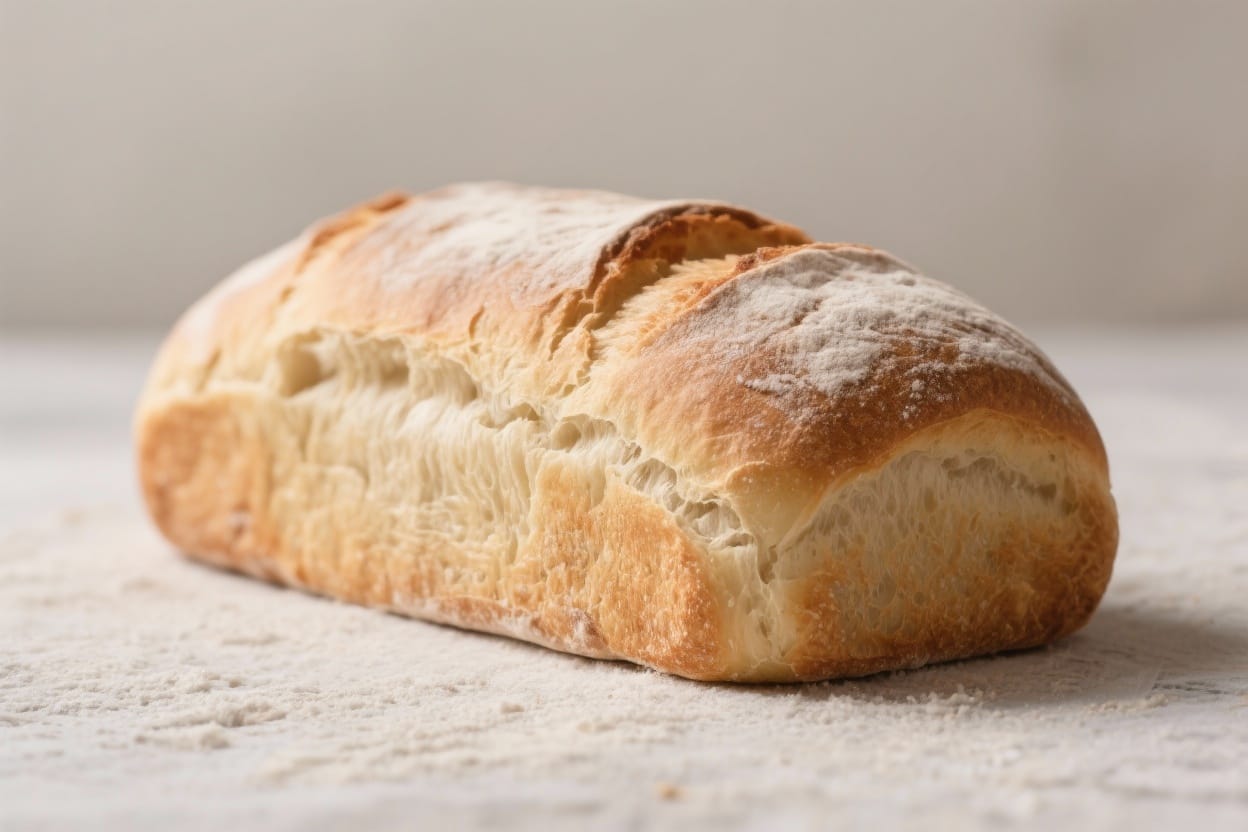
This loaf focuses on basics: a soft crumb, a gentle chew, and a golden crust that’s not too hard. It uses common pantry ingredients and a straightforward process, so you can bake it on a weeknight without stress. The dough is versatile—shape it into a sandwich loaf, rolls, or even a rustic boule. And you don’t need special flour or a stand mixer, just a bowl, a spoon, and a little patience.
Ingredients
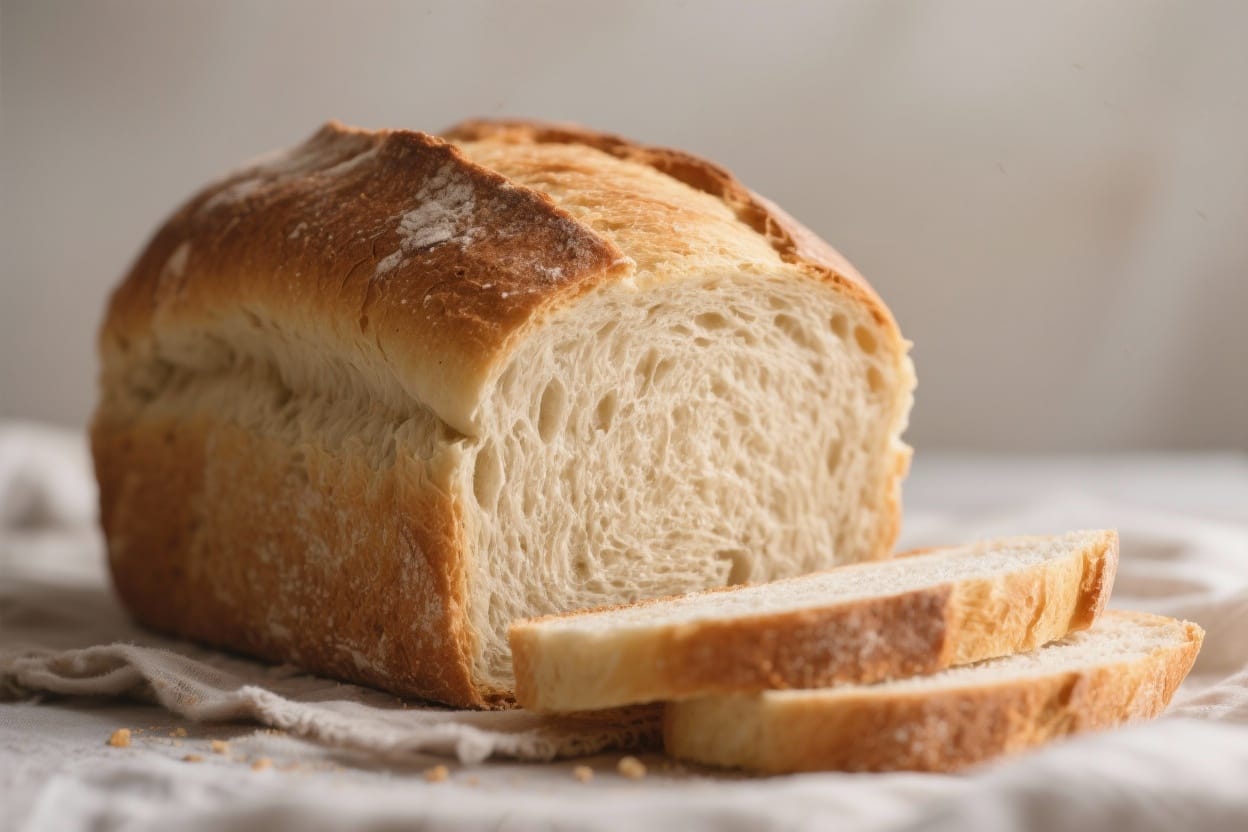
Simple homemade bread loaf – It smells inviting, tastes nostalgic, and turns a regular meal into something special
- 3 1/2 cups (420 g) all-purpose flour (or bread flour for a chewier texture)
- 1 1/4 cups (300 ml) warm water (about 105–110°F / 40–43°C)
- 2 1/4 teaspoons (7 g) instant or active dry yeast (one packet)
- 1 1/2 teaspoons salt
- 1 tablespoon sugar or honey (helps with browning and flavor)
- 2 tablespoons olive oil or melted butter (optional, for softness)
- Additional flour for kneading and dusting
- Neutral oil or butter for greasing the pan
Instructions
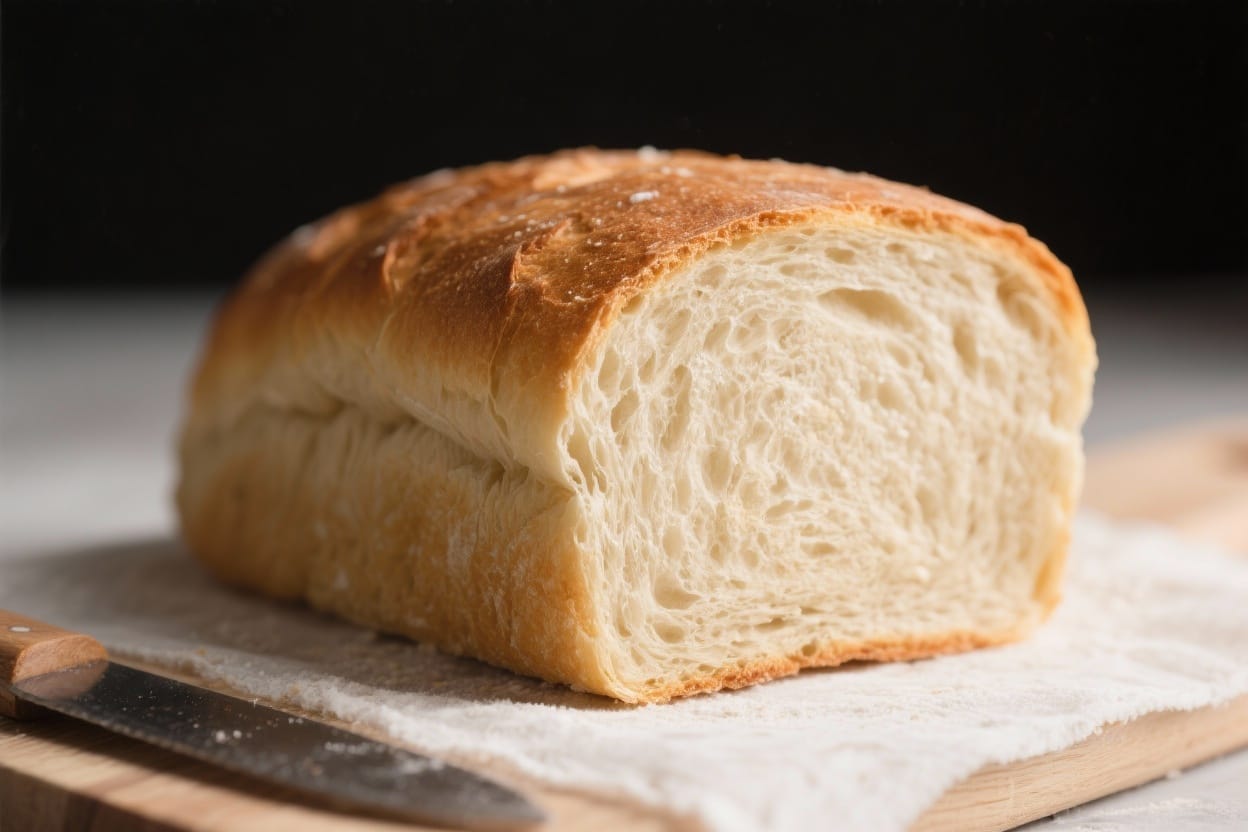
Simple homemade bread loaf – This simple homemade bread loaf is designed for everyday baking—no fancy equipment, no complicated s
- Activate the yeast (if using active dry). In a bowl, mix warm water and sugar or honey. Sprinkle in the yeast and let it sit for 5–10 minutes, until foamy. If using instant yeast, you can skip this step and mix it directly with the dry ingredients.
- Mix the dough. In a large bowl, combine flour and salt. Add the yeast mixture (or warm water if using instant yeast), plus the oil or butter. Stir with a spoon until a shaggy dough forms.
- Knead until smooth. Turn the dough onto a lightly floured surface. Knead for 8–10 minutes, adding small sprinkles of flour only if the dough sticks badly. The dough should become smooth, stretchy, and slightly tacky, not dry.
- First rise. Place the dough in a lightly oiled bowl, turning it to coat. Cover with a clean towel or plastic wrap. Let it rise in a warm spot until doubled in size, about 60–90 minutes, depending on room temperature.
- Shape the loaf. Gently press the dough to release air. Pat it into a rectangle roughly the length of your loaf pan. Roll it up tightly from the short side, pinch the seam, and tuck the ends under. Place seam-side down in a greased 8.5×4.5-inch or 9×5-inch loaf pan.
- Second rise. Cover and let the dough rise again until it crowns about 1 inch above the pan rim, 35–60 minutes. It should look puffy and spring back slowly when poked.
- Preheat the oven. Heat your oven to 375°F (190°C) while the loaf finishes rising. For a slightly crisper crust, place a small pan of hot water on a lower rack.
- Bake. Bake on the center rack for 28–35 minutes. The top should be golden brown. The loaf will sound hollow when tapped on the bottom, and an instant-read thermometer should read about 195–200°F (90–93°C) in the center.
- Cool properly. Remove the loaf from the pan and cool on a rack for at least 45–60 minutes before slicing. This sets the crumb and prevents gummy slices.
- Optional finishes. Brush the warm top with butter for a softer crust, or let it cool untouched for a slightly firmer crust.
Keeping It Fresh
Store the cooled loaf in a bread box, paper bag, or loosely wrapped in a clean towel. This helps maintain a soft interior without trapping too much moisture. If you prefer a softer crust, wrap in plastic or keep in a resealable bag. It will stay fresh at room temperature for 2–3 days.
For longer storage, slice and freeze in a freezer bag. Pull out slices as needed and toast straight from frozen. Avoid the fridge—it tends to dry bread out faster.
Why This is Good for You
Homemade bread skips preservatives and lets you control ingredients. You can reduce sugar, choose whole grains, or use quality oils. Fresh bread also encourages mindful eating—you’ll notice the flavor, texture, and aroma more than you would with packaged loaves.
It’s also budget-friendly. A few basic ingredients turn into several servings of satisfying, versatile food. And the slow, hands-on process can be calming, which is a nice bonus beyond nutrition.
Common Mistakes to Avoid
- Water that’s too hot. Yeast dies above roughly 120°F (49°C). Aim for warm, not hot—like a comfortable bath.
- Adding too much flour. A slightly sticky dough is okay. Extra flour makes a dense loaf. Dust your hands instead of dumping more flour onto the dough.
- Under-kneading. Kneading builds gluten for structure. If the dough tears easily and doesn’t stretch, keep going a few more minutes.
- Rushing the rise. Let the dough fully double before shaping. Under-proofed dough won’t have much lift in the oven.
- Slicing too soon. Cutting hot bread compresses the crumb and makes it gummy. Let it cool to set properly.
Alternatives
- Whole Wheat Version: Replace up to 50% of the flour with whole wheat. Add 1–2 extra tablespoons of water if the dough feels dry. Expect a heartier texture.
- Dairy-Rich Loaf: Swap water for warm milk and use butter. This yields a softer crumb and a slightly richer taste.
- Herb and Garlic: Add 1–2 teaspoons dried herbs (like rosemary or Italian seasoning) and 1–2 minced garlic cloves during mixing.
- Seeded Top: Brush the shaped loaf with water or egg wash and sprinkle sesame, poppy, or sunflower seeds before baking.
- Rustic Boule: Skip the pan. Shape into a round, let rise on a parchment-lined sheet, and bake at 425°F (220°C) for 25–35 minutes. Steam the oven for a crispier crust by placing a pan of hot water on the lower rack.
- Overnight Rise: Let the dough rise slowly in the fridge overnight after kneading. This deepens flavor and helps timing.
FAQ
Can I use only whole wheat flour?
You can, but the loaf will be denser and may not rise as high. For a softer result, start with 50% whole wheat and 50% all-purpose or bread flour. Add a bit more water if the dough is stiff.
What if I don’t have a loaf pan?
Shape the dough into a round or oval and bake on a baking sheet. Increase the oven temperature to 400–425°F (200–220°C) and check for doneness around 25–35 minutes.
How do I know when dough has risen enough?
Look for doubling in size on the first rise. For the second rise, the dough should spring back slowly when gently pressed—if it snaps back quickly, give it more time; if it doesn’t spring back at all, it may be slightly over-proofed.
Can I use a stand mixer?
Yes. Mix with the dough hook on low until combined, then knead on medium-low for about 6–8 minutes. Stop when the dough is smooth and elastic and cleans the sides of the bowl.
How do I get a softer crust?
Brush the warm loaf with butter and store it wrapped once it cools. Using milk instead of water also softens the crust and crumb.
My loaf collapsed—what happened?
This often means over-proofing or too much moisture. Next time, shorten the second rise slightly and measure liquids carefully. Also check oven temperature with an oven thermometer to ensure proper heat.
Can I reduce the sugar?
Yes. Sugar helps browning and flavor, but the loaf will still rise without it. You can reduce to 1 teaspoon or omit entirely; the crust may be paler.
Is bread flour better than all-purpose?
Bread flour has more protein, which can give you a chewier texture and slightly higher rise. All-purpose works well and produces a softer crumb. Use what you have.
Wrapping Up
This simple homemade bread loaf is dependable, flexible, and satisfying. With a few ingredients and a bit of time, you’ll have a golden loaf that fits breakfasts, sandwiches, and dinner sides. Once you make it a couple of times, you’ll know the dough by feel—and that’s when baking becomes second nature. Enjoy the process, and enjoy the bread even more.
Printable Recipe Card
Want just the essential recipe details without scrolling through the article? Get our printable recipe card with just the ingredients and instructions.