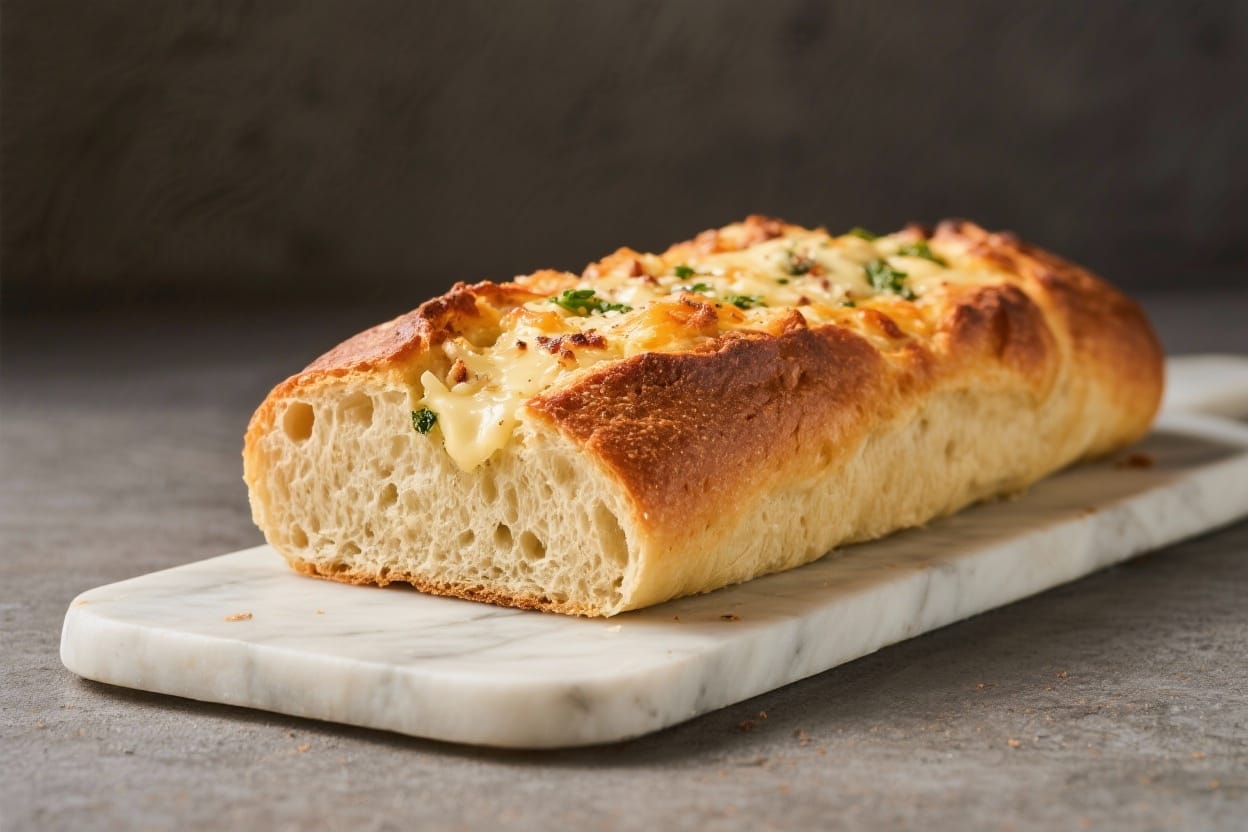
Picture a warm, golden loaf that smells like a cozy bakery and pulls apart in cheesy, tender slices. This savory cheese bread loaf is the kind of recipe you’ll make once and keep coming back to. It’s comforting without being heavy, and it works for breakfast, brunch, or as a side with soup or salad.
The crumb is soft and flavorful, swirled with melted cheese and herbs. If you’ve never baked bread before, this is a friendly place to start. If you have, this one might just become your new go-to.
Why This Recipe Works
This loaf blends a straightforward dough with a generous amount of cheese, making it both reliable and satisfying.
The dough uses a mix of all-purpose flour and a touch of olive oil for softness, so it stays tender without being greasy. A combination of shredded cheeses melts smoothly and adds flavor pockets throughout. Herbs and garlic boost aroma without overpowering the bread.
The result is a loaf that slices cleanly, toasts beautifully, and reheats well.
Ingredients
- 3 cups (360 g) all-purpose flour
- 2 teaspoons instant yeast (or active dry yeast, see FAQs)
- 1 teaspoon fine sea salt
- 1 tablespoon granulated sugar
- 1 cup (240 ml) warm water (about 105–110°F/40–43°C)
- 3 tablespoons olive oil (plus a little for greasing)
- 1 1/2 cups (150–170 g) shredded cheese (mix of sharp cheddar, mozzarella, and Parmesan works best)
- 2 cloves garlic, finely minced (or 1 teaspoon garlic powder)
- 1 teaspoon dried Italian seasoning (or a mix of dried oregano and basil)
- 1/4 teaspoon freshly ground black pepper
- Optional: 2 tablespoons chopped fresh parsley or chives for garnish
- Optional: 1 tablespoon melted butter for brushing
Instructions

- Prep your pan and ingredients. Grease a standard 9×5-inch loaf pan with olive oil or line it with parchment. Measure all ingredients before you start. Keep the water warm, not hot.
- Combine dry ingredients. In a large bowl, whisk together flour, instant yeast, salt, sugar, Italian seasoning, and black pepper.This disperses the yeast and flavor evenly.
- Add the liquids. Pour in the warm water and olive oil. Stir with a wooden spoon or spatula until a shaggy dough forms. It should look slightly sticky but hold together.
- Knead until smooth. Turn the dough onto a lightly floured surface.Knead for 6–8 minutes, adding only small sprinkles of flour as needed. Aim for a smooth, elastic dough that bounces back when poked.
- First rise. Place the dough in a lightly oiled bowl, turning once to coat. Cover with a clean towel or plastic wrap and let rise in a warm spot until doubled in size, about 60–75 minutes.
- Prepare the filling. In a small bowl, mix the shredded cheeses with the minced garlic.If using Parmesan, keep a tablespoon aside for topping.
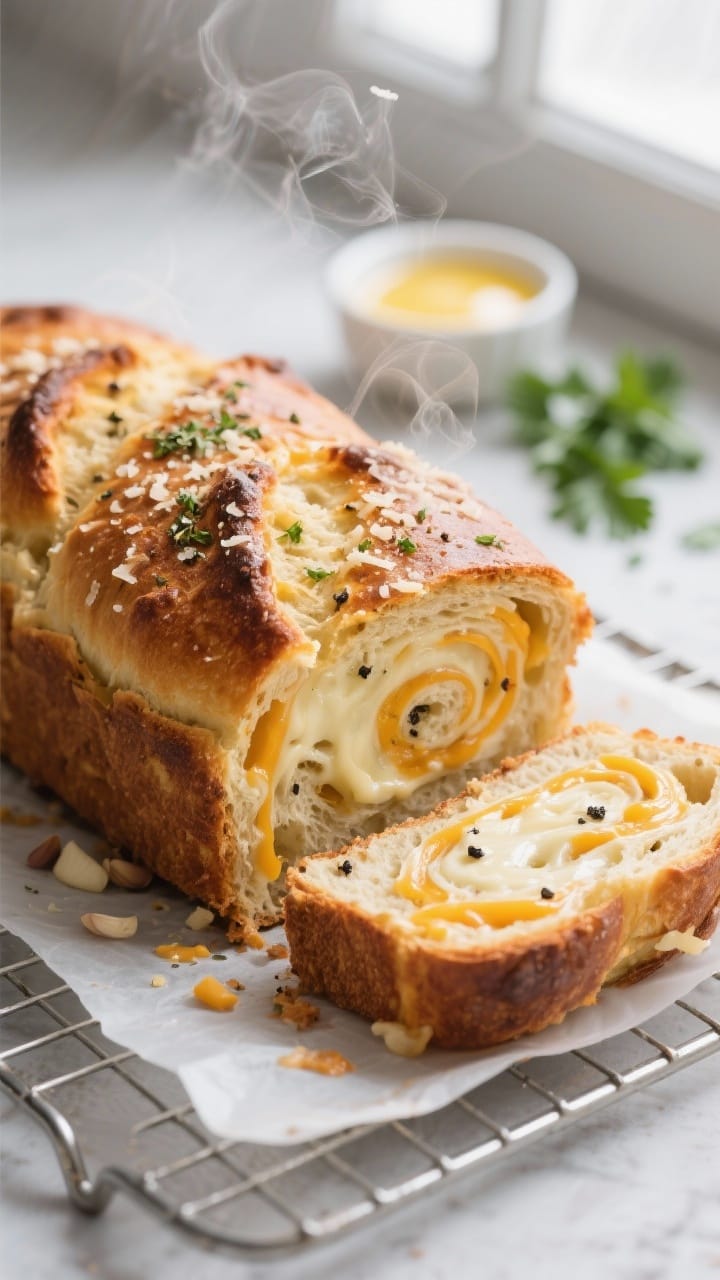
- Shape the loaf. Punch down the risen dough to release air. Roll it into a rectangle about 9×14 inches. Sprinkle the cheese-garlic mixture evenly over the surface, leaving a 1/2-inch border on the long edges.
- Roll and seal. Starting from a long side, roll the dough into a tight log.Pinch the seam to seal and tuck the ends under. Place seam-side down in the prepared loaf pan.
- Second rise. Cover the pan loosely and let the loaf rise until the dough crowns about 1 inch above the rim, 30–45 minutes depending on room temperature.
- Preheat and top. While the loaf rises, preheat the oven to 375°F (190°C). Brush the top with olive oil or melted butter.Sprinkle the reserved Parmesan on top, if using.
- Bake. Bake for 28–35 minutes, until the top is deep golden and the internal temperature reaches 195–200°F (90–93°C). If the top browns too quickly, tent loosely with foil for the last 10 minutes.
- Cool properly. Let the loaf cool in the pan for 10 minutes, then transfer to a wire rack. Cool at least 30 minutes before slicing so the cheese sets and the crumb stays tender.
- Finish and serve. Brush with melted butter and sprinkle with chopped parsley or chives, if you like.Slice and serve warm on its own, or alongside soup, chili, or a big salad.
Storage Instructions
- Room temperature: Wrap tightly in foil or store in an airtight container for up to 2 days.
- Refrigerator: Keeps 4–5 days. Warm slices in a 300°F (150°C) oven for 8–10 minutes, or toast lightly.
- Freezer: Slice, wrap in plastic, and freeze in a zip-top bag for up to 2 months. Reheat from frozen at 325°F (165°C) for 12–15 minutes or toast.
- Pro tip: For crisp edges, reheat uncovered on a baking sheet.

Health Benefits
While this is a comfort bake, it can still fit a balanced approach.
The cheeses provide protein and calcium, and olive oil adds heart-friendly monounsaturated fats. Homemade bread lets you control sodium and additives, and you can choose higher-quality ingredients. Pairing a slice with a salad or vegetable soup rounds out the meal and adds fiber and micronutrients.
If you want to lighten it up, see the Alternatives section for smart swaps.
Pitfalls to Watch Out For
- Water too hot: If it’s hotter than bath-warm, you might kill the yeast and the dough won’t rise.
- Too much flour:</-strong> Over-flouring during kneading leads to a dense loaf. Keep the dough slightly tacky.
- Under-kneading: Poor gluten development can cause a flat loaf and uneven crumb.
- Cutting too soon: Slicing hot bread releases steam and can make the interior gummy. Let it rest.
- Overfilling with cheese: Tempting, but too much can create gaps and leaks.Stick to the amounts given.
Alternatives
- Cheese swaps: Try Monterey Jack, Gruyère, or provolone. Avoid very wet fresh mozzarella inside the loaf; use low-moisture instead.
- Herb variations: Fresh rosemary or thyme adds a fragrant touch. Use 1 tablespoon fresh herbs in place of 1 teaspoon dried.
- Whole wheat upgrade: Replace up to 1 cup of the flour with white whole wheat for more fiber.Add 1–2 extra tablespoons of water if needed.
- Garlic lovers: Roast a head of garlic and mash 3–4 cloves into the filling for sweet, mellow flavor.
- No-knead shortcut: Use bread flour, mix until combined, and let rise 8–10 hours in the fridge. Shape, proof, and bake as directed. Texture will be slightly different but still delicious.
- Spice it up: Add a pinch of red pepper flakes or smoked paprika to the filling.
- Dairy-free approach: Use your favorite plant-based shredded cheese and swap olive oil for butter in the topping.
FAQ
Can I use active dry yeast instead of instant yeast?
Yes.
Use the same amount, but bloom it first in the warm water with the sugar for 5–10 minutes until foamy, then proceed with the recipe.
How do I know when the loaf is fully baked?
Look for a deep golden top and an internal temperature of 195–200°F (90–93°C). If you tap the bottom, it should sound hollow. If it’s pale or feels soft in the center, bake a few minutes longer.
Can I make this without a loaf pan?
Yes.
Shape into a tight batard and bake on a parchment-lined sheet. Start checking for doneness at 25 minutes, as it may bake a bit faster.
What’s the best way to shred cheese for this?
Use a box grater and shred from a block. Pre-shredded cheese contains anti-caking agents that can affect melting and texture.
A mix of cheddar and mozzarella gives both flavor and stretch.
How can I add more flavor without more salt?
Boost dried herbs, add fresh garlic, or swirl in finely chopped sun-dried tomatoes (patted dry). A sprinkle of fresh herbs on top after baking also brightens flavor.
Why did my loaf collapse after baking?
It may have over-proofed during the second rise or had too much moisture. Next time, bake when the dough rises about 1 inch above the pan, and measure water carefully.
Can I use bread flour?
Absolutely.
Bread flour gives a chewier crumb. You may need a teaspoon or two more water, as bread flour absorbs slightly more.
Is there a gluten-free option?
Use a 1:1 gluten-free flour blend designed for yeast breads, plus the binder recommended by the blend. Expect a denser but still tasty loaf.
Final Thoughts
This savory cheese bread loaf brings bakery warmth to your kitchen with simple steps and familiar ingredients.
It’s flexible, forgiving, and big on flavor. Serve it fresh the day you bake it, then enjoy leftovers toasted with a smear of butter or alongside your favorite soup. Once you master the base, tweak the cheese blend and herbs to match your taste.
It’s the kind of loaf that makes any meal feel a little more special.
Printable Recipe Card
Want just the essential recipe details without scrolling through the article? Get our printable recipe card with just the ingredients and instructions.