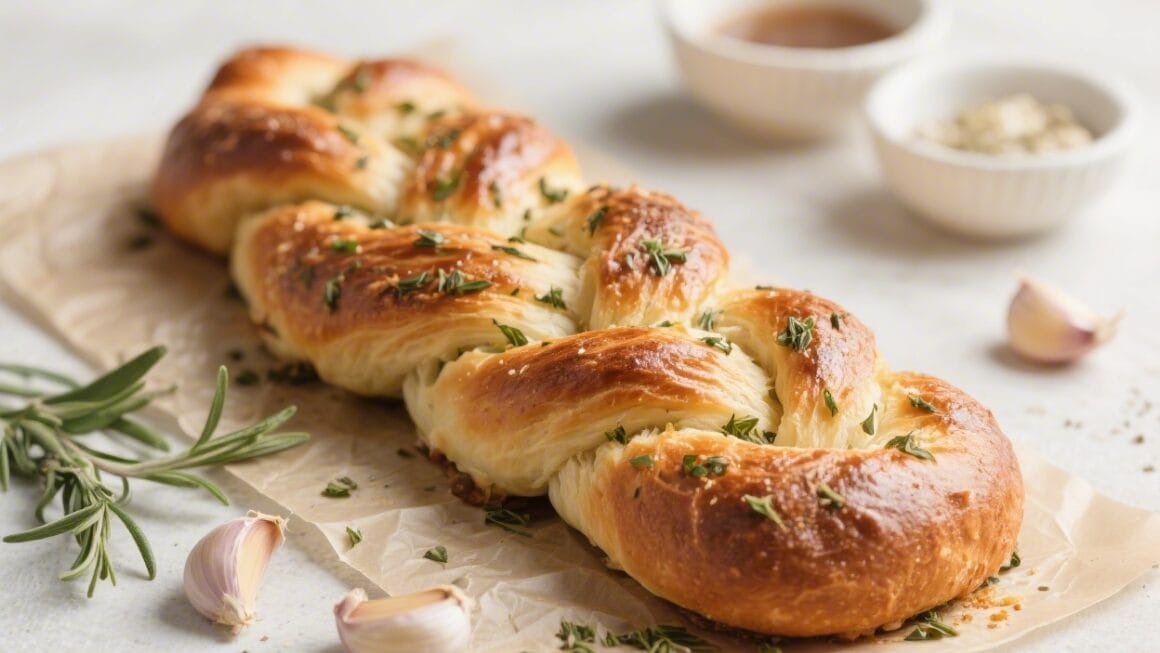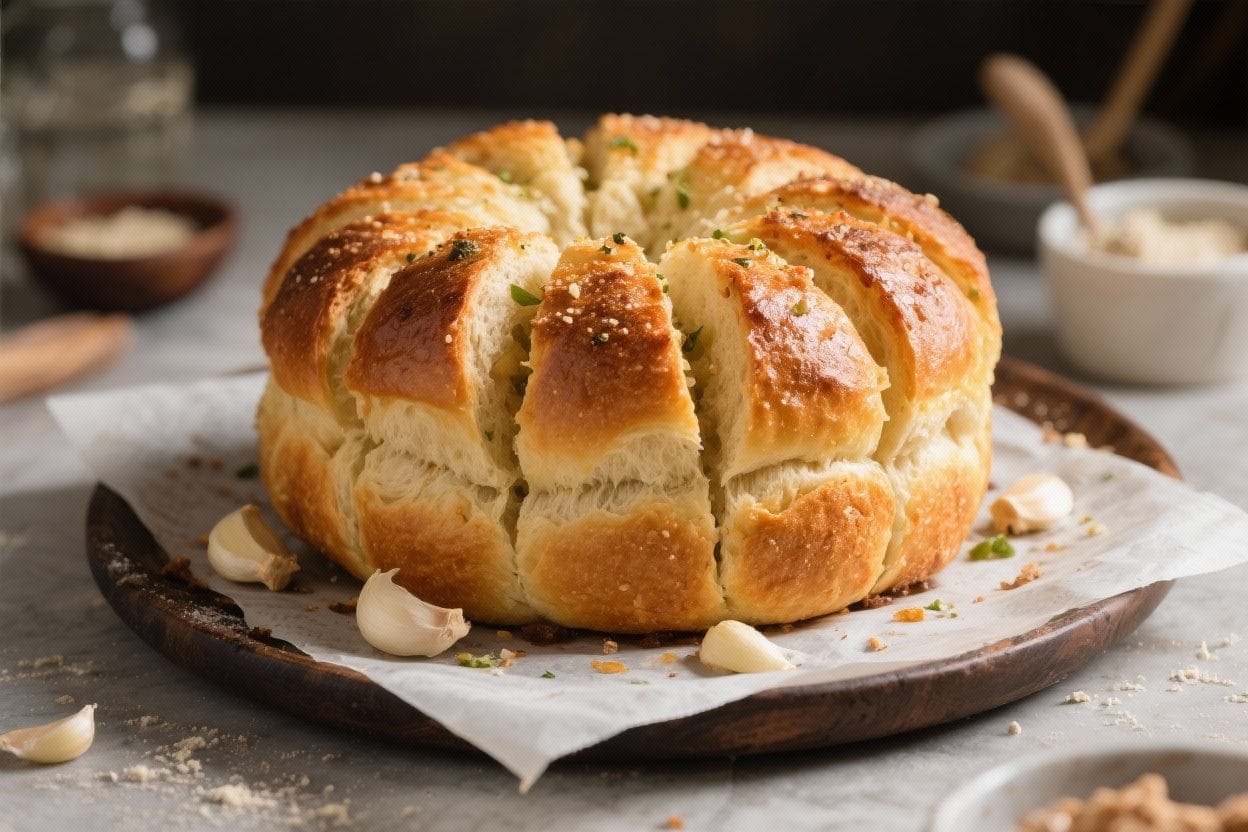
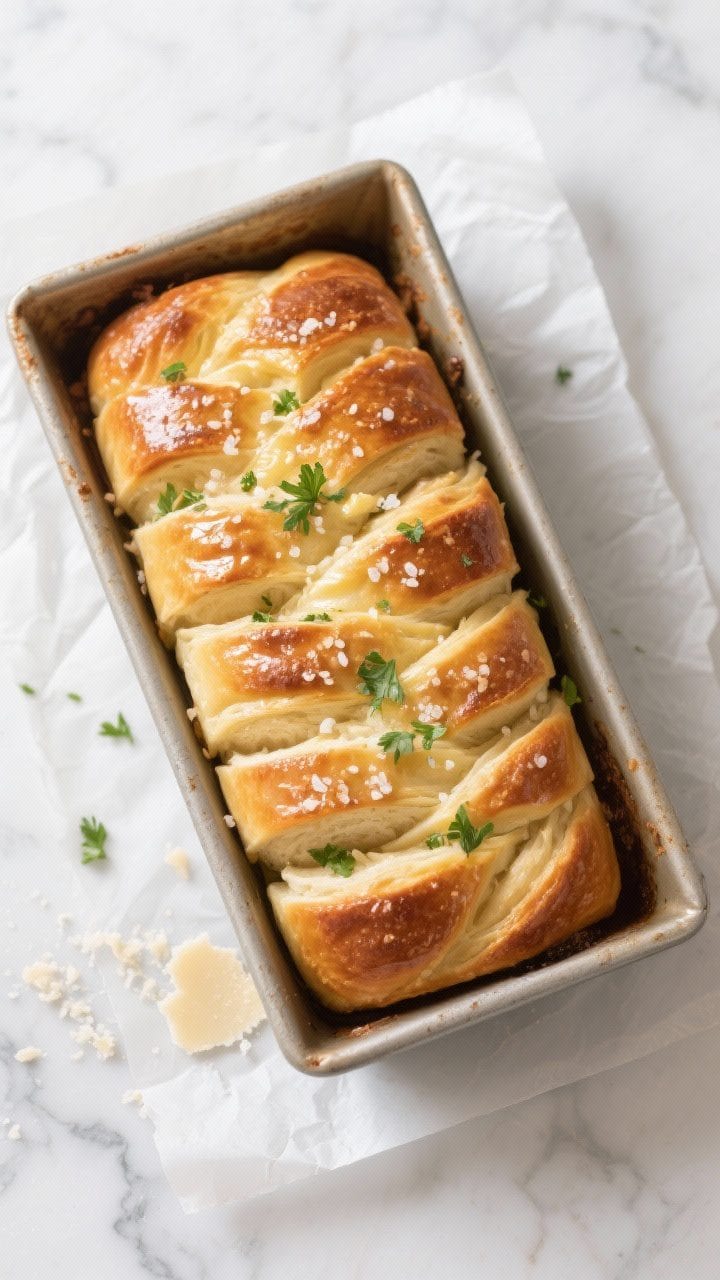
Warm, buttery, and fragrant, pull-apart garlic bread is the kind of snack that disappears fast. It’s the perfect side for pasta night, soup, or any gathering where people reach for “just one more piece.” Making it from scratch might sound intense, but it’s actually straightforward and very satisfying. The dough is soft and forgiving, the shaping is simple, and the result is a loaf that pulls apart in tender layers.
If you love garlic bread, this version gives you control over the flavor, texture, and quality.
Why This Recipe Works
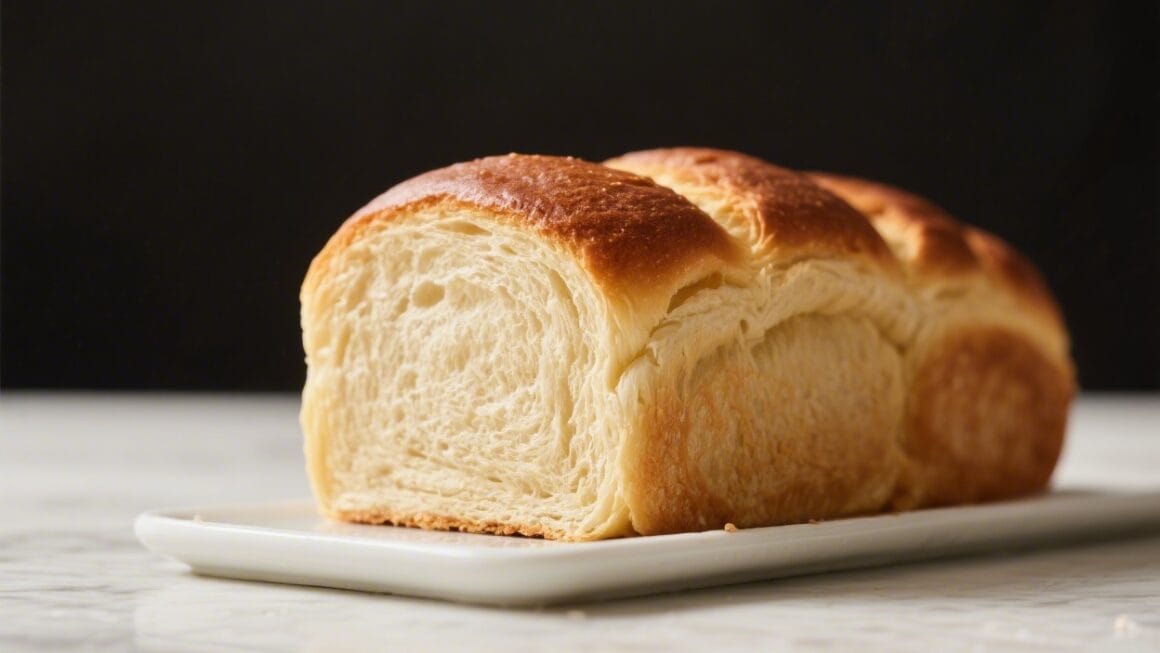
- Enriched dough for softness: A bit of milk, butter, and sugar gives the bread a tender, pillowy crumb that stays soft even as it cools.
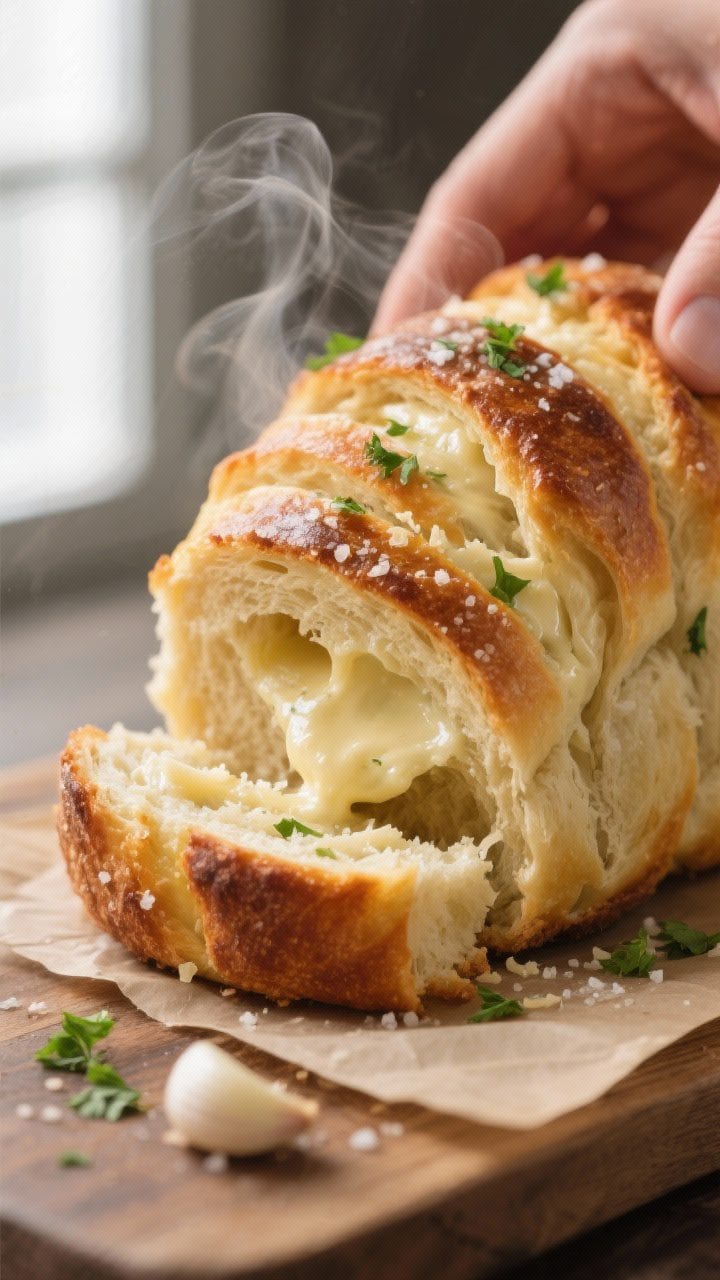
- Layered shaping: Stacking dough pieces with garlic butter creates distinct pull-apart layers, so every bite is seasoned and fluffy.
- Fresh garlic and herbs: Using fresh garlic and parsley boosts aroma and flavor, while a touch of Parmesan adds savory depth.
- High-heat finish: Baking at a moderately high temperature ensures a golden crust without drying out the interior.
Ingredients
- For the dough:
- 3 cups (360 g) all-purpose flour, plus more for dusting
- 2 1/4 teaspoons (7 g) instant yeast
- 1 tablespoon sugar
- 1 teaspoon fine salt
- 3/4 cup (180 ml) warm milk (about 105–110°F / 40–43°C)
- 1/4 cup (60 ml) warm water
- 3 tablespoons unsalted butter, melted and cooled slightly
- 1 large egg, at room temperature
- For the garlic butter:
- 6 tablespoons unsalted butter, melted
- 4–5 garlic cloves, finely minced or grated
- 2 tablespoons fresh parsley, finely chopped
- 2 tablespoons grated Parmesan (optional but recommended)
- 1/2 teaspoon kosher salt
- 1/4 teaspoon freshly ground black pepper
- Pinch of red pepper flakes (optional)
- To finish:
- Flaky salt, for sprinkling
- Extra parsley or Parmesan, for garnish
Instructions
- Mix the dough: In a large bowl, whisk flour, instant yeast, sugar, and salt. Add warm milk, warm water, melted butter, and the egg. Stir with a wooden spoon until a shaggy dough forms.
- Knead until smooth: Turn the dough onto a lightly floured surface.Knead for 7–9 minutes until smooth, elastic, and slightly tacky. If using a stand mixer, knead with the dough hook for 5–6 minutes on medium-low. The dough should clear the sides but stick a bit at the bottom.
- First rise: Shape into a ball and place in a lightly oiled bowl.Cover tightly and let rise in a warm spot until doubled, about 60–90 minutes.
- Make the garlic butter: Stir melted butter with garlic, parsley, Parmesan (if using), salt, pepper, and red pepper flakes. Set aside; it will thicken slightly as it cools.
- Prep the pan: Grease a 9×5-inch loaf pan or a 9-inch round cake pan. Line the bottom with parchment for easy removal.
- Shape the layers: Punch down the dough and turn it out.Roll into a rectangle about 12×16 inches. Using a knife or pizza cutter, cut into roughly 3×3-inch squares (you’ll get about 18–20 pieces).
- Coat and stack: Brush each piece generously with garlic butter. Stack 4–5 pieces at a time and stand the stacks upright in the pan, like a row of books.If using a round pan, arrange stacks around the edge and fill the center. Drizzle any leftover butter on top.
- Second rise: Cover and let rise until puffy and just reaching the top of the pan, 30–45 minutes. Preheat the oven to 375°F (190°C) while it rises.
- Bake: Bake for 22–28 minutes, until the top is deeply golden and the center registers about 195°F (90°C).If it’s browning too fast, tent with foil for the last 5–8 minutes.
- Finish and rest: Remove from the oven, sprinkle with flaky salt and extra parsley or Parmesan. Let rest in the pan for 10 minutes, then lift out. Serve warm so the layers pull apart easily.
Keeping It Fresh
Pull-apart garlic bread is best the day it’s baked, when the layers are soft and steamy.
If you have leftovers, store them in an airtight container at room temperature for up to 1 day. For longer storage, wrap tightly and refrigerate for up to 3 days, or freeze for up to 2 months.
To reheat: Wrap the bread in foil and warm at 325°F (165°C) for 10–15 minutes (20 if frozen). A quick 5-minute unwrapped blast at the end re-crisps the edges without drying the interior.
Why This is Good for You
- Real ingredients: You control the fat, salt, and flavor.No preservatives, no mystery oils, and plenty of fresh herbs.
- Garlic perks: Garlic may support heart health and has antimicrobial properties. Plus, it’s satisfying, which can help you enjoy smaller portions.
- Mindful carbs: Homemade bread offers better texture and portion control. Pair it with a protein-rich main or a big salad for balance.
What Not to Do
- Don’t kill the yeast: Liquids hotter than 115°F (46°C) can weaken yeast.Aim for warm, not hot.
- Don’t add too much flour: A slightly tacky dough bakes softer. If you keep dusting in flour, the bread turns dry and dense.
- Don’t skip the second rise: This is key for a light, airy texture and clean pull-apart layers.
- Don’t under-season the butter: Under-salted bread tastes flat. Season the garlic butter so it pops.
- Don’t overbake: Dry garlic bread is a bummer.Pull it when golden and cooked through.
Alternatives
- Cheesy version: Add 1–1.5 cups shredded mozzarella or provolone between layers. A sprinkle of Parmesan on top adds a nice crust.
- Herb swap: Try basil, chives, dill, or oregano. For a bolder flavor, add a teaspoon of Italian seasoning to the butter.
- Spicy twist: Mix Calabrian chili paste or a pinch of cayenne into the butter for heat.
- Whole-wheat blend: Use half all-purpose and half white whole-wheat flour.Add 1–2 tablespoons extra milk if the dough feels stiff.
- Dairy-free: Use olive oil or vegan butter and a plant-based milk. Skip Parmesan or use a dairy-free alternative.
- Pan options: Make mini pull-apart rolls in a muffin tin by stacking smaller pieces. Bake 12–16 minutes.
FAQ
Can I use active dry yeast instead of instant?
Yes.
Use the same amount, but proof it first in the warm milk and water with the sugar for 5–10 minutes until foamy. Then mix with the dry ingredients and proceed.
What if I don’t have a rolling pin?
Press the dough into a rectangle with your hands. It doesn’t need to be perfect—roughly even thickness is enough, and the layers will still pull apart nicely.
How do I prevent soggy bottoms?
Make sure your oven is fully preheated and avoid overloading the dough with butter.
Lining the pan with parchment and placing it on a preheated baking sheet can also help.
Can I prepare it ahead?
Yes. Shape the stacked dough in the pan, cover tightly, and refrigerate up to 12 hours. Bring to room temperature for 45–60 minutes, then bake as directed.
Is fresh garlic necessary?
Fresh garlic gives the best flavor, but garlic powder works in a pinch.
Use 1 to 1 1/2 teaspoons garlic powder in the butter mixture and adjust to taste.
How do I know it’s done without a thermometer?
The top will be deep golden brown, and the center layers will feel set, not doughy, when you gently pull them. If the top is browning too fast but the middle seems soft, tent with foil and bake a few more minutes.
Can I make it gluten-free?
Use a high-quality 1:1 gluten-free flour blend designed for yeast breads and add 1 teaspoon xanthan gum if your blend doesn’t include it. The texture will be different, but the flavor will still be great.
Final Thoughts
Homemade pull-apart garlic bread is simple, forgiving, and always a crowd-pleaser.
With a tender dough and a bold garlic butter, you get bakery-level results at home. Tweak the herbs, add cheese if you like, and make it your own. Serve warm, let people pull their own pieces, and watch it vanish fast.
Printable Recipe Card
Want just the essential recipe details without scrolling through the article? Get our printable recipe card with just the ingredients and instructions.