If you love a pizza with a golden, crisp edge and a pillowy interior, this pan pizza will be your new favorite. It’s the kind you can tear into and feel that soft, airy crumb, yet still enjoy a satisfying crust. No special equipment or fancy techniques required—just a pan, patience, and good ingredients.
This is the perfect at-home pizza for a cozy night in, and it turns out consistently great. The method is simple, forgiving, and very beginner-friendly.
What Makes This Recipe So Good
- Soft, airy crumb: The dough hydrates slowly, creating those light, bouncy pockets inside.
- Crisp, caramelized edges: Oil and a hot pan give you that irresistible fried-cheese edge.
- Minimal kneading: Time does most of the work. A few folds are all you need.
- Flexible schedule: Make it same day or let it cold-proof overnight for even better flavor.
- Customizable toppings: Keep it classic or load it up.The dough supports it.
Ingredients
- 2 1/4 cups (280 g) bread flour, or all-purpose in a pinch
- 1 cup (240 ml) warm water (about 100–105°F / 38–41°C)
- 2 teaspoons sugar or honey
- 1 1/4 teaspoons instant yeast (or active dry yeast)
- 1 teaspoon fine salt
- 2–3 tablespoons olive oil (plus more for the pan)
- 1 to 1 1/2 cups low-moisture mozzarella, shredded
- 1/2 cup pizza sauce (store-bought or homemade)
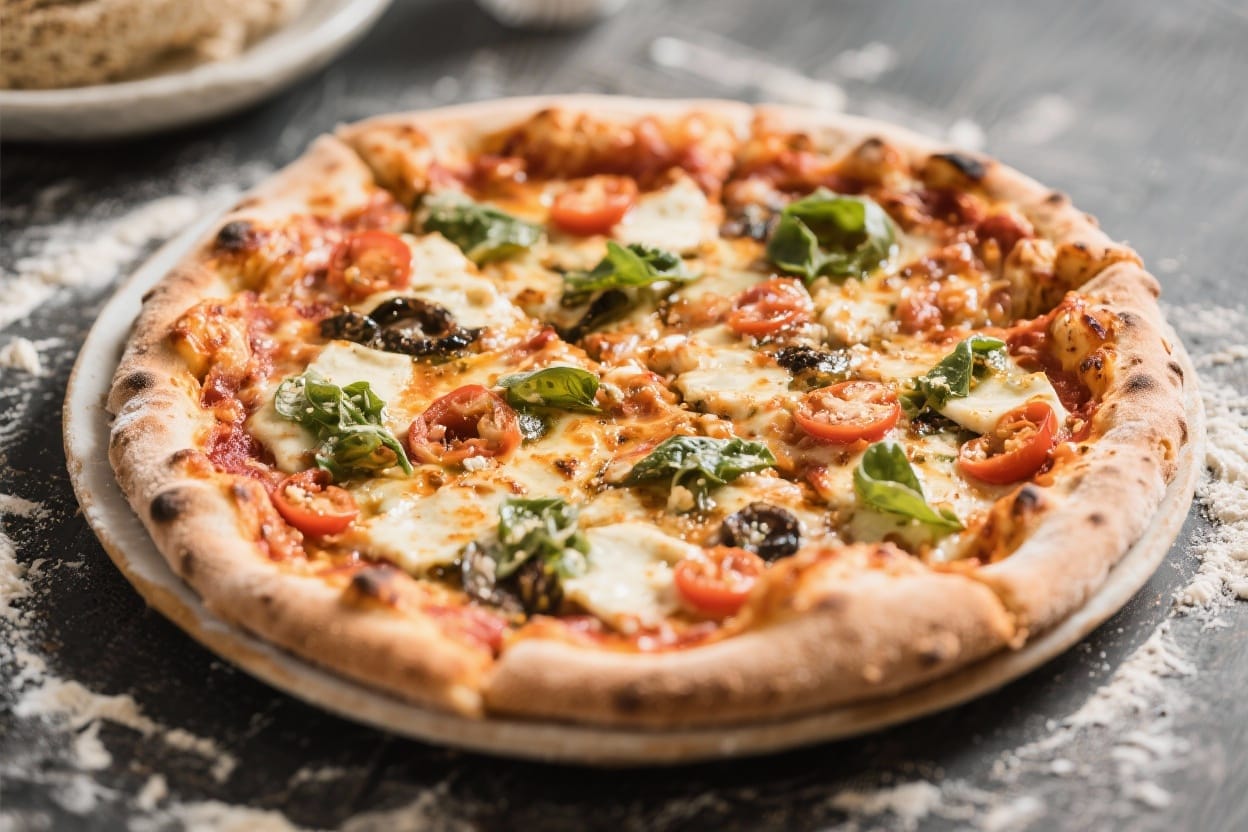
- Optional: grated Parmesan, sliced pepperoni, sliced mushrooms, peppers, onions, olives, or fresh basil
Instructions
- Activate the yeast (if using active dry): Mix warm water and sugar in a bowl. Sprinkle yeast over the top, wait 5–10 minutes until foamy. If using instant yeast, add it directly to the flour and skip this step.
- Mix the dough: In a large bowl, combine flour and salt.Add the yeast mixture (or water + sugar if using instant yeast) and 1 tablespoon olive oil. Stir with a spoon until you get a shaggy dough with no dry pockets.
- Rest and fold: Let the dough rest for 10 minutes. With wet hands, perform 4–6 gentle folds, pulling the edge of the dough up and over itself.Repeat this rest-and-fold cycle twice more at 10-minute intervals. The dough should become smoother and more elastic.
- First rise: Lightly oil the bowl, cover, and let rise at room temperature until doubled, about 60–90 minutes. For better flavor, you can refrigerate the dough for 8–24 hours after a 30–45 minute room-temperature start.Bring to room temp before shaping.
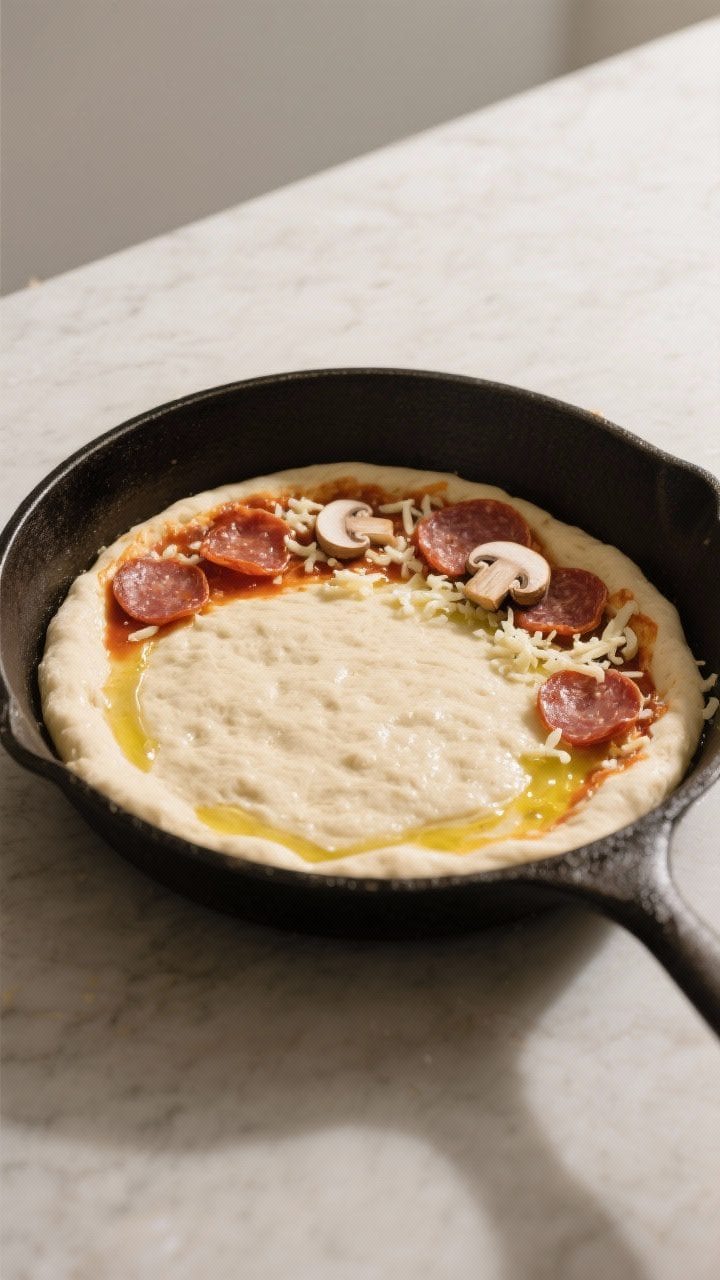
- Prepare the pan: Generously oil a 10- to 12-inch cast-iron skillet or a heavy, oven-safe pan (about 2 tablespoons oil). Don’t skimp on oil; it creates that crisp underside and caramelized edge.
- Pan stretch: Transfer the dough to the oiled pan. Press it gently outward with oiled fingers. If it springs back, rest 10 minutes and press again.Repeat until it reaches the edges. Cover and let it puff for 30–45 minutes.
- Preheat the oven: Heat to 475°F (245°C). If your oven runs cool, go up to 500°F (260°C).A hot oven is key to a soft inside and a crisp bottom.
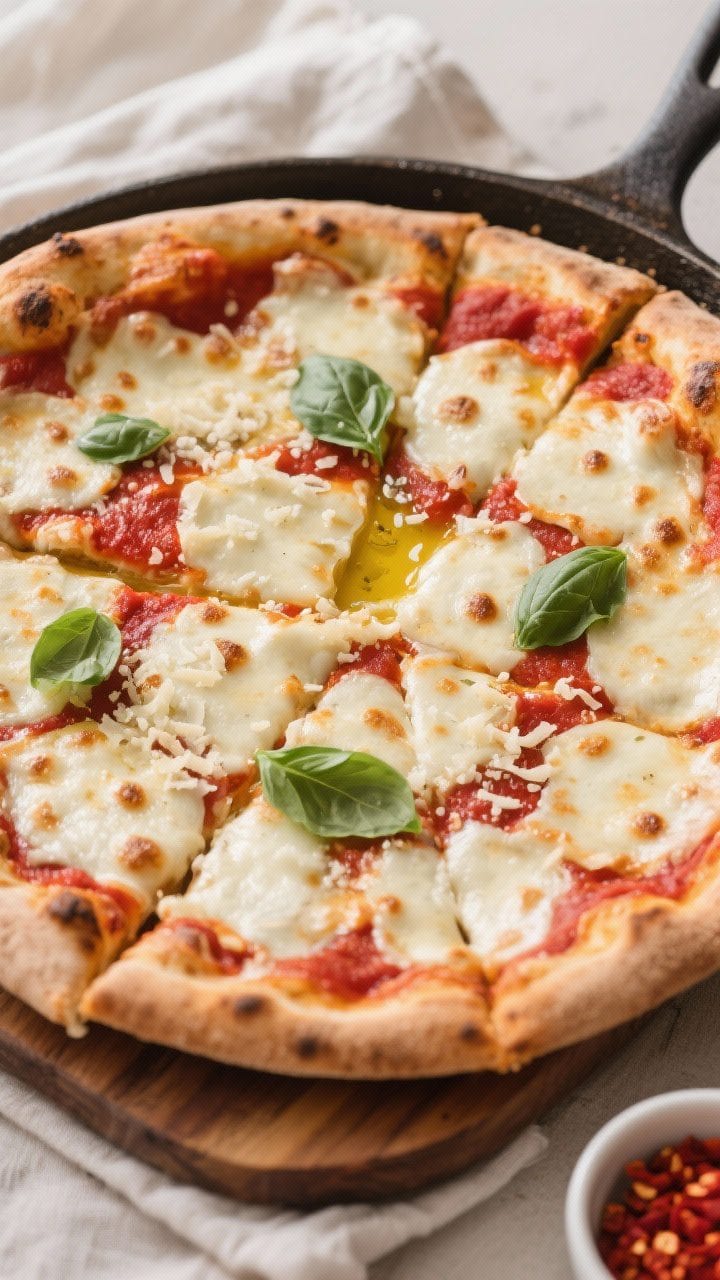
- Top the dough: Spoon a thin layer of sauce, leaving a small border. Sprinkle mozzarella evenly. For a “frico” edge, push a little cheese right up to the sides so it touches the pan.Add your toppings, keeping them evenly spread.
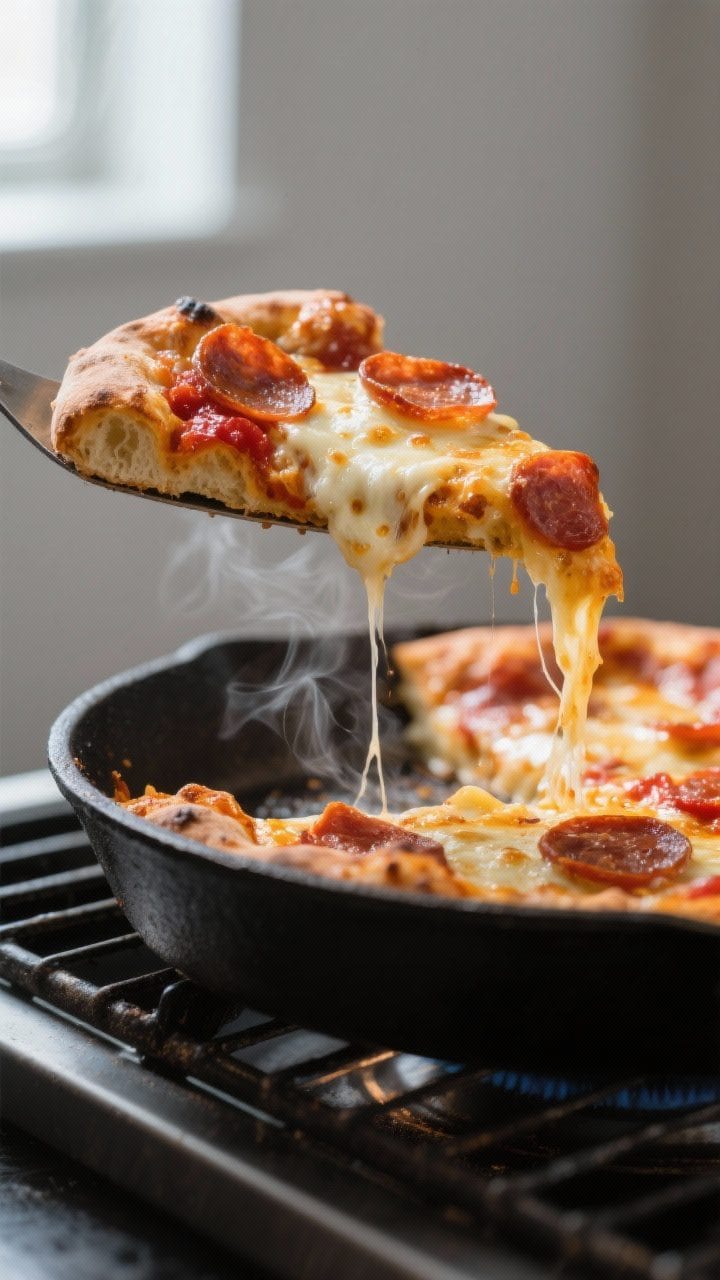
- Bake: Place the pan on the lower rack for 12–15 minutes, until the cheese bubbles and the edges brown. If needed, move to the top rack for 2–3 minutes to finish browning.
- Rest and release: Let the pizza sit 2–3 minutes. Run a thin spatula around the edge to loosen the caramelized cheese.Lift the pizza to check the bottom; it should be deep golden. Slide onto a board.
- Finish and serve: Optional drizzle of olive oil, sprinkle of Parmesan, or fresh basil. Slice and enjoy while the center is still soft and steamy.
Storage Instructions
- Refrigerate: Cool completely, then store slices in an airtight container for up to 3 days.
- Reheat: Best in a skillet over medium heat with a lid for 3–5 minutes, or in a 400°F (205°C) oven for 6–8 minutes.This restores the crisp bottom and keeps the inside soft.
- Freeze: Wrap slices tightly, then freeze up to 2 months. Reheat from frozen in a 400°F (205°C) oven for 12–15 minutes.
Benefits of This Recipe
- Texture you can’t beat: Fluffy inside, crispy outside—classic pan pizza comfort.
- Beginner-friendly: Minimal kneading and a forgiving rise make this easy to learn.
- Flexible timing: Same-day works, but cold fermentation adds flavor.
- Budget-friendly: Simple pantry ingredients yield a takeout-level result.
- Customizable: Works with almost any topping combo, from veggie-loaded to classic pepperoni.
Common Mistakes to Avoid
- Not enough oil in the pan: Without enough oil, the crust sticks and won’t crisp properly.
- Rushing the stretch: If the dough resists, rest it. Forcing it can tear the gluten and lead to dense spots.
- Too much sauce: A heavy layer can make the center soggy.Use a thin, even coat.
- Cold toppings overload: Piling on cold, wet veggies can slow baking and steam the crust. Pat them dry.
- Underbaking: Pulling it too soon leaves the inside gummy. Look for deep golden edges and a browned bottom.
Variations You Can Try
- Garlic Herb Crust: Brush the dough with olive oil mixed with minced garlic and Italian seasoning before saucing.
- Detroit-Style Vibes: Use a rectangular metal pan, lay cheese edge-to-edge, and stripe sauce on top after baking.
- White Pie: Skip the red sauce.Use ricotta dollops, mozzarella, garlic oil, and a shower of black pepper.
- Veggie Supreme: Bell peppers, onions, mushrooms, and olives. Pre-sauté mushrooms to drive off moisture.
- Spicy Pepperoni & Hot Honey: Pepperoni cups, red pepper flakes, and a light drizzle of hot honey after baking.
- Whole Wheat Boost: Swap 25–30% of the flour for whole wheat and add 1–2 extra tablespoons water.
FAQ
Can I use all-purpose flour instead of bread flour?
Yes. Bread flour gives a chewier bite, but all-purpose works well and still yields a soft interior.
If using all-purpose, avoid overhandling and let it rest when it resists stretching.
Do I need a cast-iron skillet?
No. Any heavy, oven-safe pan or metal cake pan works. A dark metal pan promotes a crisper bottom.
Avoid glass, which can bake unevenly at high heat.
How do I keep the center soft but fully cooked?
Use a hot oven, don’t overload sauce or wet toppings, and bake on a lower rack to set the bottom first. Let the pizza rest a couple of minutes before slicing to finish carryover cooking.
What if my dough is too sticky?
Lightly oil your hands and the surface rather than adding extra flour. Stickiness usually means good hydration, which leads to a softer crumb.
Can I make the dough ahead?
Absolutely.
After the initial 30–45 minutes at room temperature, refrigerate up to 24 hours. Bring to room temperature before stretching in the pan.
Why didn’t my dough rise?
Common causes are expired yeast, water that’s too hot or too cold, or a cool room. Check yeast freshness, aim for warm water, and allow more time if your kitchen is chilly.
How much cheese should go to the edge?
A light ring of cheese touching the pan creates that caramelized crust.
Don’t pack it too thick or it may burn before the center finishes.
Can I make this gluten-free?
Use a high-quality gluten-free pizza flour blend and follow the package hydration guidelines. Press the dough gently into the pan rather than stretching.
In Conclusion
Pan Pizza With Soft Inside is all about balance: a gentle, well-hydrated dough, a hot oven, and just the right amount of oil. The result is a pizza that’s plush in the middle and crisp around the edges—deeply satisfying and easy to pull off at home.
Keep the process simple, respect the rest times, and enjoy the kind of pizza that makes the whole kitchen smell amazing. Once you try it, you’ll want to make it part of your weekly routine.
Printable Recipe Card
Want just the essential recipe details without scrolling through the article? Get our printable recipe card with just the ingredients and instructions.