These make-ahead dessert rolls are the kind of treat that makes you look like you planned days in advance—without the stress. Soft, buttery dough wraps around a swirled filling, bakes up golden, and finishes with a creamy glaze. You can prepare them the night before or freeze them for later, then bake whenever the craving hits.
They’re perfect for brunch, potlucks, or holiday mornings when you want something special with minimal hands-on time. If you love a cinnamon roll vibe but want flexibility, this recipe fits right in.
What Makes This Special

This recipe is designed for convenience without sacrificing taste or texture. You prep the rolls ahead of time, then bake straight from the fridge or freezer.
The dough is soft and forgiving, with a rich, buttery base that holds up well to different fillings.
- Plan-friendly: Make the dough and shape the rolls a day or weeks in advance.
- Flexible flavors: Use cinnamon-sugar, chocolate, or fruit fillings.
- Bakery-quality texture: Tender crumb with a gooey center and light glaze.
- Great for crowds: Bakes in a standard 9×13-inch pan or two 9-inch pans.
Ingredients
For the Dough

- 3/4 cup whole milk, warmed to 105–110°F
- 2 1/4 teaspoons active dry yeast (1 packet)
- 1/4 cup granulated sugar
- 2 large eggs, room temperature
- 1/2 cup unsalted butter, very soft (not melted)
- 1 teaspoon vanilla extract
- 3 1/2 to 4 cups all-purpose flour, plus more for dusting
- 1 teaspoon fine salt
For the Filling (Classic Cinnamon)
- 1/2 cup unsalted butter, softened
- 3/4 cup light brown sugar, packed
- 1 tablespoon ground cinnamon
- Pinch of salt
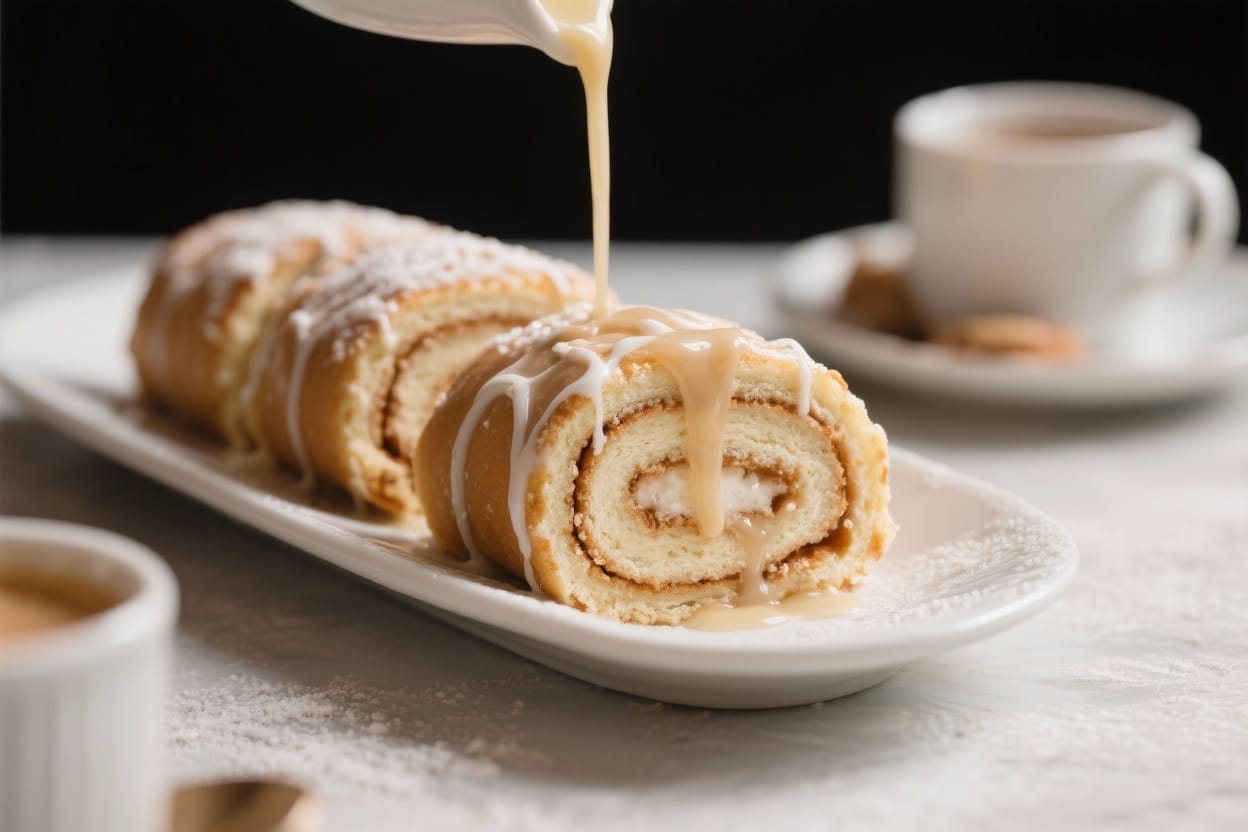
For the Glaze
- 1 1/4 cups powdered sugar
- 2–3 tablespoons milk or cream
- 1 teaspoon vanilla extract
- Pinch of salt
Instructions
- Bloom the yeast: In a large bowl, combine warm milk, yeast, and 1 tablespoon of the sugar. Let sit 5–10 minutes until foamy. If it doesn’t foam, your yeast may be inactive or the milk too hot/cold.
- Mix the dough: Add remaining sugar, eggs, butter, and vanilla.Stir to combine. Add 3 1/2 cups flour and the salt. Mix until a shaggy dough forms.
Add up to 1/2 cup more flour if sticky, a little at a time.
- Knead: Knead on a lightly floured surface (or with a dough hook) for 6–8 minutes, until smooth and slightly tacky but not sticky. The dough should spring back when pressed.
- First rise: Place in a lightly oiled bowl, cover, and let rise in a warm spot until doubled, about 1–1.5 hours.
- Make the filling: Stir softened butter, brown sugar, cinnamon, and a pinch of salt into a spreadable paste.
- Shape the rolls: Punch down the dough. Roll into a 12×18-inch rectangle.Spread the filling evenly, leaving a 1/2-inch border on the long edge. Roll up tightly from the long side to form a log, seam-side down.
- Slice: Trim the ends. Cut into 12 even pieces (a bench scraper or serrated knife works well).Arrange in a greased 9×13-inch pan with slight space between rolls.
- Second rise (same day): Cover and let rise until puffy, 30–45 minutes, then bake at 350°F for 22–27 minutes, until lightly golden and set in the center. Or follow the make-ahead directions below.
- Make-ahead (refrigerator): After shaping and placing in the pan, cover tightly and refrigerate up to 18 hours. When ready, let sit at room temperature 45–60 minutes until puffy, then bake as directed.
- Make-ahead (freezer): Place shaped rolls on a parchment-lined sheet pan and freeze until firm, 2–3 hours.Transfer to a freezer bag or wrap the whole pan tightly. Freeze up to 2 months. To bake, thaw covered in the pan overnight in the fridge, then proof 60–90 minutes at room temperature before baking.
- Glaze: Whisk powdered sugar, milk, vanilla, and salt until smooth and pourable.Spread over warm rolls so it melts into the swirls.
How to Store
- Room temperature: Keep baked, unglazed rolls covered for up to 2 days. Glaze just before serving for the best texture.
- Refrigerator: Store glazed or unglazed rolls up to 4 days. Warm in the microwave for 15–20 seconds or in a 300°F oven for 8–10 minutes.
- Freezer (baked): Wrap individual rolls tightly and freeze up to 2 months.Thaw overnight in the fridge, then warm and glaze.
Benefits of This Recipe
- Time-saving: Do the messy work ahead and bake when it’s convenient.
- Consistent results: The dough is enriched and forgiving, producing soft rolls even after chilling.
- Customizable: Swap fillings to match seasons or preferences.
- Make once, enjoy twice: Bake some now, freeze some for later.
Pitfalls to Watch Out For
- Milk too hot or cold: Yeast needs warm, not hot. Aim for 105–110°F to get a healthy bloom.
- Too much flour: Add flour gradually. A slightly tacky dough bakes softer than a dry one.
- Skipping the proof after chilling: Cold dough needs time to puff before baking; otherwise, rolls will be dense.
- Underbaking: Pale rolls may seem done but are gummy inside.Look for light golden tops and set centers.
- Overheating the glaze: Add glaze to warm rolls, not hot-from-oven. If the rolls are too hot, the glaze can thin out and run off.
Variations You Can Try
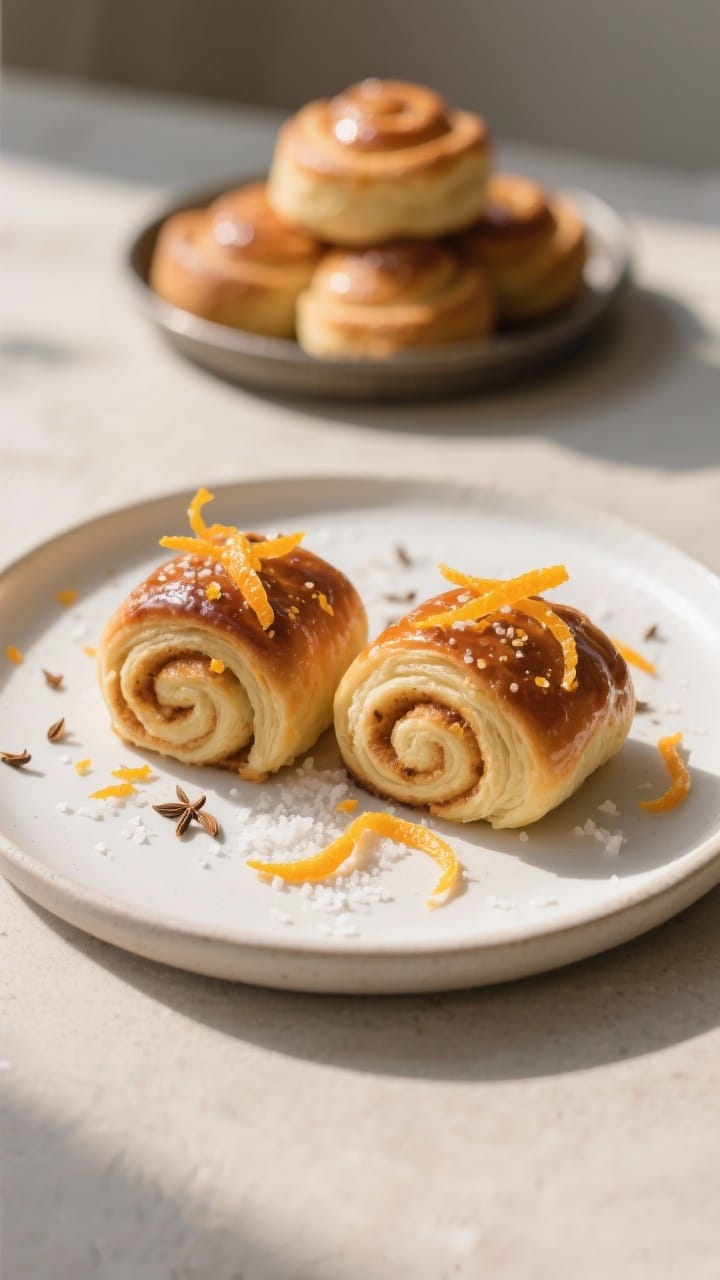
- Orange Cardamom: Add 1 tablespoon orange zest to the filling and 1/2 teaspoon ground cardamom. Use orange juice in the glaze instead of milk.
- Chocolate Hazelnut:</-strong> Spread 3/4 cup chocolate-hazelnut spread over the dough.Sprinkle with chopped toasted hazelnuts before rolling.
- Berry Cream Cheese: Spread a thin layer of softened cream cheese mixed with 2 tablespoons sugar, then dot with raspberry jam. Glaze with lemon-vanilla icing.
- Maple Pecan: Mix brown sugar with 1 teaspoon cinnamon and 1/2 cup chopped pecans. Use maple syrup in the glaze and add a pinch of flaky salt on top.
- Apple Pie: Sauté diced apples with butter, cinnamon, and a spoonful of sugar until just tender.Cool, then spread over the dough before rolling.
- Chocolate Chip Cinnamon: Add mini chocolate chips to the classic cinnamon filling for a gooey twist.
FAQ
Can I use instant yeast instead of active dry yeast?
Yes. Use the same amount and skip the blooming step. Mix instant yeast directly with the flour and other dry ingredients, then proceed.
Keep the liquid warm for best results.
What if I don’t have a stand mixer?
No problem. Stir with a sturdy spoon, then knead by hand. It may take a few extra minutes of kneading, but the dough will still come together smoothly.
How do I know when the rolls are fully baked?
They should be lightly golden on top, and the center roll should feel set, not squishy.
An instant-read thermometer in the center should read about 190°F.
Can I halve or double the recipe?
Absolutely. Halve for a square 8- or 9-inch pan (about 9 rolls). Double the recipe and bake in two 9×13-inch pans, rotating halfway for even browning.
What’s the best way to slice the rolls cleanly?
Use unflavored dental floss.
Slide it under the log, cross the ends on top, and pull tight to slice without squishing the layers.
Can I make them dairy-free?
Yes. Use almond or oat milk, a dairy-free butter alternative, and check that your glaze liquid is plant-based. Texture stays soft if the dough isn’t too dry.
Why did my rolls unwind while baking?
The log may have been rolled too loosely, or the seam wasn’t placed face-down in the pan.
Roll snugly, pinch the seam to seal, and place seam-side down.
Do I need to par-bake before freezing?
No. Freeze shaped, unbaked rolls. Thaw overnight in the fridge, proof at room temperature until puffy, then bake fresh for the best texture.
Final Thoughts
Make-ahead dessert rolls give you bakery-level comfort with real-life flexibility.
Mix and shape when you have time, then bake when it counts. Keep a pan in the freezer for busy mornings, weekend guests, or whenever you want a warm, sweet treat without a big production. Once you have the base dough down, the filling possibilities are endless—and every pan comes out smelling like home.
Printable Recipe Card
Want just the essential recipe details without scrolling through the article? Get our printable recipe card with just the ingredients and instructions.