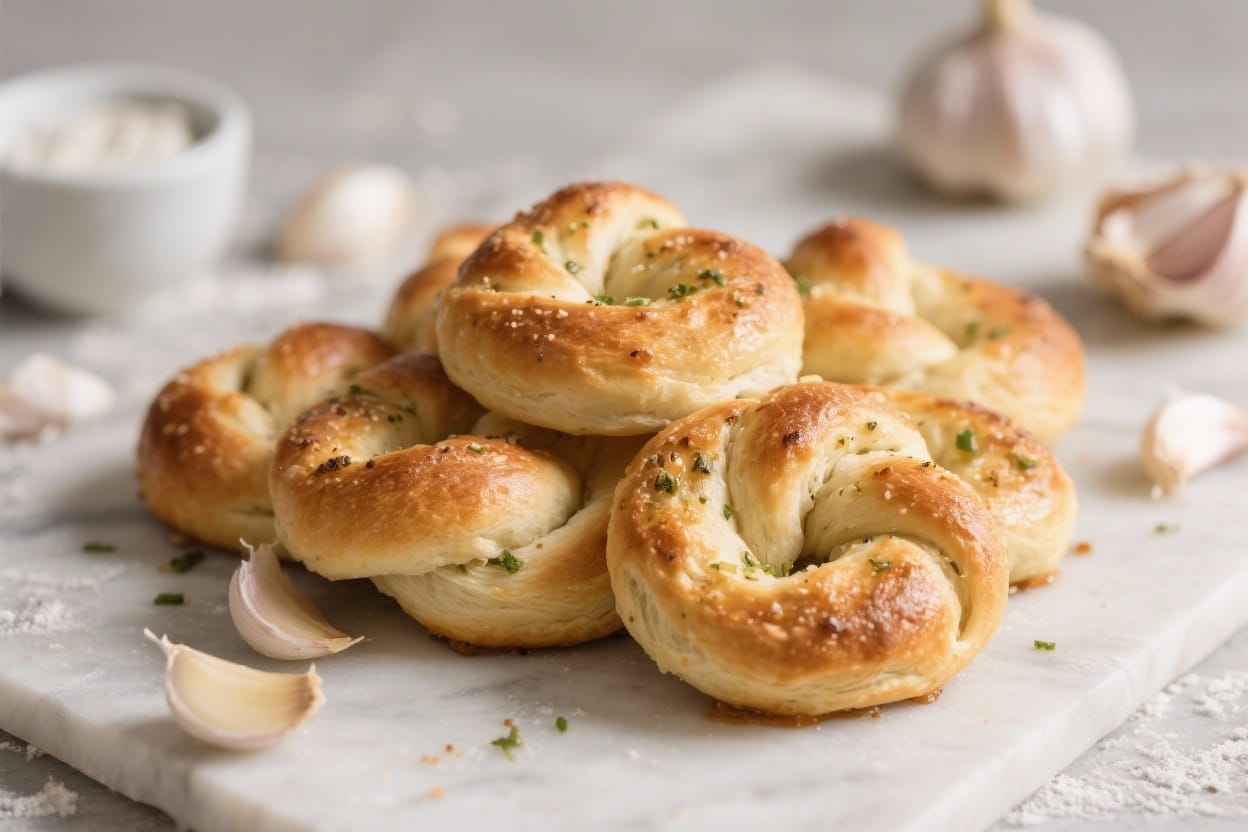
Garlic knots are one of those irresistible snacks that disappear as soon as they hit the table. Warm, soft, and brushed with buttery garlic, they’re perfect as a side for pizza night, a game-day snack, or just because you’re craving something comforting. Making them from scratch is easier than you might think, and the results are so much better than anything from a box.
The dough comes together quickly, the twists are fun to shape, and the aroma alone makes the effort worth it. If you love garlicky, herby, pull-apart bread, this recipe will be your new go-to.
What Makes This Recipe So Good
- Soft, pillowy texture: The dough rises beautifully and bakes into tender knots that pull apart easily.
- Big garlic flavor: Fresh garlic and melted butter deliver bold, savory flavor in every bite.
- Simple pantry ingredients: Flour, yeast, sugar, and oil are all you need to get started.
- Foolproof method: Clear steps and timing make this great for beginners and experienced bakers alike.
- Endlessly customizable: Add herbs, cheese, or spice to suit your taste.
Ingredients
- For the dough:
- 3 cups (360 g) all-purpose flour, plus more for dusting
- 1 packet (2 1/4 tsp) instant or rapid-rise yeast
- 1 tablespoon sugar
- 1 teaspoon fine sea salt
- 1 cup (240 ml) warm water, about 105–115°F (40–46°C)
- 2 tablespoons olive oil
- For the garlic butter:
- 4 tablespoons unsalted butter
- 2 tablespoons olive oil
- 4 cloves garlic, finely minced or grated
- 2 tablespoons fresh parsley, finely chopped
- 1/4 teaspoon red pepper flakes (optional)
- Kosher salt and freshly ground black pepper, to taste
- 2 tablespoons grated Parmesan (optional, for finishing)
Instructions
- Activate the yeast: In a large bowl, whisk warm water, sugar, and yeast. Let it sit for 5 minutes until foamy.If it doesn’t foam, the yeast may be inactive and you should start over with fresh yeast and warmer water.
- Make the dough: Add olive oil, salt, and 2 1/2 cups of the flour to the bowl. Stir with a wooden spoon until a rough dough forms. Sprinkle in the remaining flour a little at a time until the dough is soft and slightly tacky but not sticky.
- Knead until smooth: Transfer the dough to a lightly floured surface.Knead for 6–8 minutes, adding a dusting of flour if needed, until the dough is smooth and elastic. It should spring back when pressed.
- First rise: Place the dough in a lightly oiled bowl, turning it to coat. Cover with a clean towel or plastic wrap.Let it rise in a warm spot for 60–75 minutes, or until doubled in size.
- Prep the pan: Line a large baking sheet with parchment paper. Lightly oil it or mist with cooking spray to reduce sticking.
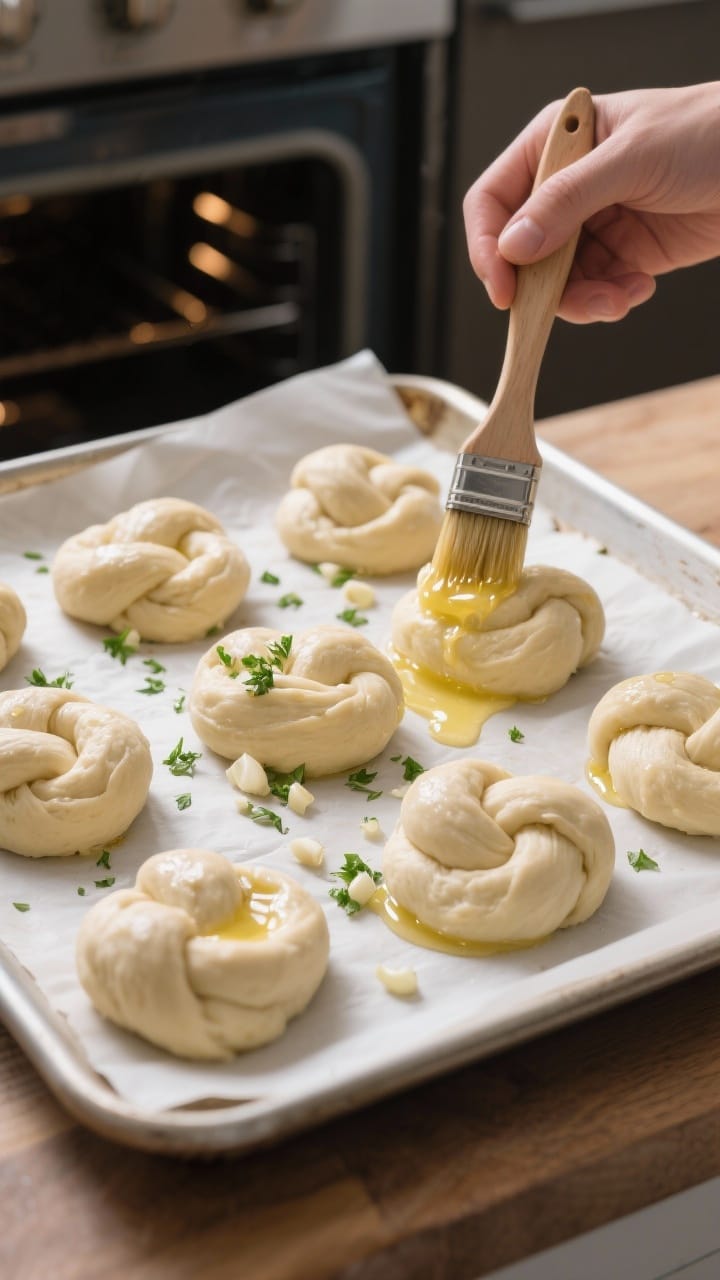
- Shape the knots: Punch down the dough and transfer it to a work surface. Divide into 12–16 equal pieces.Roll each piece into a rope about 8–10 inches long. Tie each rope into a simple knot, tucking the ends underneath. Space the knots on the baking sheet.
- Second rise: Cover the shaped knots loosely and let them rise for 20–30 minutes, until slightly puffy.Meanwhile, preheat your oven to 400°F (205°C).
- Make the garlic butter: In a small saucepan, melt butter with olive oil over low heat. Stir in minced garlic and cook gently for 30–60 seconds, just until fragrant. Remove from heat, then add parsley, red pepper flakes (if using), and a pinch of salt and pepper.
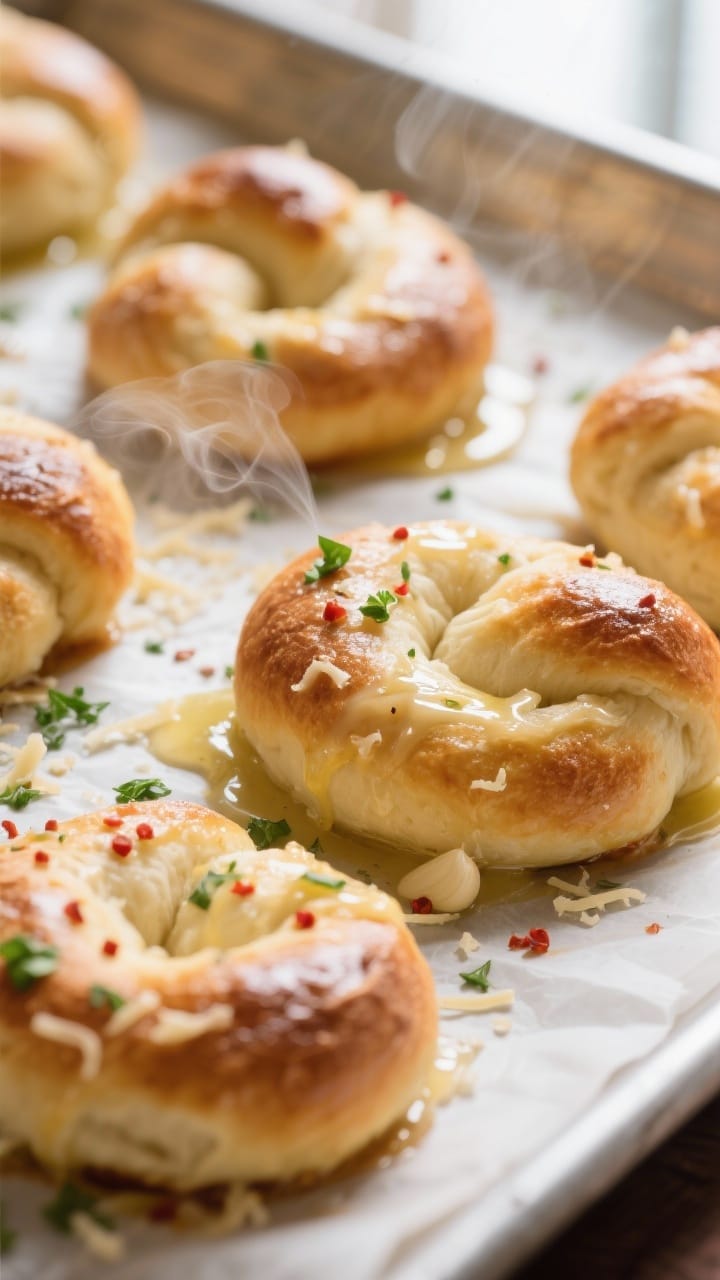
- Bake: Brush the knots lightly with some of the garlic butter.Bake for 12–15 minutes, or until golden on top and lightly browned on the bottom.
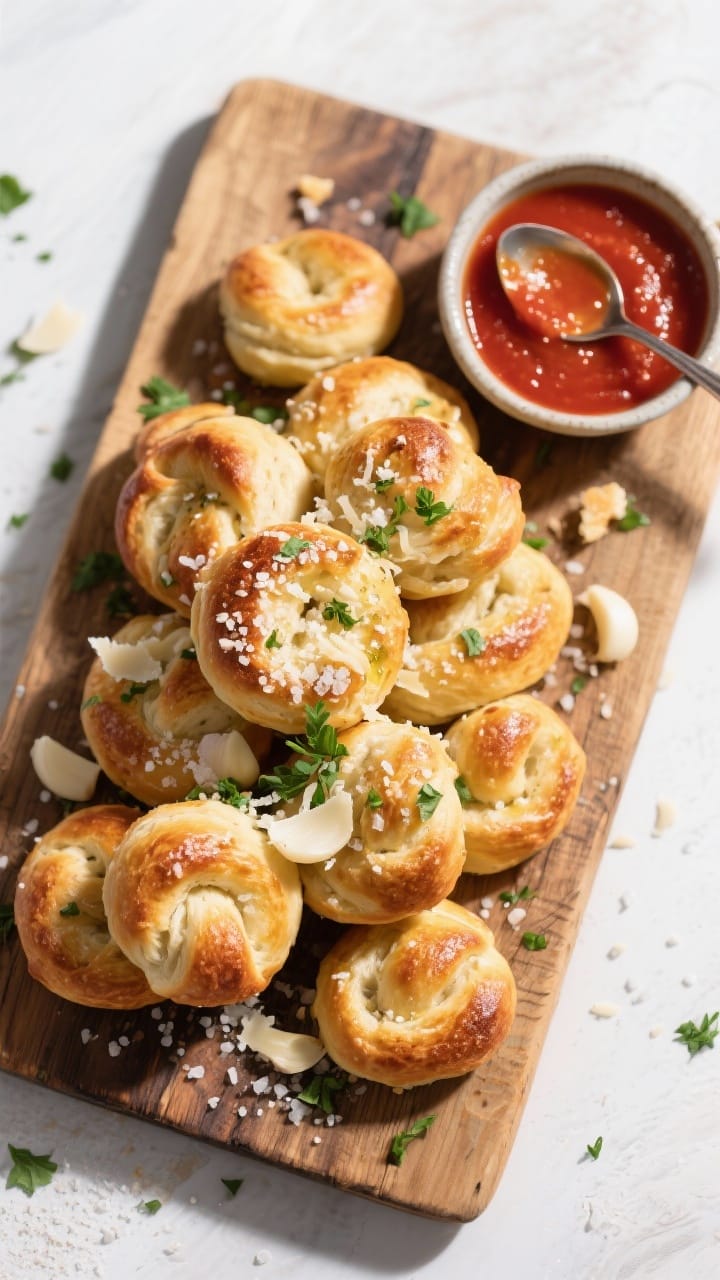
- Toss and finish: While still warm, brush or toss the baked knots with the remaining garlic butter. Sprinkle with Parmesan if you like. Serve warm.
Keeping It Fresh
- Room temperature: Store cooled knots in an airtight container for up to 2 days.Rewarm in a 300°F (150°C) oven for 5–7 minutes to refresh.
- Refrigerator: Not ideal for bread texture, but works for 3–4 days if needed. Reheat in the oven to soften.
- Freezer: Freeze baked knots in a zip-top bag for up to 2 months. Reheat straight from frozen at 325°F (165°C) for 10–12 minutes.
- Make-ahead dough: After the first rise, refrigerate the dough up to 24 hours.Bring back to room temp, shape, let rise, and bake.
Benefits of This Recipe
- Budget-friendly: Simple ingredients stretch into a big batch that feeds a crowd.
- Beginner-approved: Straightforward steps help build confidence with yeasted doughs.
- Great for sharing: Perfect for potlucks, family dinners, and parties.
- Customizable flavors: Easy to adapt with different herbs, cheeses, and spices.
- Comfort factor: Warm, buttery, garlicky bread is always a hit.
Common Mistakes to Avoid
- Water too hot or too cold: Water that’s too hot kills yeast; too cold slows the rise. Aim for warm, not steaming.
- Adding too much flour: A slightly tacky dough bakes softer. Resist the urge to keep adding flour during kneading.
- Skipping the second rise: This short rise adds lightness and volume.Don’t rush it.
- Overbaking: These bake quickly. Check at 12 minutes and pull when golden.
- Burning the garlic: Cook garlic gently in butter. Bitter, burnt garlic will overpower the knots.
Recipe Variations
- Cheesy Garlic Knots: Sprinkle shredded mozzarella or provolone on top during the last 2–3 minutes of baking.Finish with Parmesan.
- Herb Blend: Swap parsley for basil, oregano, or chives. A mix of dried Italian herbs works well too.
- Lemon-Garlic: Add 1 teaspoon lemon zest to the garlic butter for a bright, fresh twist.
- Spicy: Increase red pepper flakes or add a pinch of cayenne for heat.
- Whole-Wheat: Use half whole-wheat flour and half all-purpose. Add an extra tablespoon of olive oil to keep them tender.
- Everything Seasoning: Brush with butter, then sprinkle everything bagel seasoning before baking.
- Dipping Sauces: Serve with warm marinara, pesto, or a creamy garlic sauce for extra flavor.
FAQ
Can I use active dry yeast instead of instant yeast?
Yes.
Bloom active dry yeast in the warm water with sugar for 5–10 minutes until foamy, then proceed. Rising times may be slightly longer than with instant yeast.
Do I have to knead by hand?
No. A stand mixer with a dough hook works well.
Mix on low, then knead on medium-low for about 5–6 minutes, until the dough is smooth and elastic.
How do I make the knots extra soft?
Keep the dough slightly tacky, don’t overbake, and brush generously with butter right after baking. You can also add 2 tablespoons of milk or plain yogurt to the dough for extra tenderness.
Can I make smaller or larger knots?
Absolutely. For bite-size knots, divide into 18–20 pieces and bake 9–11 minutes.
For larger knots, divide into 10–12 pieces and bake 13–16 minutes, watching the color.
What if I don’t have fresh garlic?
Use 1/2 to 3/4 teaspoon garlic powder in the butter mixture. Add it off heat to avoid scorching. Fresh garlic has a brighter flavor, but garlic powder works in a pinch.
Why did my dough not rise?
Common reasons include old yeast, water that’s too hot or cold, or a cool environment.
Make sure your yeast is fresh, check your water temperature, and let the dough rise somewhere warm and draft-free.
Can I make them vegan?
Yes. Use plant-based butter and omit Parmesan or use a vegan alternative. The dough itself is already dairy-free, made with olive oil and water.
Final Thoughts
Homemade garlic knots feel special, but they’re easy enough for any weeknight.
With a simple dough and a fast, fragrant garlic butter, you get soft, golden pulls of bread that make any meal better. Keep this recipe handy for pizza night, potlucks, or whenever you want something warm and comforting. Once you try them from scratch, you’ll never go back to store-bought.
Printable Recipe Card
Want just the essential recipe details without scrolling through the article? Get our printable recipe card with just the ingredients and instructions.