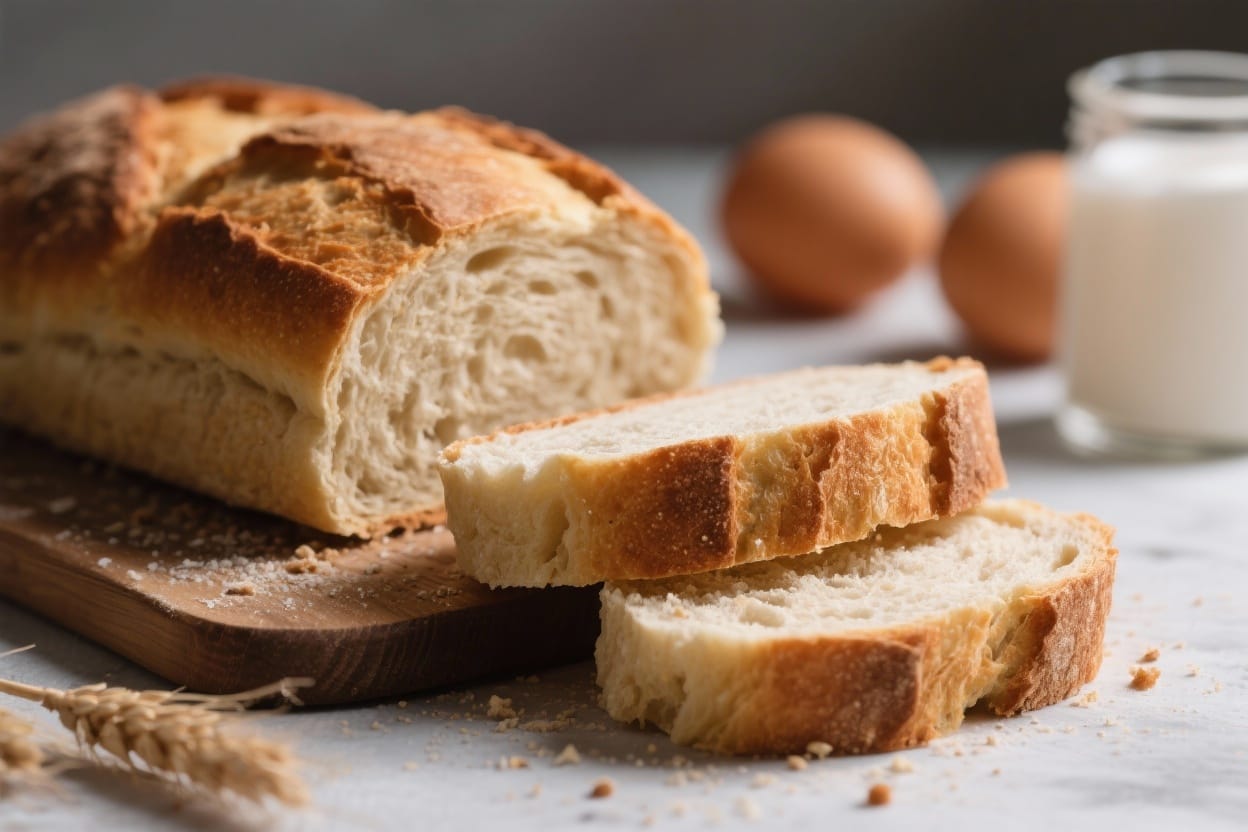
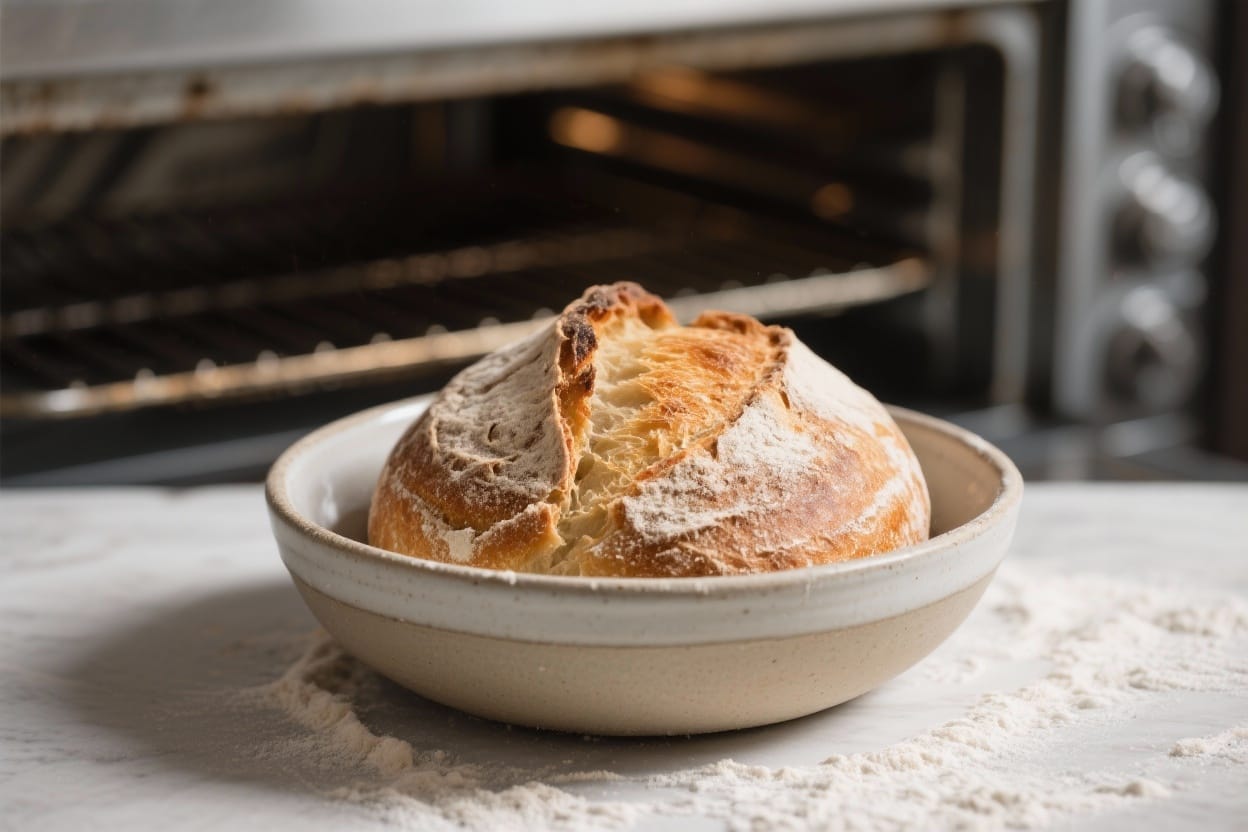
Crusty Bread Without Bread Machine – Easy, Rustic Loaf at Home
There’s something special about a warm, crackly loaf that you made with your own two hands. No bread machine, no fancy tools—just a bowl, some patience, and a hot oven. This crusty bread is simple to make, even if you’re new to baking. The dough is forgiving, the ingredients are basic, and the results are bakery-level. If you’ve ever wanted that golden, crunchy crust with a soft, airy middle, this is your go-to recipe.
What Makes This Special
Crusty bread without bread machine – Crusty Bread Without Bread Machine – Easy, Rustic Loaf at Home There’s something special about a war
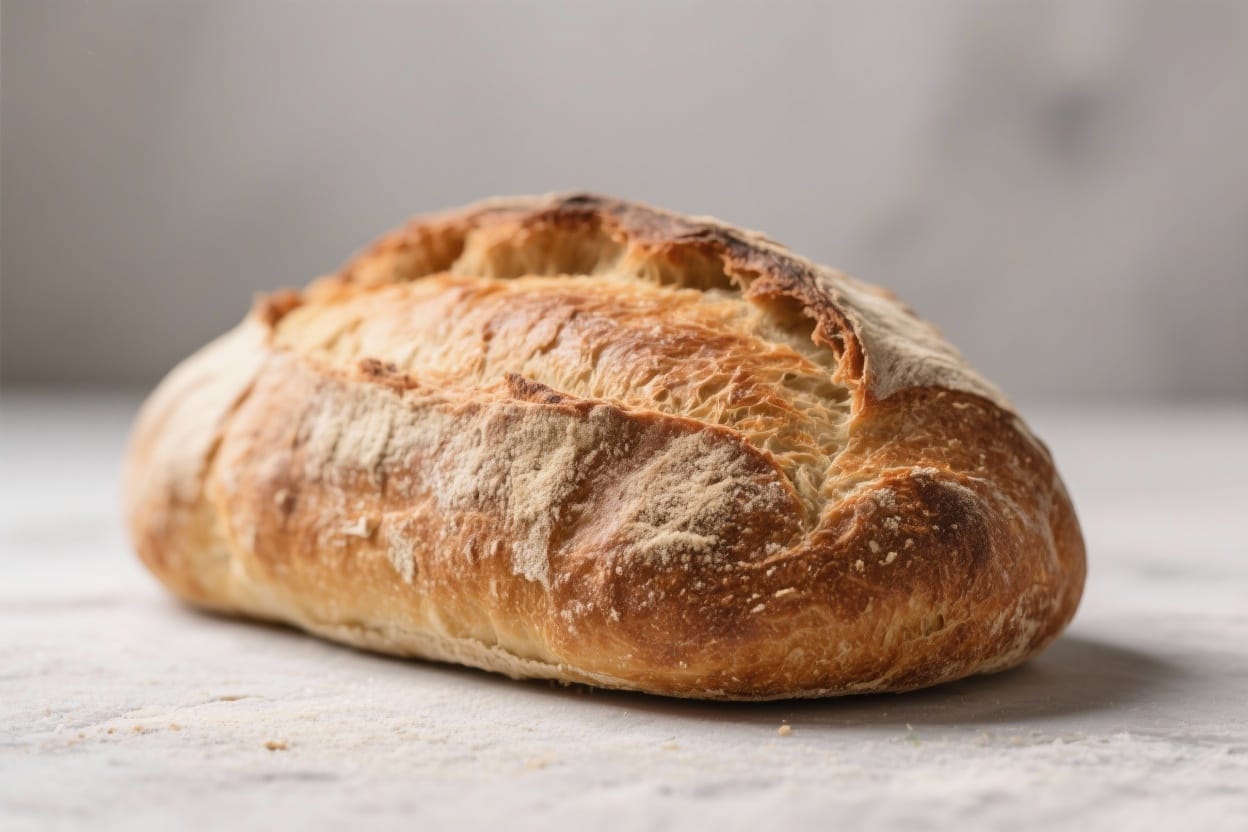
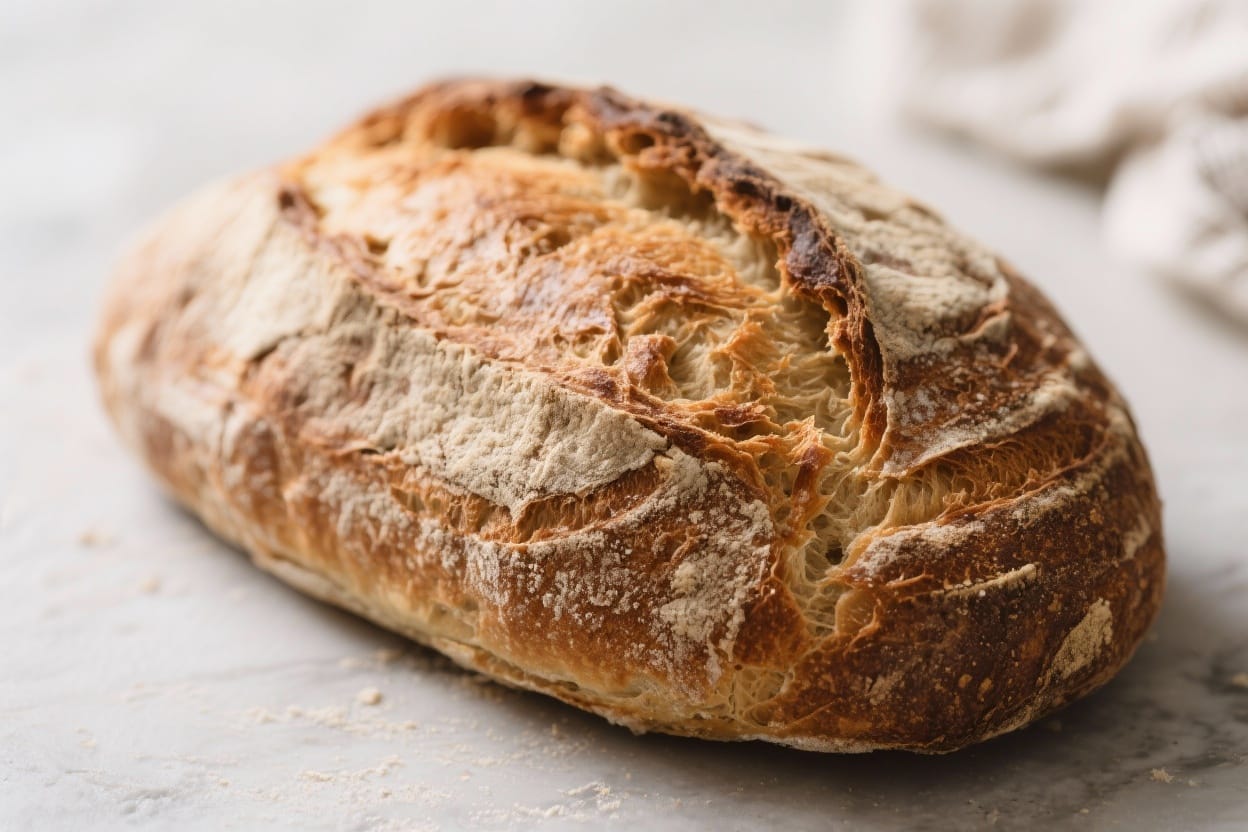
This bread leans on a long, slow rise to develop flavor and texture, so you don’t need kneading skills. The result is a loaf with a shattering crust and a tender, open crumb. It uses pantry staples and works well with a cast-iron Dutch oven, but you can bake it on a sheet pan too. The technique is reliable, repeatable, and perfect for home kitchens.
Ingredients
Crusty bread without bread machine – No bread machine, no fancy tools—just a bowl, some patience, and a hot oven
- 3 cups (360 g) bread flour (all-purpose works in a pinch)
- 1 1/4 teaspoons fine sea salt
- 1 teaspoon instant or active dry yeast
- 1 1/2 cups (360 ml) lukewarm water
- Optional: 1 tablespoon olive oil for a softer crumb
- Optional add-ins: 1/2 cup mixed seeds, 1 teaspoon dried herbs, or 1/2 cup chopped olives
- For dusting: extra flour or cornmeal
Instructions
Crusty bread without bread machine – This crusty bread is simple to make, even if you’re new to baking
- Mix the dough. In a large bowl, whisk together the flour, salt, and yeast. Pour in the lukewarm water (and olive oil, if using). Stir with a spoon until no dry flour remains. The dough will be shaggy and sticky—that’s perfect.
- First rise (no-knead). Cover the bowl with plastic wrap or a clean towel and let it sit at room temperature for 8 to 12 hours. Cooler kitchen? Go up to 16 hours. The dough should double in size and look bubbly on top.
- Shape the dough. Lightly flour your counter. Scrape out the dough and dust the top with a little flour. Use your hands or a bench scraper to fold the dough over itself a few times, forming a rough ball. Don’t overwork it—gentle is key.
- Second rise. Place the dough seam-side down on a piece of parchment dusted with flour or cornmeal. Cover loosely and let it rise for 45 to 60 minutes, until puffy. If you poke it, the dent should slowly spring back.
- Preheat the oven and pot. Place a Dutch oven (with lid) on the center rack and preheat your oven to 450°F (232°C) for at least 30 minutes. This traps steam and helps build that crisp crust.
- Score the loaf. Just before baking, dust the dough lightly with flour and use a sharp knife or razor to make a 1/2-inch deep slash on top. This controls the expansion and prevents random bursting.
- Bake covered. Carefully remove the hot pot, lift the dough using the parchment, and place it inside. Cover and bake for 30 minutes.
- Finish uncovered. Remove the lid and bake another 12 to 18 minutes, until deep golden brown. The crust should be richly colored and sound hollow when tapped.
- Cool completely. Transfer the loaf to a rack and let it cool at least 1 hour. This sets the crumb and keeps the interior from getting gummy.
Keeping It Fresh
Crusty bread is best the day it’s baked, but you can keep it great for a couple of days. Store the loaf cut-side down on a cutting board or wrapped loosely in a clean towel. Avoid sealed plastic bags, which soften the crust. To refresh, warm slices in a 350°F (175°C) oven for 5 to 8 minutes. For longer storage, freeze slices in a zip-top bag and toast straight from the freezer.
Health Benefits
- Simple ingredients: Flour, water, yeast, and salt—no additives or preservatives.
- Portion-friendly: A satisfying crust and chewy texture mean smaller slices feel more filling.
- Whole-grain option: Swap up to 50% of the flour for whole wheat for more fiber and nutrients. Add 1–2 tablespoons extra water if needed.
- Low fat: The base recipe contains minimal fat, making it a lighter option than enriched breads.
What Not to Do
- Don’t rush the rise. Cutting the first rise short leads to dense, bland bread.
- Don’t skip preheating. A fully heated pot and oven are crucial for oven spring and a crisp crust.
- Don’t over-flour the dough. Sticky is normal. Too much flour during shaping creates a tight, dry crumb.
- Don’t slice while hot. It’s tempting, but you’ll compress the crumb and lose moisture.
- Don’t store in plastic at room temp. It softens the crust and encourages mold.
Variations You Can Try
- Seeded crust: Press sesame, poppy, or sunflower seeds onto the surface after shaping.
- Herb and garlic: Add 1–2 teaspoons dried rosemary, thyme, or Italian seasoning to the flour. Stir in 1–2 minced garlic cloves for extra aroma.
- Olive and rosemary: Fold in 1/2 cup chopped olives and 1 teaspoon chopped fresh rosemary during mixing.
- Cheddar-jalapeño: Mix in 3/4 cup grated cheddar and 1–2 finely chopped jalapeños. Reduce salt slightly.
- Sourdough-ish: Replace 1/2 cup water with 1/2 cup active sourdough starter and reduce yeast to 1/2 teaspoon. Expect a slightly longer rise and tangier flavor.
- Whole wheat blend: Use 50% whole wheat flour and 50% bread flour. Add a tablespoon of honey for balance if you like.
FAQ
Can I make this without a Dutch oven?
Yes. Preheat a baking stone or an inverted sheet pan. Place the shaped dough on parchment and bake at 450°F (232°C). Add steam by placing a metal pan on the lower rack and pouring in a cup of hot water when the loaf goes in. Bake 30–40 minutes until deeply browned.
How do I know the bread is done?
The crust should be deep golden with some darker spots, and the loaf should sound hollow when tapped on the bottom. If you have a thermometer, the internal temperature should read around 205–210°F (96–99°C).
Can I knead this dough?
You don’t need to, but a few stretch-and-folds during the first hour of rising can add structure. Wet your hands and gently lift and fold the dough from each side. Do this 2–3 times, 20 minutes apart.
What if my dough is too wet to handle?
Sticky dough is normal. Lightly flour your hands and the surface, and use a bench scraper to help with shaping. Avoid adding lots of extra flour; a tacky dough produces a better crumb and crust.
Can I use active dry yeast instead of instant?
Yes. If using active dry yeast, dissolve it in the lukewarm water with a pinch of sugar and let it sit for 5–10 minutes until foamy, then mix into the flour and salt.
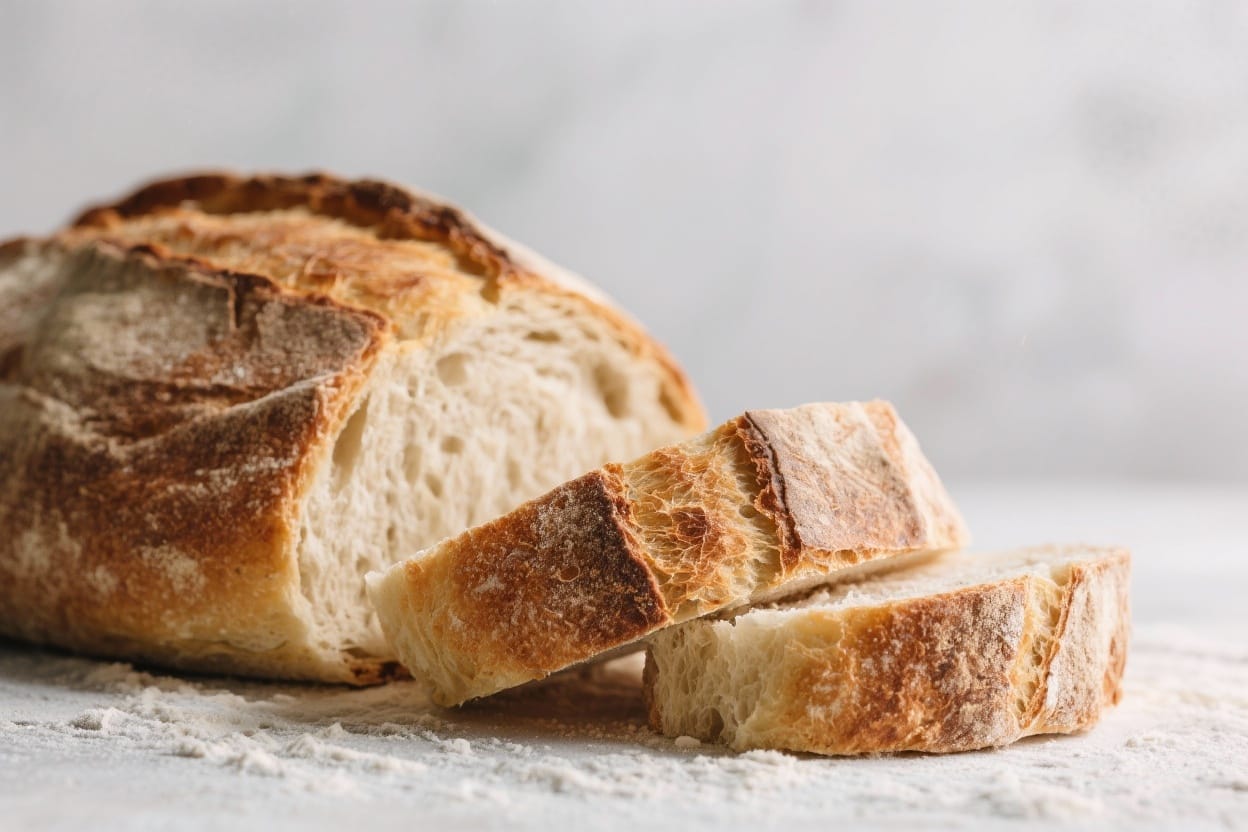
How should I slice the loaf?
Use a serrated bread knife and saw gently. For sandwiches, slice across the loaf into 1/2-inch slices. For a rustic table loaf, cut it into wedges. Always let it cool first to keep the interior airy.
Why didn’t my bread rise much?
Common reasons include old yeast, a cold kitchen, or cutting the rise short. Check your yeast’s expiration date, give the dough more time, and make sure your water is lukewarm, not hot.
Can I make the dough ahead and refrigerate it?
Absolutely. After mixing, let it rise for 1 hour at room temperature, then refrigerate up to 24 hours. Bring to room temperature, shape, and continue with the second rise and bake. This adds flavor and flexibility.
Final Thoughts
Crusty bread without a bread machine is totally doable and incredibly satisfying. With a slow rise and a hot oven, you’ll get that classic, crackly crust and a soft, open crumb. Keep the process simple, trust the timing, and don’t stress over sticky dough. Once you master this, you’ll have a reliable loaf for soups, sandwiches, or just butter and salt—any day of the week.
Printable Recipe Card
Want just the essential recipe details without scrolling through the article? Get our printable recipe card with just the ingredients and instructions.