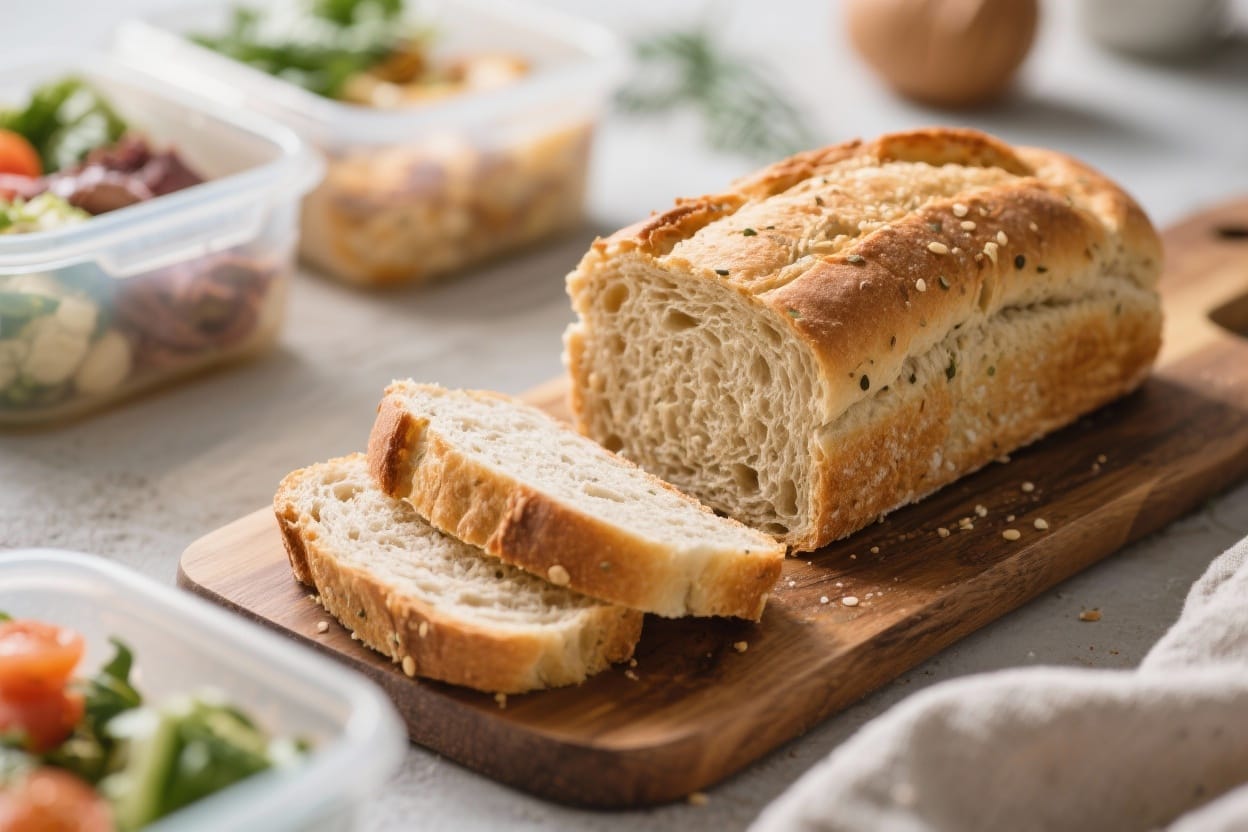
Allergy Friendly Bread Recipe – Soft, Simple, and Safe for Most Diets
This allergy friendly bread recipe is for anyone who feels left out by typical loaves. If wheat, dairy, eggs, nuts, or soy cause trouble, this bread gives you a way back to toast and sandwiches without stress. It’s soft, sliceable, and bakes up with a golden crust. The ingredients are straightforward, and the method is beginner-friendly. You’ll get a reliable loaf that works for breakfast, lunchboxes, and everything in between.
What Makes This Special
Allergy friendly bread recipe – Allergy Friendly Bread Recipe – Soft, Simple, and Safe for Most Diets This allergy friendly bread re
This bread is made to avoid many common allergens while still tasting like real bread. It’s gluten-free, dairy-free, egg-free, nut-free, and soy-free, and it doesn’t rely on complicated techniques. The crumb is tender, and the slices hold together—no crumbling or chalky texture. With a short ingredient list and one bowl, it’s simple enough for a weeknight bake. You can use it for toast, sandwiches, or breadcrumbs without losing texture or flavor.
Ingredients

Allergy friendly bread recipe – If wheat, dairy, eggs, nuts, or soy cause trouble, this bread gives you a way back to toast and sand
- 2 cups (280 g) gluten-free all-purpose flour blend (one that already includes xanthan gum; if not, add 1 teaspoon xanthan gum)
- 1 cup (100 g) certified gluten-free oat flour (or use millet flour for an oat-free version)
- 1/2 cup (70 g) potato starch (not potato flour)
- 2 tablespoons sugar (or maple syrup)
- 2 teaspoons instant yeast (also called rapid-rise; ensure gluten-free if needed)
- 1 1/2 teaspoons fine sea salt
- 1 3/4 cups (415 ml) warm water (about 105–110°F; warm to the touch, not hot)
- 3 tablespoons neutral oil (such as avocado, olive, or sunflower)
- 1 tablespoon apple cider vinegar
- Optional for softness: 2 tablespoons aquafaba (liquid from canned chickpeas) or applesauce
- Optional topping: sesame-free seeds like pumpkin or sunflower, if tolerated
Instructions
- Prep the pan and oven. Grease a 9×5-inch loaf pan and line it with a parchment sling for easy removal. Preheat the oven to 375°F (190°C) so it’s ready when the dough is.
- Mix dry ingredients. In a large bowl, whisk the gluten-free flour blend, oat flour, potato starch, sugar, instant yeast, and salt until evenly combined. This keeps the crumb uniform and prevents pockets of starch.
- Add wet ingredients. Pour in the warm water, oil, vinegar, and optional aquafaba or applesauce. Stir with a sturdy spoon or use a stand mixer with the paddle attachment on medium speed for 2–3 minutes. The dough will look like thick batter—smooth and sticky.
- Fill the pan. Scrape the dough into the prepared pan. Smooth the top with a damp spatula to level it out. If using seeds, sprinkle them now and press lightly so they stick.
- Let it rise. Cover the pan loosely with lightly oiled plastic wrap or a clean towel. Let it rise in a warm, draft-free spot until the dough crowns about 1 inch above the rim, 30–60 minutes. Do not overproof—if it rises too much, it can collapse in the oven.
- Bake. Place the pan on the center rack. Bake for 45–55 minutes until the top is deep golden and firm. An instant-read thermometer should read about 205–210°F (96–99°C) in the center.
- Cool correctly. Let the loaf rest in the pan for 10 minutes, then lift it out onto a wire rack. Cool fully—at least 90 minutes—before slicing. This sets the crumb and prevents gumminess.
- Slice and enjoy. Use a serrated knife for clean slices. Toasting brings out flavor and adds structure, especially on day two.
Storage Instructions
- Room temperature: Store in an airtight container for up to 2 days. Keep it wrapped in a clean towel inside the container to prevent condensation.
- Refrigerator: Not ideal for texture; it can dry out. If your kitchen is hot, chill for up to 3 days and toast before serving.
- Freezer: Slice first. Freeze in a zip-top bag with parchment between slices for up to 2 months. Toast straight from frozen.
Health Benefits
This loaf can support various dietary needs without feeling restrictive. It’s gluten-free, which helps those with celiac disease or gluten sensitivity. It’s also egg-free and dairy-free, covering common allergens and making it friendly for vegan or lactose-free diets. Using oat or millet flour adds fiber and minerals, which help with fullness and steady energy. The oil and starch blend gives a soft crumb without butter or eggs, keeping the loaf light and easy to digest.
What Not to Do
- Don’t swap yeast for baking powder. You’ll lose the rise and flavor that make this taste like bread.
- Don’t skip cooling. Slicing too soon makes the interior gummy. Letting it cool fully sets the structure.
- Don’t overheat the water. Water above 120°F can kill yeast. Aim for warm, not hot.
- Don’t overproof. If the dough rises too high, it can collapse and create a dense bottom layer.
- Don’t pack the flours. Spoon and level your flours to avoid a dry, heavy loaf.
Alternatives
- Oat-free: Replace oat flour with millet flour or sorghum flour for a similar texture and mild flavor.
- Gum-free: If avoiding xanthan gum, use 1 1/2 teaspoons psyllium husk powder instead. Hydrate it by mixing it with the water first, then add to the bowl.
- Sugar-free: Use maple syrup or date syrup. Yeast needs a little sugar source, but the amount is small and mostly consumed during fermentation.
- Oil-free: Replace oil with equal parts applesauce. The crumb will be slightly denser but still tender.
- No oats and no corn: Ensure your blend is corn-free and use millet plus potato starch for body.
- Seed toppings: If seeds are an issue, skip them. For a nice finish, brush the top lightly with water before baking to encourage shine.
FAQ
Can I make this without yeast?
Yeast is key for the rise and flavor. If you must avoid yeast, use 2 teaspoons baking powder and 1/2 teaspoon baking soda, and bake immediately after mixing. The texture will be more like quick bread than sandwich bread.
Is this safe for celiac disease?
Yes, as long as all ingredients are certified gluten-free and you avoid cross-contact in your kitchen. That includes using clean tools, separate toasters, and sealed flours.
Can I use a bread machine?
Yes. Use the gluten-free cycle if available. Add wet ingredients first, then dry, and let it mix thoroughly. Check the dough after a few minutes; it should look like thick batter. Smooth the top before baking.
Why add vinegar?
The mild acid helps the yeast and strengthens the structure for a better rise. It won’t make the bread taste sour; it just brightens the crumb.
My loaf sank after baking. What happened?
Common reasons include overproofing, underbaking, or slicing too soon. Next time, proof only until the dough rises slightly above the pan, bake to 205–210°F internally, and cool completely before cutting.
Can I replace potato starch?
Yes. Try tapioca starch or arrowroot in the same amount. The texture may be a bit chewier with tapioca, but it still works well.
Does it toast well?
It toasts beautifully. The edges crisp up, and the center stays soft. It’s especially good for avocado toast or grilled sandwiches.
What’s the best gluten-free flour blend to use?
Choose a blend designed for baking that includes rice flour and starches like tapioca or potato. If your blend lacks xanthan gum, add 1 teaspoon to this recipe for structure.
In Conclusion
This allergy friendly bread recipe brings soft, sliceable bread back to your table without the most common allergens. It’s easy to mix, rises reliably, and bakes into a loaf you’ll actually want to eat. With simple swaps, you can tailor it to your needs while keeping the texture you love. Keep a sliced loaf in the freezer, and you’re always a few minutes away from real toast, safe sandwiches, and a little comfort on a plate.
Printable Recipe Card
Want just the essential recipe details without scrolling through the article? Get our printable recipe card with just the ingredients and instructions.