
Minced Beef Stuffed Bread Buns – Soft, Savory, and Satisfying
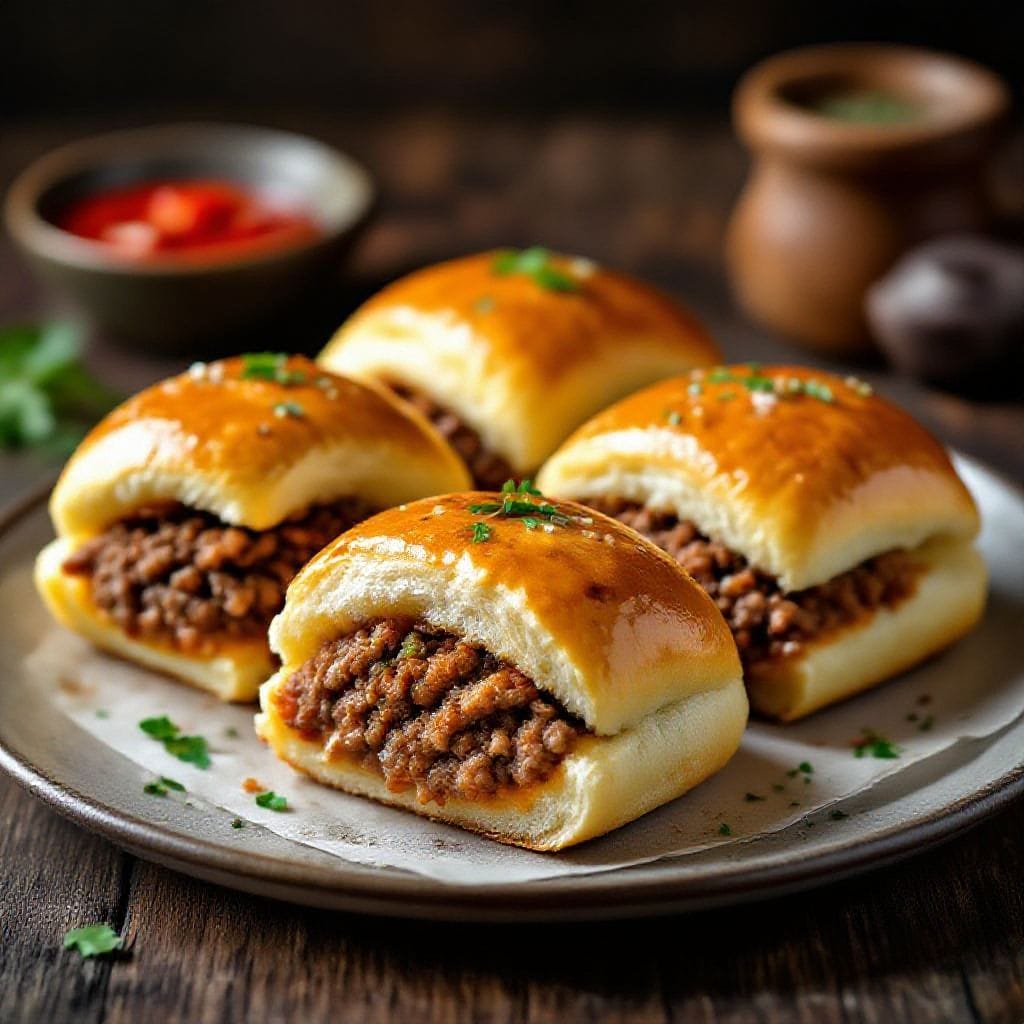
Picture a warm, fluffy bun that breaks open to reveal juicy, spiced minced beef. These minced beef stuffed bread buns are the kind of thing you make once and immediately plan to make again. They’re comforting, portable, and perfect for everything from weeknight dinners to picnic baskets. The dough is simple, the filling is forgiving, and the result tastes like you put in more effort than you actually did. If you like the idea of meat pies but prefer something lighter and softer, this is your new favorite recipe.
What Makes This Recipe So Good
Minced beef stuffed bread buns – Minced Beef Stuffed Bread Buns – Soft, Savory, and Satisfying Picture a warm, fluffy bun that breaks
- Soft, pillowy dough: The buns bake up tender with a light, golden crust that’s just sturdy enough to hold the juicy filling.
- Flavor-packed filling: The minced beef is cooked with onions, garlic, warm spices, and a touch of tomato for richness.
- Freezer-friendly: Bake a batch, freeze, and reheat anytime you want a satisfying snack or quick lunch.
- Flexible: Adjust the spice level, add veggies, or swap the protein without ruining the texture or balance.
- Great for sharing: These buns are easy to pack, easy to serve, and everyone loves a handheld savory bite.
Ingredients
Minced beef stuffed bread buns – These minced beef stuffed bread buns are the kind of thing you make once and immediately plan to mak
- For the dough:
- 3 cups (360 g) all-purpose flour, plus more for dusting
- 2 1/4 tsp (1 packet) instant yeast
- 1 tbsp sugar
- 1 tsp fine salt
- 1 cup (240 ml) warm milk (about 105–110°F / 40–43°C)
- 3 tbsp unsalted butter, softened
- 1 large egg
- For the minced beef filling:
- 1 lb (450 g) minced beef (80–90% lean)
- 1 medium onion, finely chopped
- 3 cloves garlic, minced
- 1 small carrot, finely grated (optional, for sweetness and moisture)
- 1/2 cup (120 ml) finely chopped bell pepper (any color)
- 2 tbsp tomato paste
- 1 tsp ground cumin
- 1 tsp smoked paprika
- 1/2 tsp ground coriander (optional)
- 1/4–1/2 tsp chili flakes or cayenne (to taste)
- 2 tbsp fresh parsley or cilantro, chopped
- 2 tbsp olive oil
- Salt and black pepper to taste
- For assembly:
- 1 egg, beaten with 1 tbsp milk (egg wash)
- Sesame or nigella seeds for topping (optional)
Instructions
Minced beef stuffed bread buns – They’re comforting, portable, and perfect for everything from weeknight dinners to picnic baskets
- Make the dough:In a large bowl, whisk flour, instant yeast, sugar, and salt. Add warm milk, egg, and butter. Mix until a shaggy dough forms, then knead by hand for 8–10 minutes (or 5–6 minutes in a mixer) until smooth and slightly tacky.
- First rise:Place dough in a lightly oiled bowl, cover, and let it rise in a warm spot until doubled, about 60–90 minutes.
- Cook the filling:Heat olive oil in a pan over medium. Add onion and cook 3–4 minutes until soft. Stir in garlic, grated carrot, and bell pepper; cook 2–3 minutes.
- Brown the beef:Add minced beef. Cook, breaking it up, until no longer pink. Drain excess fat if needed. Stir in tomato paste, cumin, smoked paprika, coriander, chili flakes, salt, and pepper. Cook 2–3 minutes to bloom the spices.
- Finish and cool:Stir in chopped parsley. Taste and adjust seasoning. Spread the mixture on a plate to cool quickly.Filling must be coolbefore stuffing or it will make the dough soggy.
- Portion the dough:Punch down the risen dough and turn it out onto a lightly floured surface. Divide into 10–12 equal pieces. Shape each into a smooth ball, cover, and rest for 10 minutes to relax the gluten.
- Fill the buns:Working one at a time, flatten a dough ball into a 4–5 inch circle. Add 2–3 tablespoons of the cooled beef filling to the center. Pull edges up and pinch firmly to seal. Place seam-side down on a parchment-lined baking sheet. Repeat.
- Second rise:Loosely cover the buns and let them puff for 25–35 minutes. They should look slightly larger and feel airy when gently poked.
- Preheat and glaze:Preheat oven to 375°F (190°C). Brush buns with egg wash and sprinkle seeds if using.
- Bake:Bake 15–20 minutes, rotating the tray halfway, until the tops are golden and the bottoms sound hollow when tapped.
- Rest and serve:Cool on a rack for 10 minutes. Serve warm with yogurt, chutney, or a savory breakfast buns simple salad.
Keeping It Fresh
Let the buns cool completely before storing. Keep them in an airtight container at room temperature for up to 24 hours, or refrigerate for 3–4 days. For longer storage, freeze for up to 2 months in a well-sealed bag.
To reheat, warm in a 325°F (165°C) oven for 10–12 minutes from chilled, or 18–22 minutes from frozen. You can also use an air fryer at 320°F (160°C) for 6–10 minutes. Avoid microwaving for too long, as it can make the buns chewy or tough.
Why This is Good for You
- Balanced macros: Protein-rich beef, carbs from the dough, and fat from olive oil and butter give steady energy.
- Hidden veggies: Onion, pepper, and carrot add fiber and vitamins without overwhelming the flavor.
- Iron and B vitamins: Beef contributes iron, zinc, and B12, which support energy and focus.
- Portion control: Individual buns make it easy to serve the right amount without guesswork.
What Not to Do
- Don’t overfill:Too much filling will burst the seams and leak during baking.
- Don’t skip cooling the filling:Hot filling can melt the dough and prevent a good seal.
- Don’t under-knead:The dough needs proper gluten development to be elastic and airy.
- Don’t crowd the baking sheet:Leave space so the buns brown evenly and don’t steam.
- Don’t overbake:Dry Cheese Filled Buns are a result of too much time in the oven. Pull them once golden.
Recipe Variations
- Cheese boost: Add a cube of mozzarella or cheddar on top of the filling before sealing.
- Spice route: Swap paprika and cumin for curry powder and garam masala for an Indian-inspired twist.
- Lean and green: Replace beef with ground turkey or chicken and add chopped spinach.
- Sweet-heat: Stir in a spoonful of harissa or chili crisp for a bold kick.
- Herb-forward: Use dill and parsley with a squeeze of lemon for a brighter profile.
- Whole wheat dough: Swap 1 cup of the all-purpose flour with whole wheat. Add 1–2 tbsp extra milk if needed.
- Pan-fried finish: After baking, brush with garlic butter and quickly sear the bottoms in a hot skillet for a crisp edge.
FAQ
Can I make the dough ahead of time?
Yes. After the first rise, punch down, cover tightly, and refrigerate for up to 24 hours. Bring to room temperature for 30–45 minutes before shaping and filling.
Can I use store-bought dough?
Absolutely. Pizza dough or soft roll dough works well. Let it rest to relax, then proceed with filling and baking as directed.
How do I keep the buns from opening while baking?
Pinch the seams firmly and place the buns seam-side down. If your dough is sticky, very lightly flour your fingers. Make sure the filling is cool and not too wet.
What if I don’t eat beef?
Use ground turkey, chicken, or plant-based mince. Add a splash of soy sauce or Worcestershire (or a vegan alternative) to deepen the flavor.
Can I steam these instead of baking?
You can, but the texture will be softer and more dumpling-like. For steaming, reduce fat in the filling slightly and keep buns smaller for even cooking.
How do I know the buns are done?
The tops should be golden, and the bottoms should sound hollow when tapped. Internal temperature of the bread should be around 195–200°F (90–93°C).
Can I add potatoes to the filling?
Yes. Use small diced potatoes par-cooked until tender, or stir in leftover mashed potatoes. Reduce other moisture so the filling isn’t too wet.
In Conclusion
Minced beef stuffed bread buns hit that perfect spot between comfort and convenience. They’re simple to make, easy to adapt, and crowd-pleasing every time. Once you’ve mastered the base, play with spices, herbs, and add-ins to make them your own. Keep a few in the freezer, and you’ll always have a warm, satisfying bite ready when you need it.
Printable Recipe Card
Want just the essential recipe details without scrolling through the article? Get our printable recipe card with just the ingredients and instructions.