No Yeast Flatbread on Stove – Quick, Soft, and Versatile
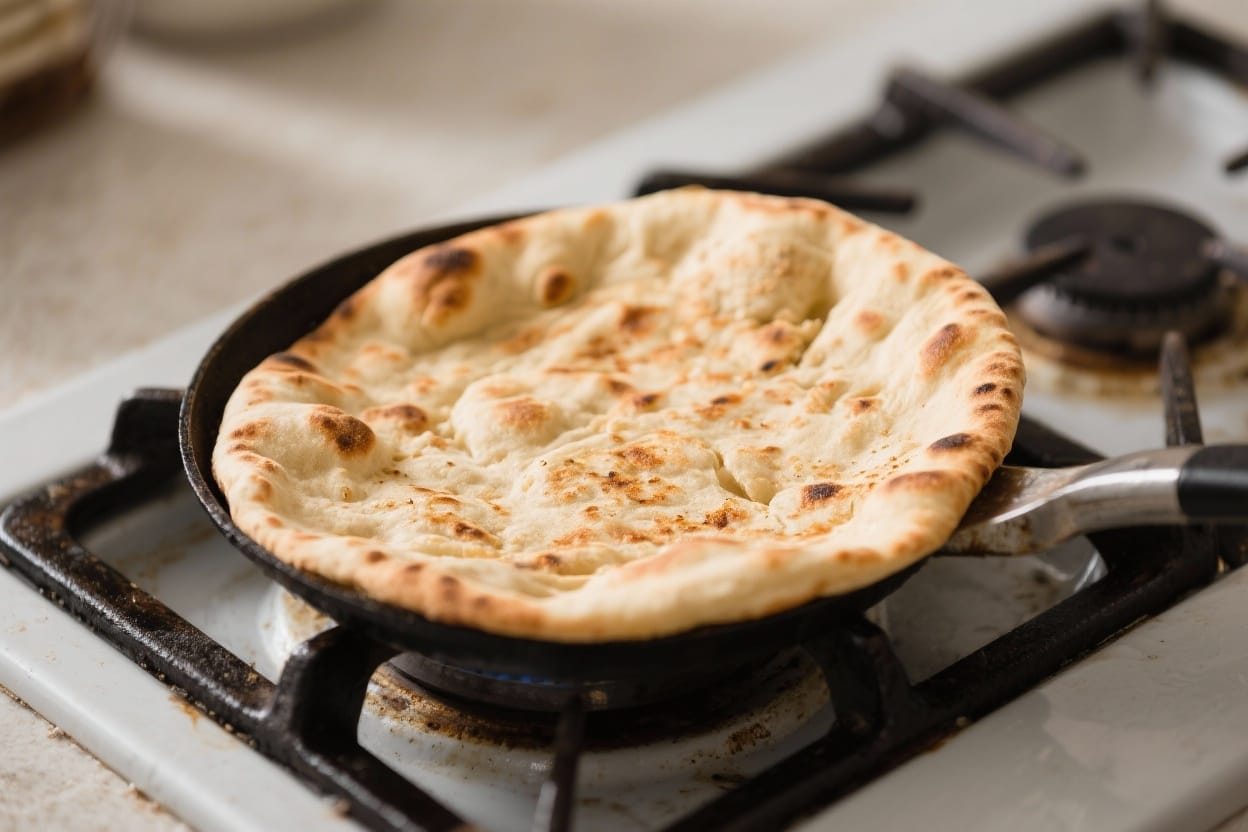
If you’re craving warm, soft flatbread but don’t want to fuss with yeast or oven preheating, this recipe is your new go-to. It comes together with pantry basics and cooks right on the stovetop in minutes. The dough is forgiving, easy to roll, and perfect for beginners. Serve it with curries, dips, or wraps, or just brush it with butter and enjoy on its own. You’ll be amazed at how simple it is to make fresh flatbread whenever you want.
What Makes This Recipe So Good
No yeast flatbread on stove – No Yeast Flatbread on Stove – Quick, Soft, and Versatile If you’re craving warm, soft flatbread but
- Fast and fuss-free: No yeast means no rising time. Mix, rest briefly, and cook—done in under 30 minutes.
- Soft and pliable: The combination of flour, yogurt or milk, and oil keeps the bread tender and bendy.
- Simple ingredients: You likely have everything on hand—perfect for weeknights or last-minute meals.
- Versatile flavor: Keep it plain, or add herbs, garlic, or spices to match your meal.
- Stovetop convenience: No oven required, just a skillet or griddle and medium-high heat.
Ingredients
No yeast flatbread on stove – It comes together with pantry basics and cooks right on the stovetop in minutes
- 2 cups all-purpose flour (plus extra for dusting)
- 1 teaspoon baking powder
- 1/2 teaspoon fine salt
- 2 tablespoons olive oil (or neutral oil)
- 3/4 cup plain yogurt (or 3/4 cup milk; add a little more if needed)
- 2–4 tablespoons water, as needed to bring the dough together
- Optional flavor boosters:
- 1 clove garlic, finely grated
- 1 tablespoon chopped fresh herbs (parsley, cilantro, dill)
- 1/2 teaspoon ground cumin or smoked paprika
- Melted butter or ghee for brushing
- Flaky salt or sesame seeds for topping
Instructions

No yeast flatbread on stove – The dough is forgiving, easy to roll, and perfect for beginners
- Mix the dry ingredients:In a large bowl, whisk together the flour, baking powder, and salt until evenly combined.
- Add wet ingredients:Stir in the olive oil and yogurt (or milk). The mixture will look shaggy. Add water 1 tablespoon at a time until a soft dough forms.
- Knead lightly:Turn the dough onto a lightly floured surface. Knead for 1–2 minutes until smooth and elastic. It should be soft but not sticky.
- Rest the dough:Cover with a clean towel and let it rest for 10–15 minutes. This relaxes the gluten and makes rolling easier.
- Divide and shape:Cut the dough into 6–8 equal pieces. Roll each into a ball. Keep the balls covered so they don’t dry out.
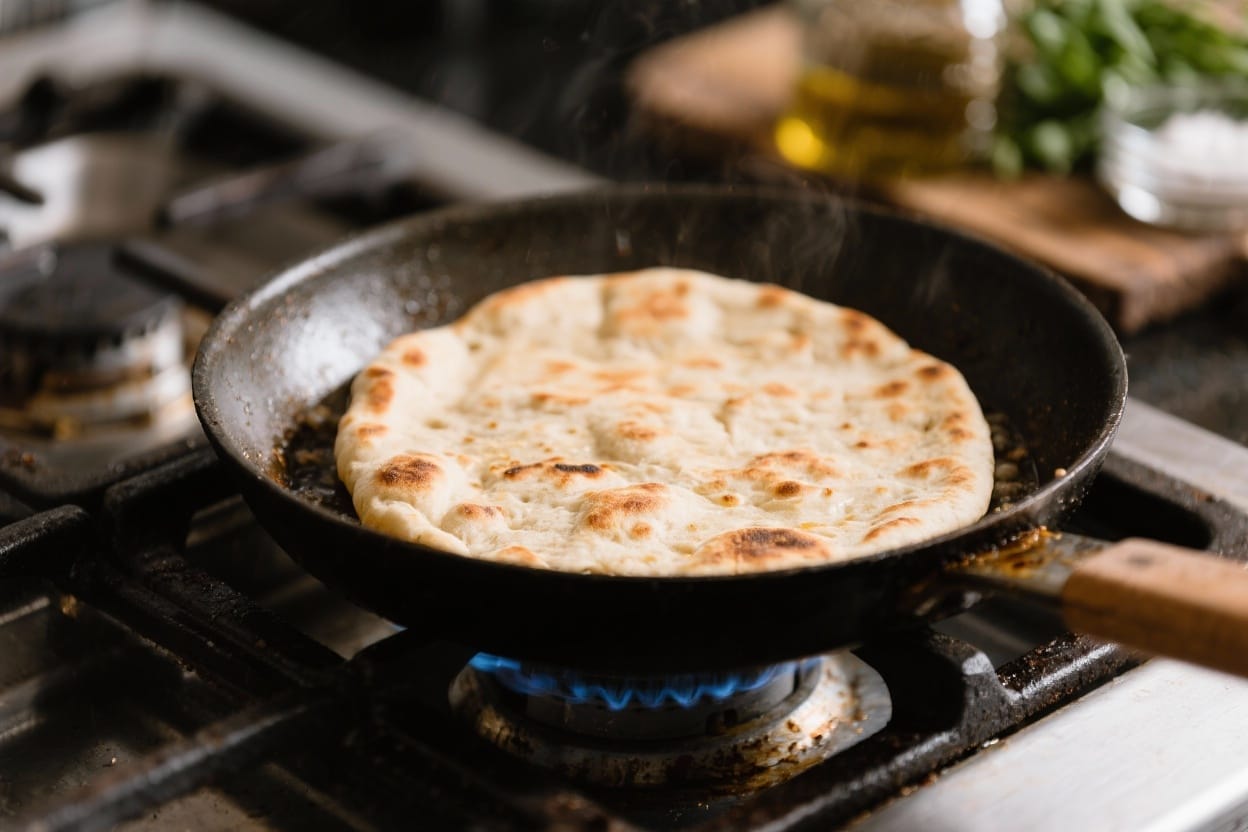
- Preheat the pan:Heat a cast-iron skillet or heavy nonstick pan over medium to medium-high heat until hot. Do not add oil to the pan.
- Roll out:On a floured surface, roll a dough ball into a circle or oval about 1/8 inch thick. Light dusting is enough—too much flour can make it dry.
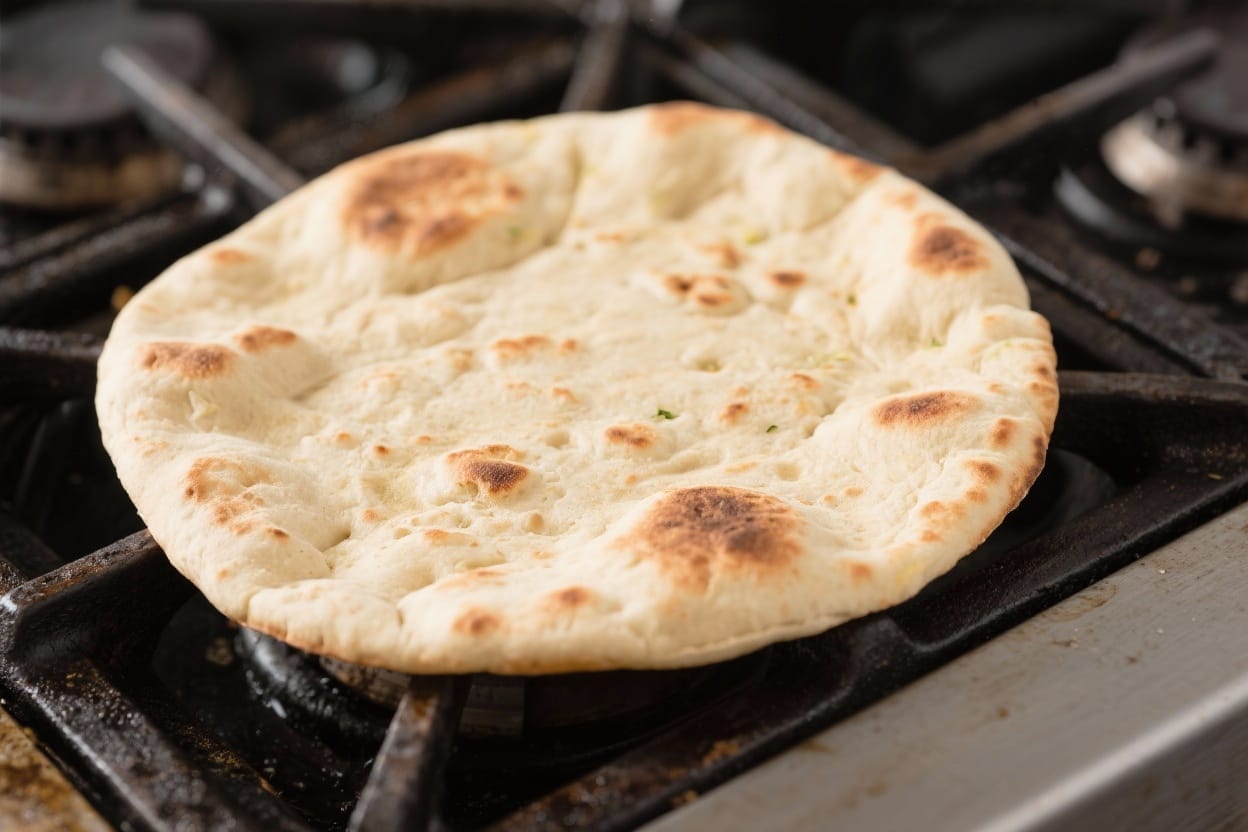
- Cook the first side:Lay the flatbread in the hot pan. Cook for 45–60 seconds until bubbles form and the underside has golden spots.
- Flip and finish:Flip and cook the second side another 45–60 seconds. Press gently with a spatula to encourage puffing. Adjust heat to avoid burning.
- Optional brushing:Remove to a plate and brush with melted butter or ghee. Sprinkle with flaky salt or herbs if you like. Keep warm under a towel while you cook the rest.
- Repeat:Continue with remaining dough balls, stacking finished easy flatbread no yeast in a towel-lined basket to keep them soft.
How to Store
- Room temperature: Keep leftovers in an airtight bag at room temp for up to 24 hours. Reheat in a hot dry skillet for 20–30 seconds per side.
- Refrigerator: Store up to 3 days in a zip-top bag. Add a damp paper towel when microwaving or reheat in a skillet to restore softness.
- Freezer: Cool completely, then stack with parchment between each piece. Freeze in a sealed bag for up to 2 months. Reheat from frozen in a skillet or warm oven.
- Make-ahead dough: Refrigerate the dough (well wrapped) for up to 24 hours. Bring to room temperature for 20 minutes before rolling.
Health Benefits
- Whole-grain option: Swap up to half the all-purpose flour with whole wheat flour for more fiber, B vitamins, and minerals.
- Lower sodium control: You can reduce the salt to 1/4 teaspoon if needed; flavor with herbs, garlic, or spices instead.
- No deep frying: Cooking on a dry skillet means less added fat compared to fried breads.
- Customizable fats: Use heart-friendly olive oil or avocado oil, and brush lightly rather than heavily.
- Protein boost: Using yogurt adds a small amount of protein and helps with satiety while keeping the bread tender.
What Not to Do
- Don’t skip the rest: Rolling is harder and the bread can turn tough if you skip the short resting period.
- Don’t over-flour: Too much dusting flour leads to dry, stiff flatbread. Use just enough to prevent sticking.
- Don’t use low heat: A hot pan creates those classic golden spots and light puffing. Low heat dries the bread out.
- Don’t roll too thick: Thick pieces cook unevenly and won’t puff. Aim for around 1/8 inch.
- Don’t stack uncovered: Uncovered flatbreads lose steam and get tough. Keep them wrapped in a towel as you go.
Alternatives
- Dairy-free: Use unsweetened plant-based yogurt or milk. If the dough seems dry, add a bit more water to reach a soft texture.
- Gluten-free: Use a 1:1 gluten-free flour blend that contains xanthan gum. Add an extra tablespoon of oil for flexibility, and handle gently when rolling.
- Herb and garlic: Mix in grated garlic and chopped herbs. Brush with garlic butter after cooking for a naan-style vibe.
- Spiced: Add 1/2 teaspoon cumin, coriander, or smoked paprika to the dough for extra depth.
- Stuffed flatbread: Roll out two small rounds, spread a thin layer of mashed potato or cheese between them, seal the edges, and cook as directed.
- Seeded: Press sesame or nigella seeds into the surface before cooking for nutty crunch.
FAQ
Can I make the dough ahead of time?
Yes. Wrap it tightly and refrigerate for up to 24 hours. Let it warm slightly on the counter before rolling so it doesn’t spring back.
Why isn’t my flatbread puffing?
The pan may not be hot enough, or the dough might be too thick. Roll thinner, preheat the pan well, and press gently with a spatula to encourage bubbles.
Can I use self-rising flour?
Yes. If using self-rising flour, omit the baking powder and reduce the added salt to a pinch, since self-rising already contains both.
What’s the best pan to use?
A cast-iron skillet or heavy nonstick pan works best. They hold heat well and create those signature brown spots without sticking.
How do I reheat without drying them out?
A hot, dry skillet is ideal—30–45 seconds per side. For the microwave, cover with a damp paper towel and heat briefly in 10–15 second bursts.
Can I bake these instead of using the stove?
You can, but they won’t char the same way. Bake on a preheated sheet at 475°F (245°C) for 3–5 minutes until puffed, then finish under the broiler for color.
Is yogurt necessary?
No. Yogurt helps tenderness, but milk or water works too. If using water, add 1 more tablespoon of oil and knead briefly to keep the dough soft.
How many flatbreads does this make?
This recipe yields 6–8, depending on how large you roll them. For wraps, make 6. For dipping or snacking, make 8 smaller ones.
Final Thoughts
No yeast flatbread on the stove is one of those recipes that becomes a weeknight habit. It’s budget-friendly, endlessly adaptable, and honestly faster than running to the store. Once you get the feel for the dough and the heat, you can whip these up anytime. Keep a batch ready for soups, salads, curries, or quick wraps—and enjoy warm, fresh bread on demand.
Printable Recipe Card
Want just the essential recipe details without scrolling through the article? Get our printable recipe card with just the ingredients and instructions.