
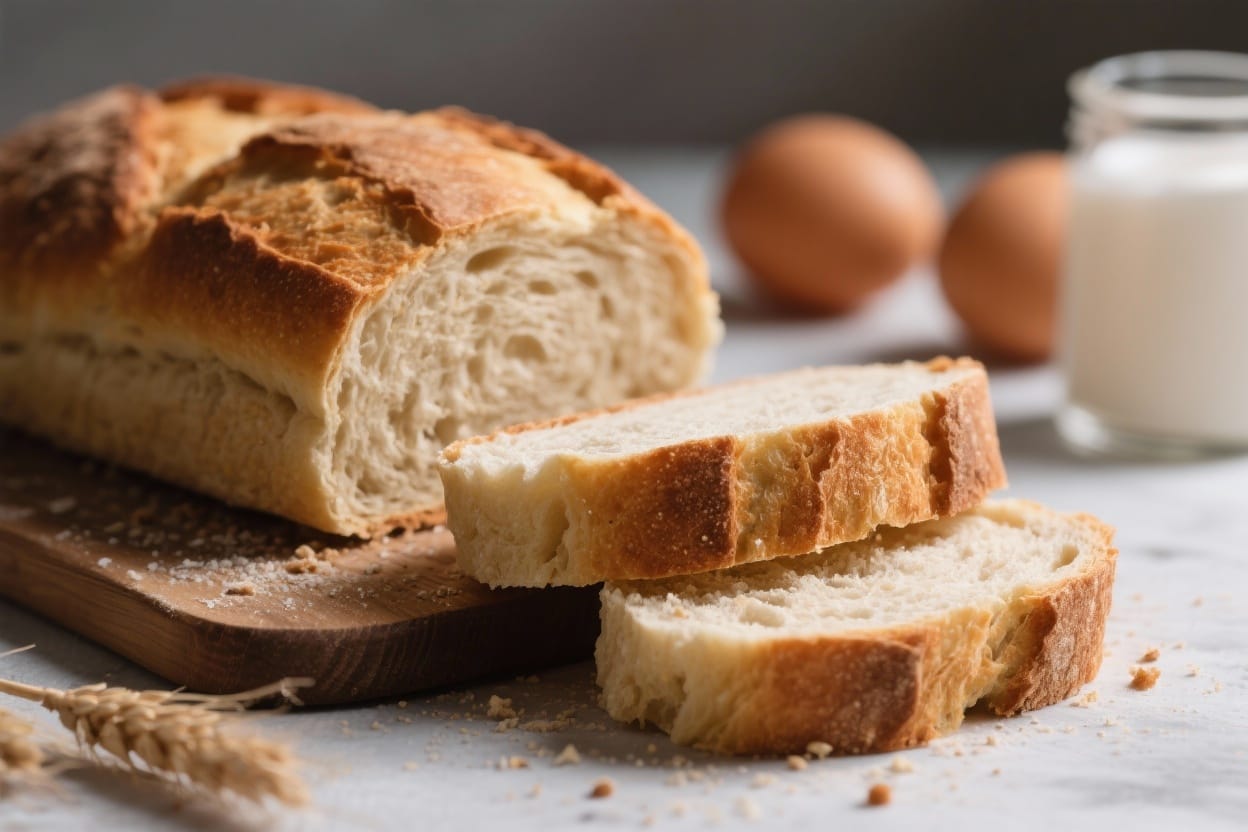
No Knead Overnight Artisan Bread – Simple, Rustic, and Reliable
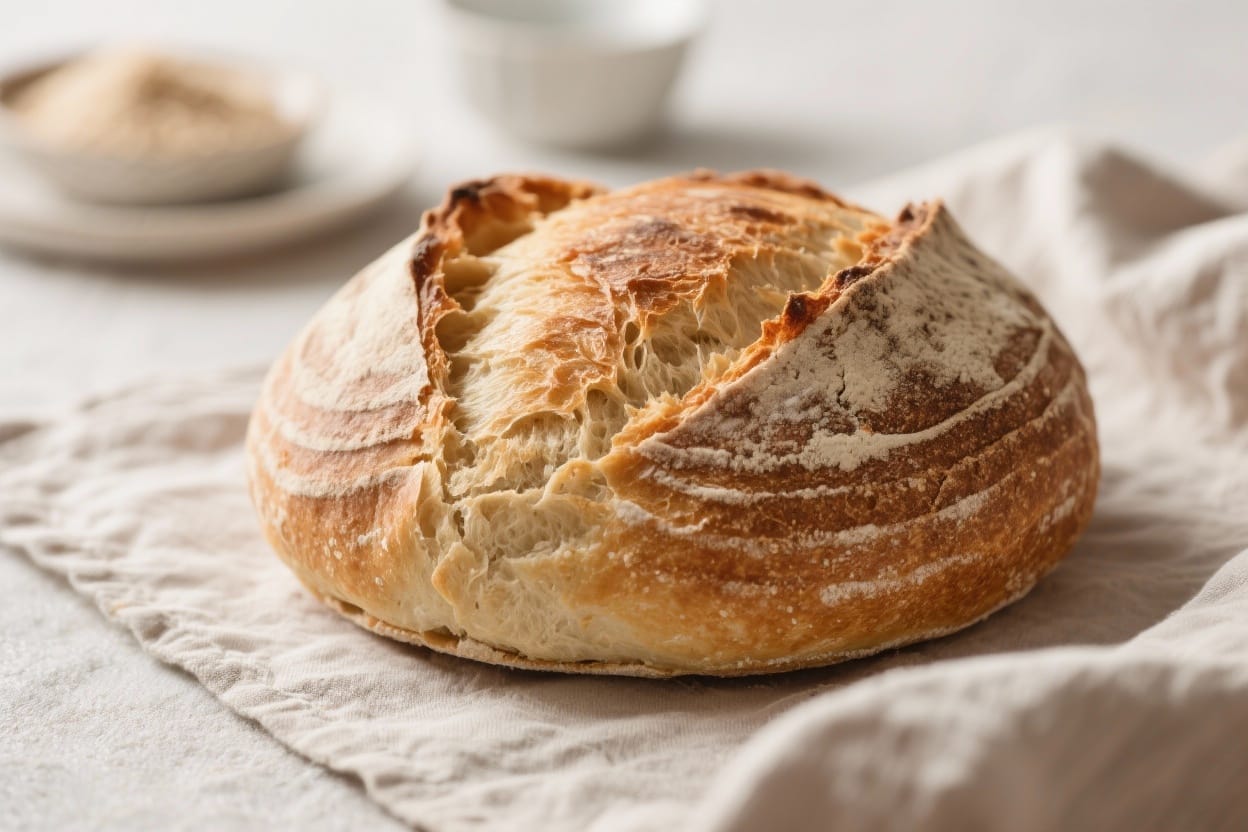
There’s something special about pulling a golden loaf from your oven and hearing that crisp crackle as it cools. This no knead overnight artisan bread gives you that bakery-style magic with almost no effort. You mix a few pantry staples, let time do the work, and bake it in a hot pot. The result is a crackly crust, tender crumb, and deep flavor that tastes like you fussed for hours. If you’ve been nervous about bread baking, start here—you’ll get a big win on your very first try.
What Makes This Special
No knead overnight artisan bread – No Knead Overnight Artisan Bread – Simple, Rustic, and Reliable There’s something special about pull
This loaf relies on long, slow fermentation instead of kneading. The dough develops gluten and flavor over 12–18 hours while you sleep or go about your day. You don’t need a stand mixer or special skills—just a bowl, a spoon, and patience.
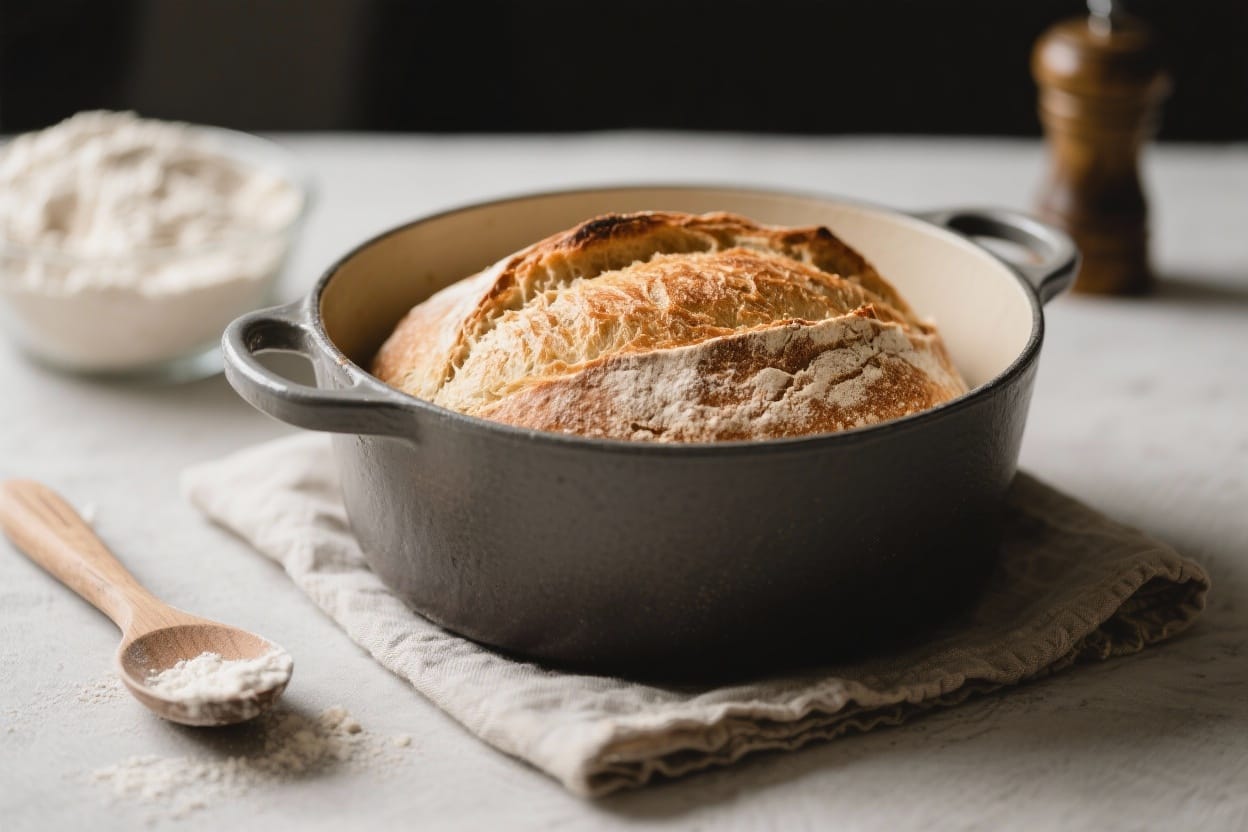
Another standout is the Dutch oven bake. The pot traps steam, which gives you a beautiful rise and a shattering crust without any fancy steam setups. It’s a forgiving, repeatable method that works in home ovens.
Finally, the flavor is surprisingly complex. A tiny bit of yeast and a long rest create a gentle tang and aroma that tastes like artisan bread from a small bakery. It’s simple food, done right.
Ingredients
No knead overnight artisan bread – This no knead overnight artisan bread gives you that bakery-style magic with almost no effort
- 3 cups (360 g) bread flour (all-purpose works too; bread flour gives a chewier crumb)
- 1 1/4 teaspoons fine sea salt
- 1/2 teaspoon instant or active dry yeast
- 1 1/2 cups (360 ml) cool water
- Optional: 1 tablespoon honey or sugar for a slightly softer crumb
- Optional mix-ins: 1/2 cup chopped nuts, seeds, olives, or dried fruit
- Extra flour or cornmeal for dusting
Instructions
No knead overnight artisan bread – You mix a few pantry staples, let time do the work, and bake it in a hot pot
- Mix the dough: In a large bowl, whisk flour, salt, and yeast. Add the water (and honey, if using). Stir with a spoon until no dry patches remain. The dough will look shaggy and sticky—perfect.
- First rise (overnight): Cover the bowl tightly with plastic wrap or a lid. Let it rest at room temperature for 12–18 hours until doubled in size, puffy, and bubbly on top.
- Shape the dough: Lightly flour your counter. Scrape the dough out gently. Dust the top with flour and fold the edges into the center 3–4 times to form a rough ball. Don’t overwork it.
- Second rise: Place the dough seam-side down on a piece of parchment dusted with flour or cornmeal. Cover with a towel and let rise for 30–60 minutes, until slightly puffed. If your kitchen is cool, give it the full hour.
- Preheat the oven and pot: Place a Dutch oven (with lid) in your oven and preheat to 450°F (232°C) for at least 30 minutes. A heavy pot is key for that crust.
- Score and load: If you like, slash the top with a sharp knife for controlled expansion. Carefully lift the dough by the parchment and lower it into the hot pot. Cover with the lid.
- Bake covered: Bake for 30 minutes. The steam trapped inside will help the loaf spring and develop a thin, crisp crust.
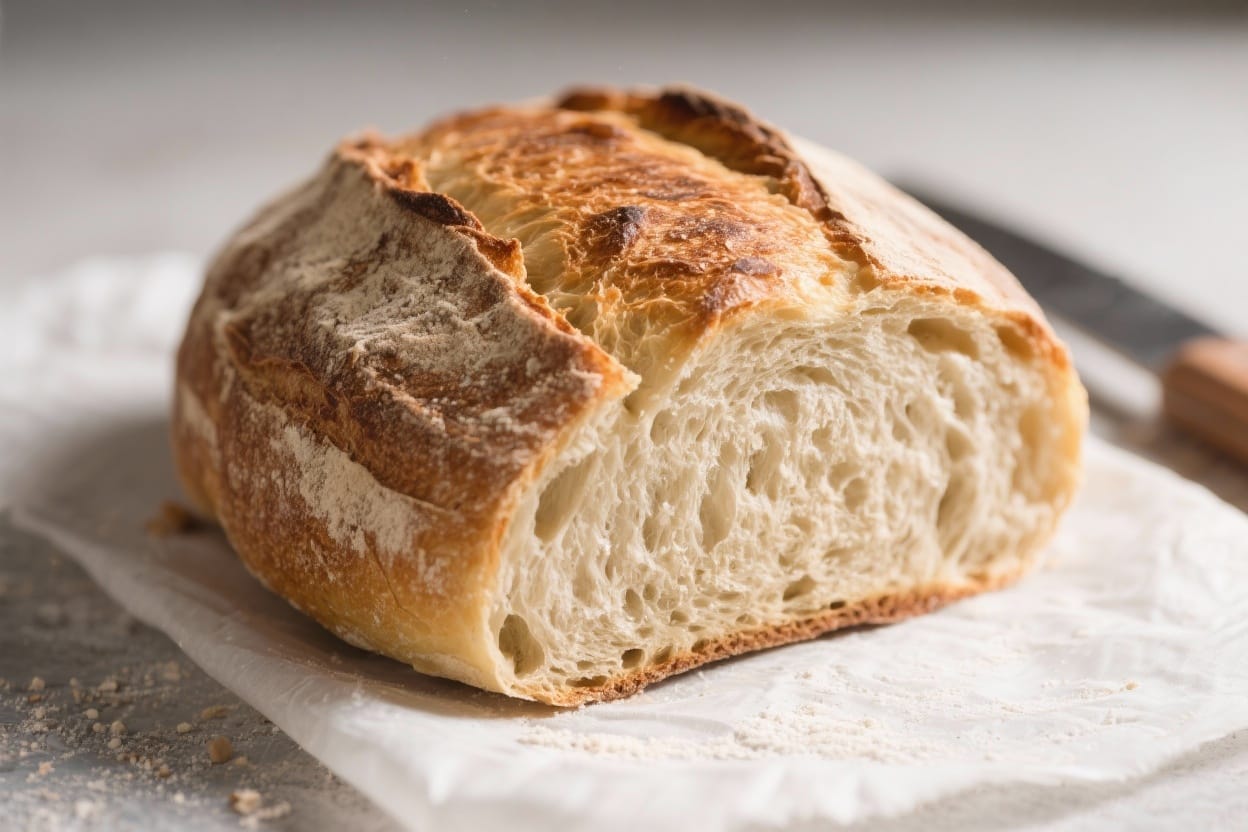
- Finish uncovered: Remove the lid and bake another 10–15 minutes until the crust is deep golden brown. For extra crispness, bake to a rich mahogany color.
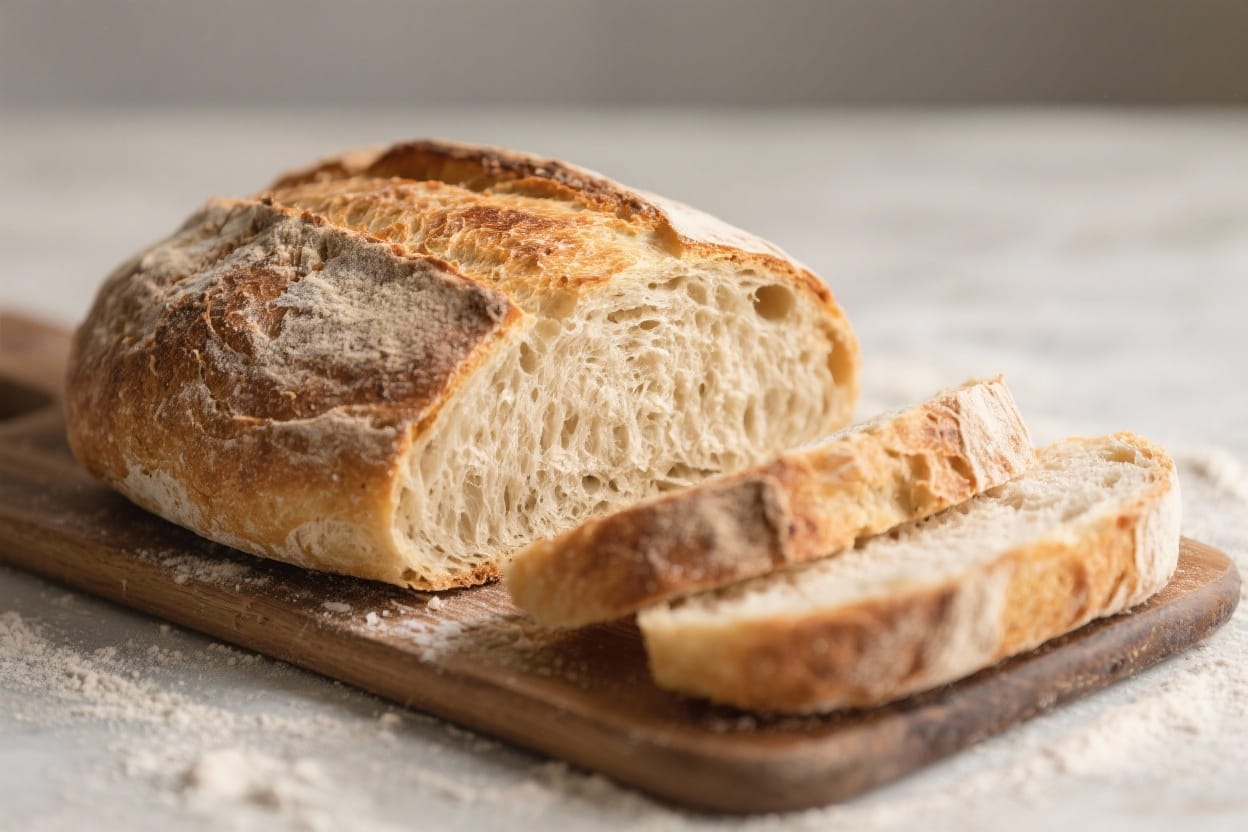
- Cool: Transfer the loaf to a rack. Let it cool for at least 1 hour before slicing. The crumb sets as it cools; cutting early can make it gummy.
Storage Instructions
- Room temperature: Store cut side down on a board or in a paper bag for up to 2 days. Avoid sealed plastic if you want to keep the crust crisp.
- Longer storage: For day 3+, wrap in foil or place in a bread box to prevent drying, knowing the crust will soften.
- Freezing: Slice the loaf, wrap tightly, and freeze up to 3 months. Reheat slices in a toaster or the whole loaf, wrapped in foil at 350°F (177°C) for 15–20 minutes.
- Reviving the crust: If the crust softens, bake the loaf directly on the oven rack at 375°F (190°C) for 8–10 minutes to re-crisp.
Why This is Good for You
- Short ingredient list: Flour, water, yeast, and salt—no additives, no preservatives. You know exactly what you’re eating.
- Slow fermentation: The long rise helps flavor and texture and may make the bread easier to digest for some people than quick-rise loaves.
- Satisfying and versatile: This bread pairs with soups, eggs, salads, and spreads, making balanced meals easier and more enjoyable.
- Confidence-building: A reliable, simple method encourages more home cooking, which often leads to better overall food choices.
What Not to Do
- Don’t rush the rise: Cutting the first rise short leads to a dense loaf and bland flavor. Aim for visible bubbles and a jiggly, airy dough.
- Don’t add too much flour: Sticky dough is normal. Extra flour can make the bread tough and reduce the open crumb.
- Don’t skip preheating the pot: The hot Dutch oven creates steam and boosts oven spring. A cold pot equals a flatter loaf.
- Don’t slice too soon: Warm bread smells amazing, but slicing early compresses the crumb and makes it gummy.
- Don’t over-proof the second rise: If the dough spreads dramatically and loses structure, it may be over-proofed. Bake sooner.
Recipe Variations
- Whole Wheat: Swap 1 cup (120 g) of the white flour for whole wheat. Add 1–2 tablespoons extra water if the dough seems stiff.
- Seeded Crust: Roll the shaped dough in a mix of sesame, poppy, and sunflower seeds before the second rise.
- Olive and Herb: Fold in 1/2 cup chopped olives and 1–2 teaspoons dried rosemary or thyme after mixing.
- Garlic Parmesan: Add 2–3 tablespoons finely grated Parmesan and 1 teaspoon garlic powder to the dry ingredients.
- Cranberry Walnut: Mix in 1/3 cup dried cranberries and 1/3 cup chopped walnuts for a sweet-savory loaf.
- Everything Spice: Sprinkle everything bagel seasoning on top before baking for a deli-style crust.
- Sourdough Twist: Replace 1/2 cup water and 1/2 cup flour with 1 cup active sourdough starter. Reduce yeast to a pinch and extend the first rise if needed.
FAQ
Can I bake without a Dutch oven?
Yes. Use a heavy oven-safe pot with a tight lid, or bake on a preheated baking stone with a metal pan of hot water on a lower rack to create steam. The crust won’t be quite the same, but it will still be good.
What if my dough seems too wet?
Wet dough is part of this style. Lightly flour your hands and the counter to shape it. If it’s truly soupy, your flour may be very low protein—add 1–2 tablespoons of flour during shaping, but avoid overdoing it.
Can I shorten the overnight rise?
You can, but flavor and texture will suffer. If you’re in a hurry, let it rise 6–8 hours at warm room temperature, or use slightly warmer water. Expect a tighter crumb.
Is all-purpose flour okay?
Absolutely. All-purpose makes a slightly softer loaf with a tender bite. Bread flour gives more chew and bigger holes. Both work well.
How do I know it’s fully baked?
The crust should be deep golden and sound hollow when tapped. If you use a thermometer, the internal temperature should be around 205–210°F (96–99°C).
Can I add butter or oil?
Yes. Add 1–2 tablespoons to the dough for a softer crumb and slightly richer flavor. The crust may be a bit less crisp.
Why did my loaf spread instead of rising?
Likely over-proofing, insufficient gluten development, or a cool oven/pot. Make sure the pot is fully preheated and reduce the second rise if the dough looks very loose.
Can I double the recipe?
Yes, but bake in two loaves. A single oversized loaf may bake unevenly and be hard to handle.
In Conclusion
No knead overnight artisan bread delivers big rewards with almost no work. With a handful of ingredients and a little time, you’ll bake a loaf with a crisp crust, airy interior, and deep flavor. Once you make it a couple of times, it becomes second nature. Keep the method simple, trust the slow rise, and enjoy warm slices with butter, soup, or olive oil and salt. This is the kind of everyday bread that feels like a small luxury at home.
Printable Recipe Card
Want just the essential recipe details without scrolling through the article? Get our printable recipe card with just the ingredients and instructions.

How can I use gluten free flour?